


Have you ever found yourself desperately comparing the pros and cons of 3D printing and rapid prototyping? It is frequently difficult for engineers to decide what technique is more beneficial for early samples of components created.
Let’s delve into this topic one more time and find answers to all common questions that you might have. Read below about how 3D printing and rapid prototyping work and the key points to consider while selecting the appropriate technique.
Definition
What is Additive Manufacturing?
First of all, we need to deal with a lack of additive manufacturing understanding, in case it is an issue. It will make 3D printing easier to distinguish from other manufacturing techniques and will help you avoid confusion.
Additive manufacturing is referred to as the creation of objects by “adding” material. It is directly opposite to machining techniques, the principle of functioning of which is “removing” pieces of a workpiece, thus, shaping it. As with any other computer numerically controlled (CNC) center, ones for additive manufacturing incorporate computer-aided design (CAD) software. It is needed to retrieve instructions for adding material. In such a manner, even intricate designs are possible to be obtained.
1. Sintering. This process involves heating material until it is near melted and extruding further to create high-resolution items.
2. Melting. Materials are fully melted and then gradually deposited until the desired design is obtained.
3. Stereolithography. Involves photopolymerization, or reacting of some materials with a light source. It helps solidify layers of a filament an object is built from.
What is 3D Printing
Well, almost everyone has heard about 3D printing. But, there is another term for it – “material extrusion.” Why is this so? It is the closest description of the process on which 3D printing is based.
3D printing is a particular type of additive manufacturing melting technology. A solid, colored filament with specific properties is fed into a printer, heated, and extruded at a certain speed rate. The crucial point is that the filament is deposited in a form of thin layers. It forms the desired shape of a component with as many details as needed.
And let’s summarize our insights into 3D printing and additive manufacturing. Basically, creating three-dimensional objects by layering melted material is a particular type of additive manufacturing. Just do not believe that those two terms are the same. See all the varieties of additive manufacturing in the infographics below.

What is Rapid Prototyping?
First of all, rapid prototyping is a machining or fabrication technique. It is considered fast production of a sample model by means of material removal. You may have heard of CNC turning, drilling, milling, etc. Basically, such processes are ones that are frequently used while rapidly prototyping an innovative component.
CNC machines for rapid prototyping work similar to mills, drills, routers, lathe, and other automated centers. It means that a CAD file, containing a digital model is absolutely due for the process. It is further transformed in a G-code-based file commanding a center on how to remove material from a workpiece.
1. Subtractive. Simply, a workpiece or a block of raw material is carved by cutting tools until the desired shape is obtained.
2. Compressive. A semi-solid or liquid (temporarily) material is forced into the desired shape. Then, the material is solidified by casting, compressive sintering, molding, etc.
Is Rapid Prototyping the Same as 3D Printing?
We could have just written “No!” and that’s it. Even though the purposes of both manufacturing techniques are similar, they are different in many ways. But you definitely expect us to prove the point, and here is the detailed explanation.
What is the Difference Between Them?
The point here is the processes are basically opposite. With rapid prototyping, from a surface of a block of raw material thin layers are removed. With 3D printing, you obtain an object from melted and extruded in the form of thin layers of material. It does not produce much waste, but a range of substances with required properties is firmly limited.
Before I share all other discrepancies between prototyping and printing, let’s talk about additive manufacturing one more time.
What is the Difference Between Rapid Prototyping and Additive Manufacturing?
Additive manufacturing is presented with a range of techniques, among which material extrusion is only one. But, to be exact, the prevalent one. Typically, means of rapid prototyping are compared rather to additive fabrication techniques rather than to 3D printing alone.
Thus, the main point here is the exact same. Processes are just based on opposite principles of functioning. The simple difference between rapid prototyping and additive manufacturing is identical to the difference between “removing” and “adding.” But all the other nuances are detailed below.
The Process: 3D Printing vs Rapid Prototyping
How Does 3D Printing Work?
Well, you have been given clues in the above text, but here is a comprehensive step-by-step process.
One more time, we do not deepen into all additive manufacturing methods mistakenly attributed to 3D printing. Here is the explanation of material extrusion/ most well-known 3D printing technique.
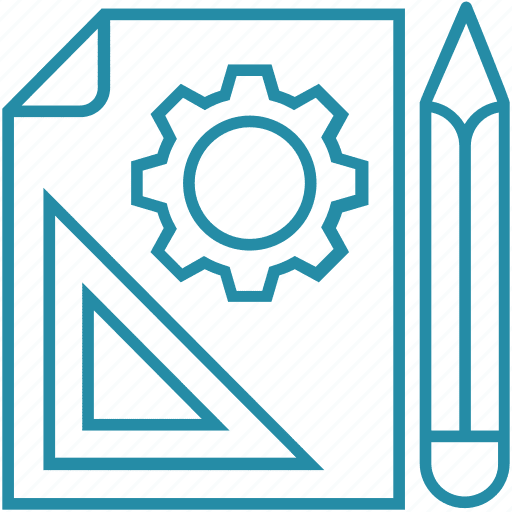
1. Creating a CAD model
With the use of various CAD software, designers/engineers create a 3-dimensional model. It should have all design details, curves, holes, etc., integrated. All true dimensions are also indicated for every distinct component of a design. So, all the details can be properly formed with little to no discrepancy between expected and actual measurements.
2. Converting a CAD file into the G-code file
Unfortunately, CAD files are not recognized by CNC equipment units (regardless of their types). So how do you make them work? Well, there are plenty of solutions for converting a CAD file into a specialized document. In them, a design is explained in sets of direct instructions. Examples of them are: moving a tool along the X-axis by 50 millimeters, feeding a tool by 10 millimeters, extruding material, etc. It is a very simplified explanation.
You can read more about G-code in our previous post.
3. Choosing materials/tooling
This stage is tricky. While creating a CAD model, a designer or an engineer expects a finished part to have certain properties. Particular features, but the design itself, depends on the material chosen for building a component.
Typically, 3D printer filaments, i.e., thermoplastics, can be selected to enhance a part fabricated with predefined properties. You can choose ABS, PLA, PETG, carbon fiber, even metal or wood filaments, and many others. However, all of them are required to suit the temperatures of printing (165-265°C).
The versatility of their use and the range of properties of finished components are far behind those made from raw materials and workpieces.
Choice of tooling is another point worth mentioning. 3D printers do not have many of them, suitable for various operations.
The principle of extruding thin layers of melted filament requires a strict set of printer parts to work collaboratively. But, for the purpose of using one or another type of filament, some components of a printer must be replaced with more suitable ones. It mostly concerns hot-ends and filament feed tubes, enabling melt a material at a needed temperature. And to feed material with different physical properties to the extruder, respectively.
4. Adjustment of a machine
This stage is as vital as the choice of material. To be honest, it is a particular material type that causes the necessity to pre-adjust a 3D printer before manufacturing. Why is it so? Well, all the filaments, due to their unique properties, require distinct treatment.
Thus, you should carefully read through a supplier’s recommendations (often indicated on filament’s packaging) and adjust the following settings:
- Temperature range within which a filament is melted.
- 3D printer feed rate.
- Speed of printing.
- Layer height.
- Fill density.
- Bottom/top thickness.
5. Executing a process
This one is simple. A 3D printer basically executes additive manufacturing operations on its own. All that’s left to you is to make sure that printing is consistent and errors do not occur.
See the simplified process in the image below.
6. Finishing
First of all, you simply need to pull each printed object off the build plate with the scraper and a hammer. Some other post-maintenance procedures may include polishing a 3D component’s surface with liquid polish. You may additionally need to colorize a part.
How Does Rapid Prototyping Work?
Let’s run through the text one more time, so rapid-prototyping is also completely understood. Some steps match the previously detailed ones, and all repetitive information is omitted.
1. Creating a CAD model
Read above.
2. Converting a CAD file into the G-code file
Centers for rapid prototyping are generally considered more complex in pre-programming. They typically have more axies that also need to be synchronized.
Additionally, the order of tool changing should be properly intended and programmed, so design details are shaped by suitable tooling in a pre-defined sequence.
3. Choosing materials/tooling
In rapid prototyping, a set of properties a machined part will have is pre-defined by choice of raw material. Alternatively, a workpiece already has some physical/chemical properties, which cannot be changed during the prototyping (compression strength and other features that depend on the design, e.g., a number of holes, curves, etc., are not considered).
Rapid prototyping is the most complex manufacturing technique possible when it comes to tooling. Due to incorporating a range of manufacturing operations, each of which has a distinct set of cutting tools, adjustment of tooling becomes a crucial point. The factors that affect the choice of tooling are the following:[/et_pb_text][et_pb_text _builder_version=”4.16″ _module_preset=”default” text_font=”Lato||||||||” text_text_color=”#292929″ text_font_size=”17px” custom_margin=”||10px|||” global_colors_info=”{}”]
- Required design.
- Order of use in the machining process.
- Type of material machined.
- Type of a CNC center used.
- Type of a tool changer.
- A number of spindles.
- Type of manufacturing process.
4. Adjustment of a machine
Centers for rapid prototyping are less demanding to pre-adjustments than 3D printers. The complex stages are already done, and all that’s left is to manually insert cutting tools in spindles and put them in primary positions.
5. Executing a process
It is also not difficult to command a CNC machine for rapid prototyping to start workpiece shaping. But, depending on the number of axes, presence or absence of robot-manipulated pallets, etc., an operator may need to execute some operations manually. Examples are fixing a workpiece in another position, unloading a CNC machine, confirming a process’s stages via a center’s control board, etc.
6. Finishing
After subtractive machining is over, a wide range of finishing procedures may be applied to a manufactured component. But we are not going to switch your focus with a detailed explanation. If you are interested in all the types of finishing that exist (especially ones applied to sheet metal parts), just read our this post.
Advantages: 3D Printing vs Rapid Prototyping
Price
The absolute favorite here is 3D printing. Depreciation, materials, maintenance, operation costs, etc., involved in printing are at least twice lower than ones for rapid prototyping.
The complexity of the Method
Well, have you read all the nuances of rapid prototyping carefully? If the answer is “yes,” you probably know the more advantageous technique, from the perspective of the simplicity of use.
3D printing requires minimum training, mostly to load filament, proceed with manufactured parts, and adjust settings as required. Compared to some manual operations involved in 3D printing and the complexity of tooling preparation, 3D printing is a relatively simple manufacturing technique.
Additionally, forming a CAD model and creating a well-functioning set of instructions for a CNC machine is way more complex than similar procedures for 3D printers. Highly specialized labor is typically involved in designing an optimal sequence of actions for machines for rapid prototyping.
Materials Used
The answer here also derives from the previous sections of the post detailed. A range of filaments, if not as wide as a range of materials, machines for rapid prototyping can work with. It is predictable that with the advancement of 3D printing technology, more materials will be available but will never exceed the choice rapid prototyping offers.
Tolerances
Level of accuracy is the other vital point to consider. Typically, rapid prototyping is far more precise than 3D printing. It is so due to advanced specific part-accuracy technology. Additionally, it is just easier to make precise cuts than build an object from extracted layers. As a result, engineering tolerance, i.e., maximum permissible variation in a dimension, is way higher in 3D printing by definition.
Efficiency
What comes to your mind first when someone mentions “efficiency”? Our experience shows that the most solid association with this word is the productivity of an equipment/machine unit (cost-efficiency is a little different). So, let’s review what such diverse processes can offer.
Surface Finish
Well, it was just explained that rapid prototyping ensures the manufacture of components with more accurate dimensions. The other pros of CNC machining are that a range of finishing options is already included in computer-based centers. Thus, at least a part can be property polished and deprived of defects if needed. Alternatively, a prepared, using rapid prototyping, component, can be further processed by most finishing techniques.
3D printer objects are mostly unable to proceed further. It is so because the material, printed parts made off, cannot be used in almost any of the existing finishing techniques. Thus, manual/automated polishing, coloring, and a few other fairy-compatible surface finishes are all that 3D printing can offer.
Summary
As you can see, both additive manufacturing and rapid prototyping can be effectively used for producing samples for testing. Often, it is the requirements to a component designed that define the selection of the more appropriate method.
Basically, 3D printed objects are used by designers and small manufacturers to assess a new component. In its turn, rapid prototyping, with all its complexity, enables the creation of more precise and sustainable parts needed for professionals in the industrial sectors.
Related Post: Are 3D Printers Worth It?

