As mentioned above, vapor polishing is a technique employed for smoothing out specific kinds of plastic resin materials at the microscopic level. Due to its reactivity with plastic, this process uses a heated solvent in its gaseous state.
The vapor from the heated solvent is applied to the workpiece’s surface, melting the plastic and filling in microscopic voids and scratches. When the gas is no longer present, the plastic quickly solidifies, resulting in a smoother and more pristine surface.
Before vapor polishing starts, the workpiece undergoes sanding using different grit sanders, for examples, 100 and 1200-grit sandpaper to reduce deeper marks and ensure comprehensive vapor reach. Sanding and manually polishing the surface is a must before vapor polishing steps.
The main vapor polishing steps for polishing polycarbonate are introduced below.
To ensure vapor polishing performance, we need to clean the workpiece effectively.
Start by removing the visible debris and contaminants on the workpiece surface with a soft brush or compressed air.
Then, wash them with pure water or a mild detergent to remove the remaining dirt, grease, or oil.
Use 200grit sander to sanding th parts manually.
Then change 400 grits sanders.
To tell the difference between the areas polished or un polished, we can use marker to paint the parts black first, then polish all the marks. During manual polishing process, the polish shall be in one direction.
The photo below shows the workers carefully polishing the PC parts manually.

Note that polycarbonate is tough and ductile, prone to burring during sanding. It is also heat sensitive and can easily develop a hazy or “milky” appearance when overheated, thus, wet sanding is essential.
From the photo shown below, after we wet manually polish the polycarbonate (PC), the surface shows a consistent lay pattern but remains opaque and matte (hazy).

Once we have removed all the marker marks in one direction, we have completed the Polycarbonate manual polishing process.
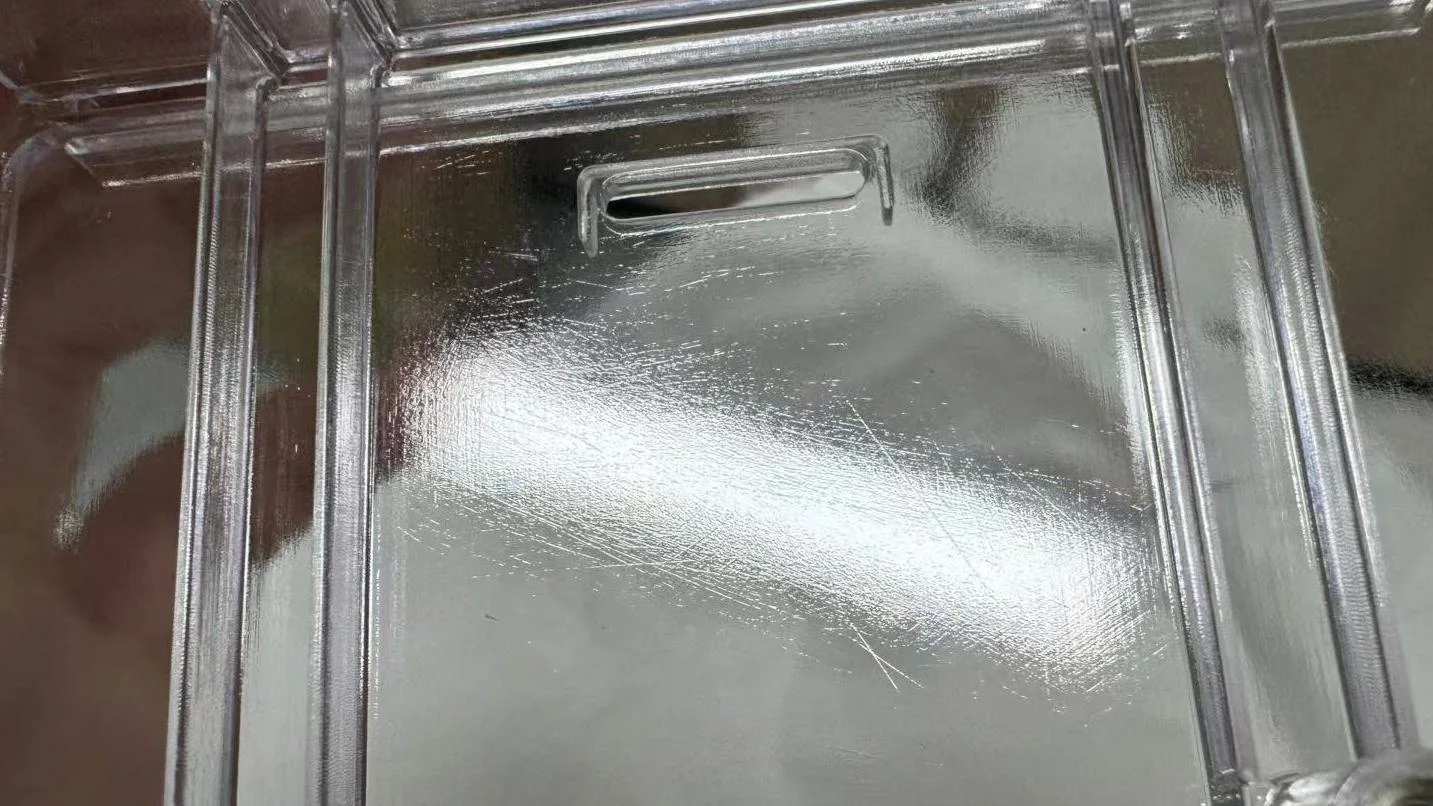
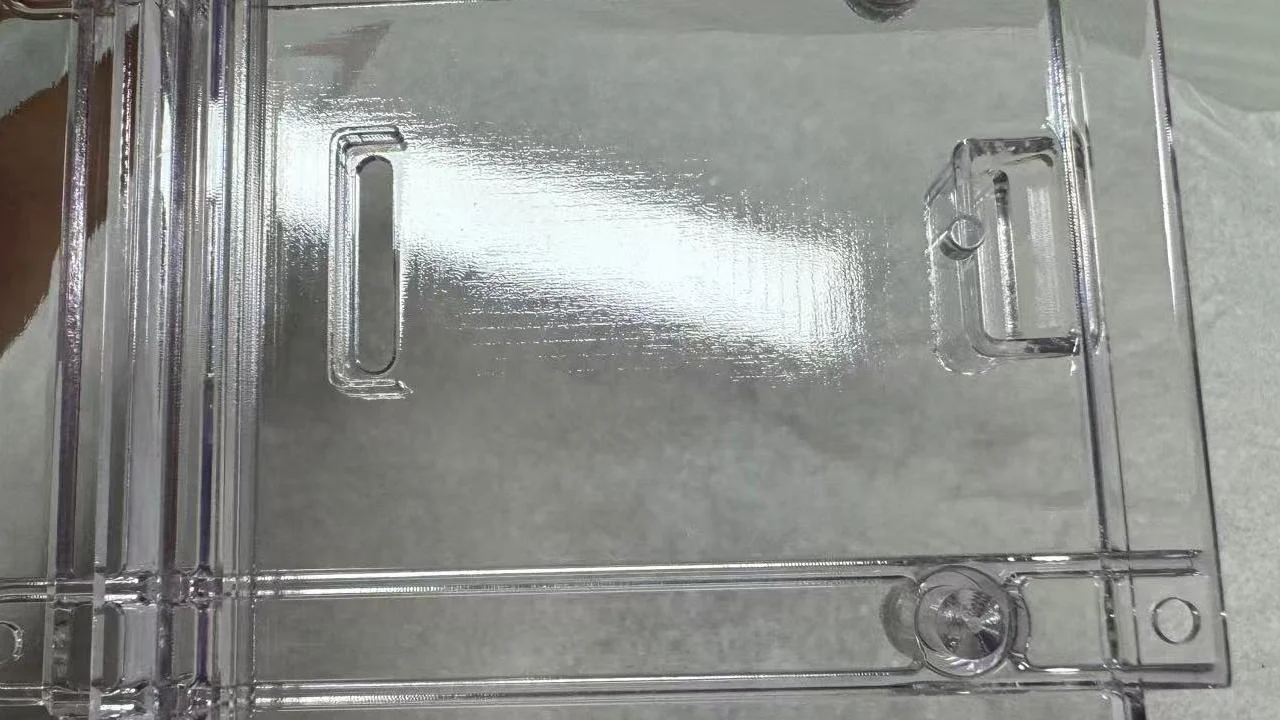
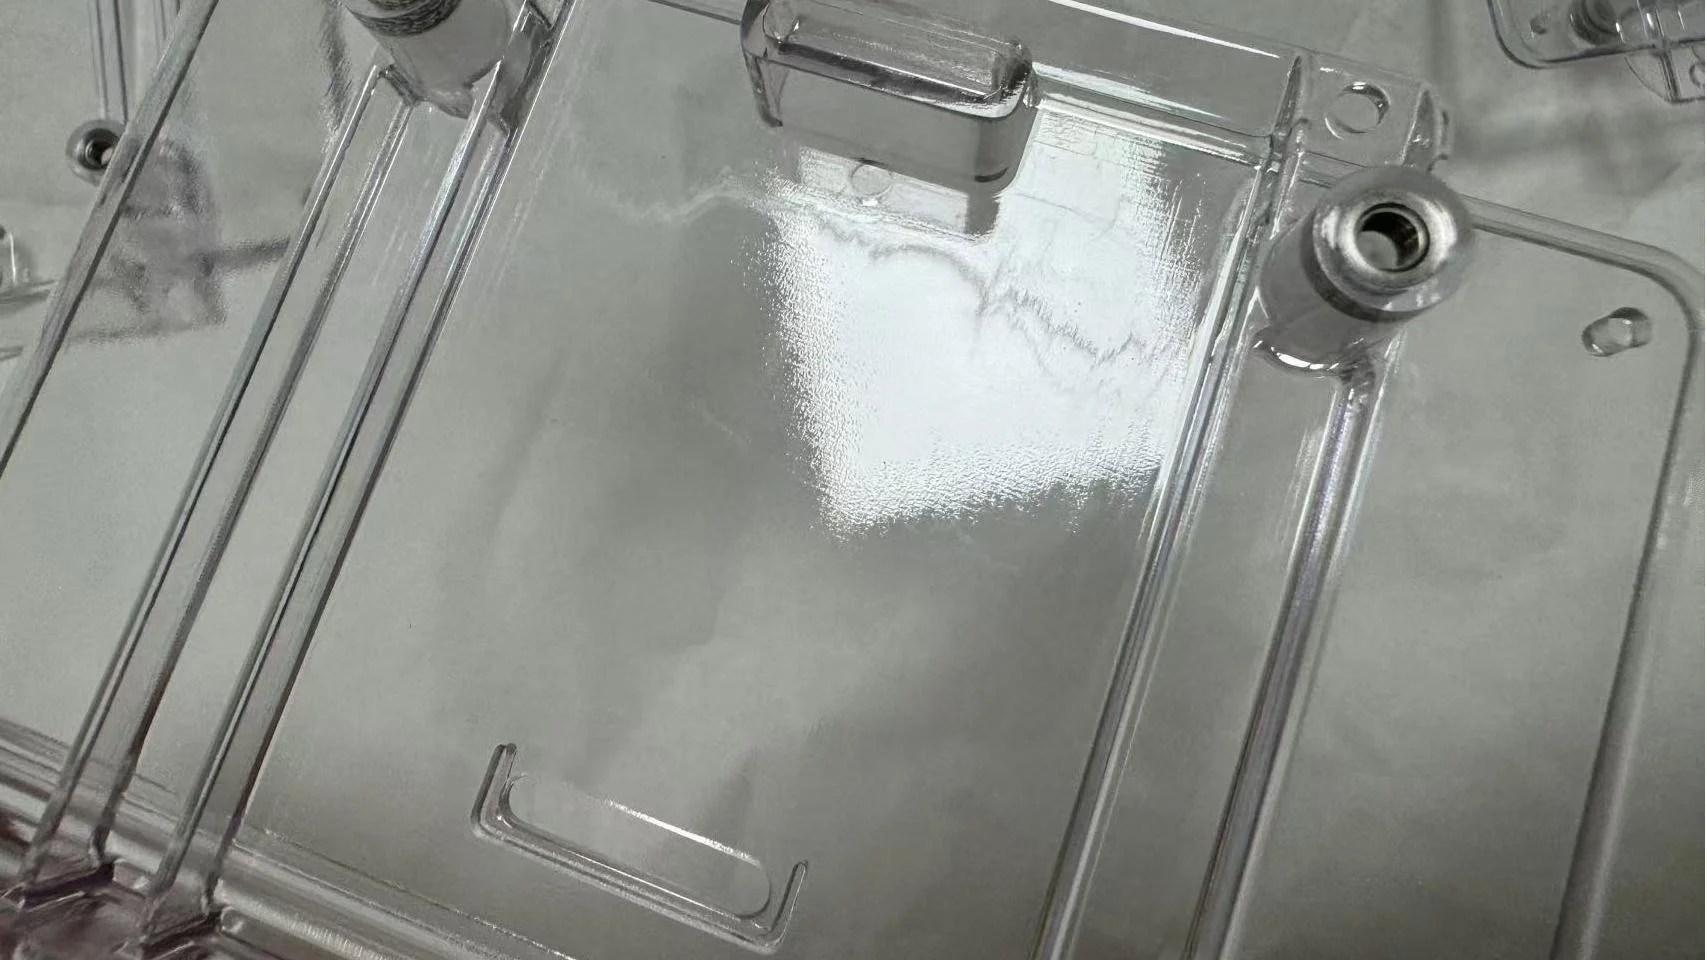
 Manually polishing in a consistent single direction is very important. The photo below shows polishing in different directions makes vapor polishing a failure.
Use a soft cloth or sponge to dry the surface gently. Rinse the workpiece thoroughly with clean water 2 or 3 times more to remove any soap residue.
Leave the workpiece in the air to dry completely before proceeding with vapor polishing.
Find a clean, heat-resistant container to hold vapor polishing solvent. A kettle will work. But make sure the container is clean and free from any contaminants.
Pour the solvent in and warm the container.
When reaching a specific temperature, the solvent will become gas and come out. Maintain the heating temperature.
1,2-Dichloroethane (DCE) and Tetrahydrofuran (THF) are commonly used solvents for vapor polishing polycarbonate (PC), because they they combine proper solubility with a low risk of damage.
DCE only needs to be vaporized for 2-3 seconds to slightly dissolve the PC surface and produce a mirror effect.
THF is more soluble than DCE, but is more likely to cause surface “ sticky” and is better suited for wipe-on finishes, with a slightly higher risk of vapor exposure.
Methylene Chloride (DCM) can easily cause stress cracks, so use with caution when vapor polishing polycarbonate.
Chloroform, due to its slow evaporation rate and relatively mild action, is less commonly used for vapor polishing PC.
Acetone is not recommended because it is very likely to whiten or crack the PC and make vapor polish fail.
Alcohols such as ethanol/isopropanol have little vapor polish effect because they very weak solvent action and produce virtually no polishing effect.
In summary, 1,2-Dichloroethane (DCE) is the most effective and reliable solvent for vapor polishing polycarbonate.
A short exposure of 2 to 3 seconds is sufficient—longer exposure is not recommended.
The solvent vapor will interact with the polycarbonate workpiece surface. It will soften and partially dissolve the surface, smoothing out the imperfections and irregularities.
Proper exposure to the solvent vapor is critical. Maintain contact for only 2 to 3 seconds—extended exposure is unnecessary and may damage the surface.
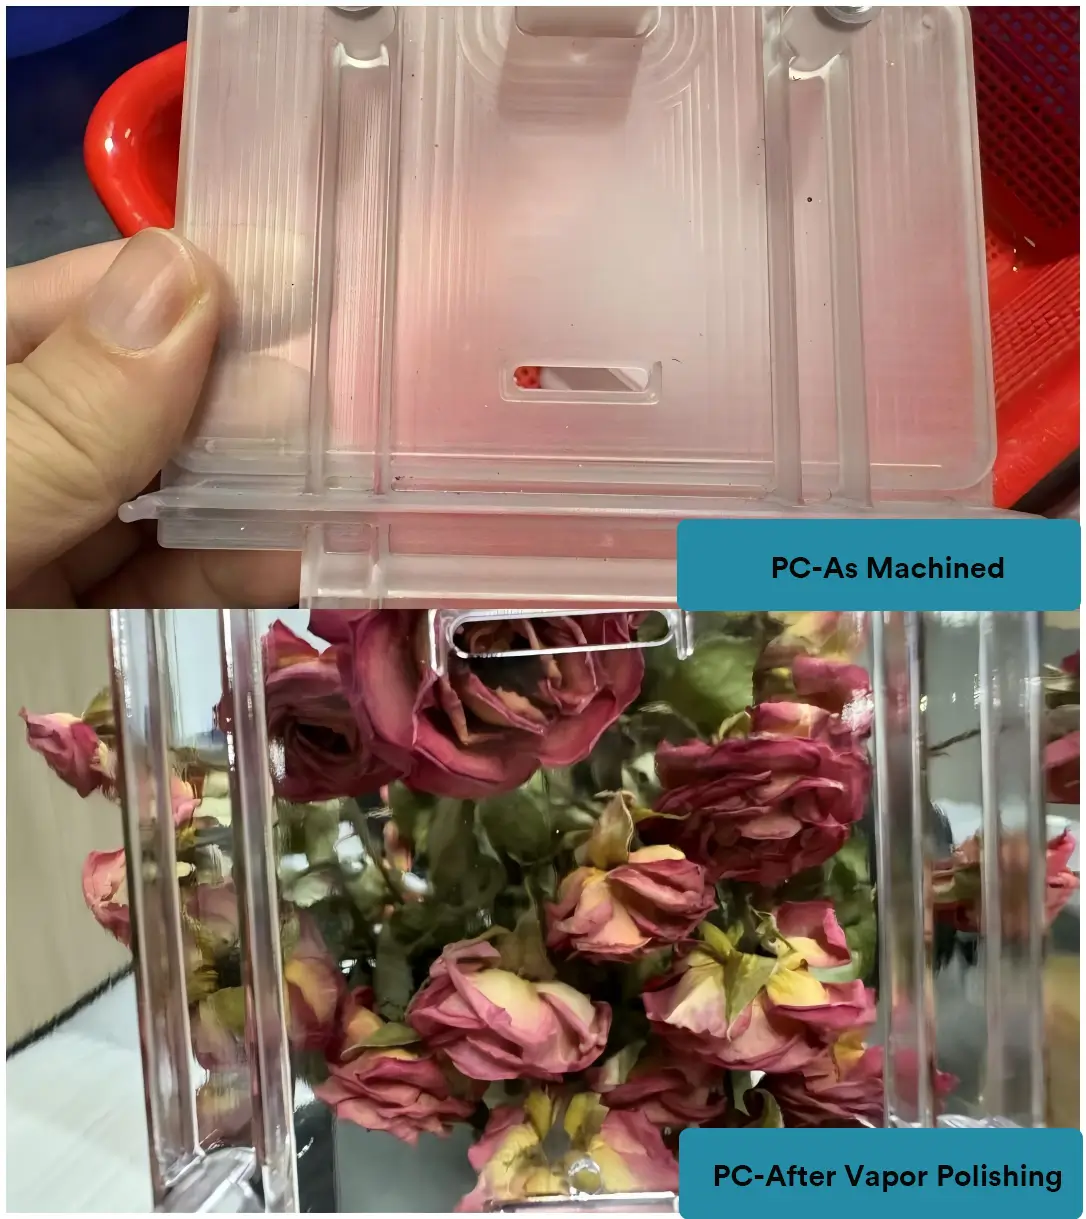
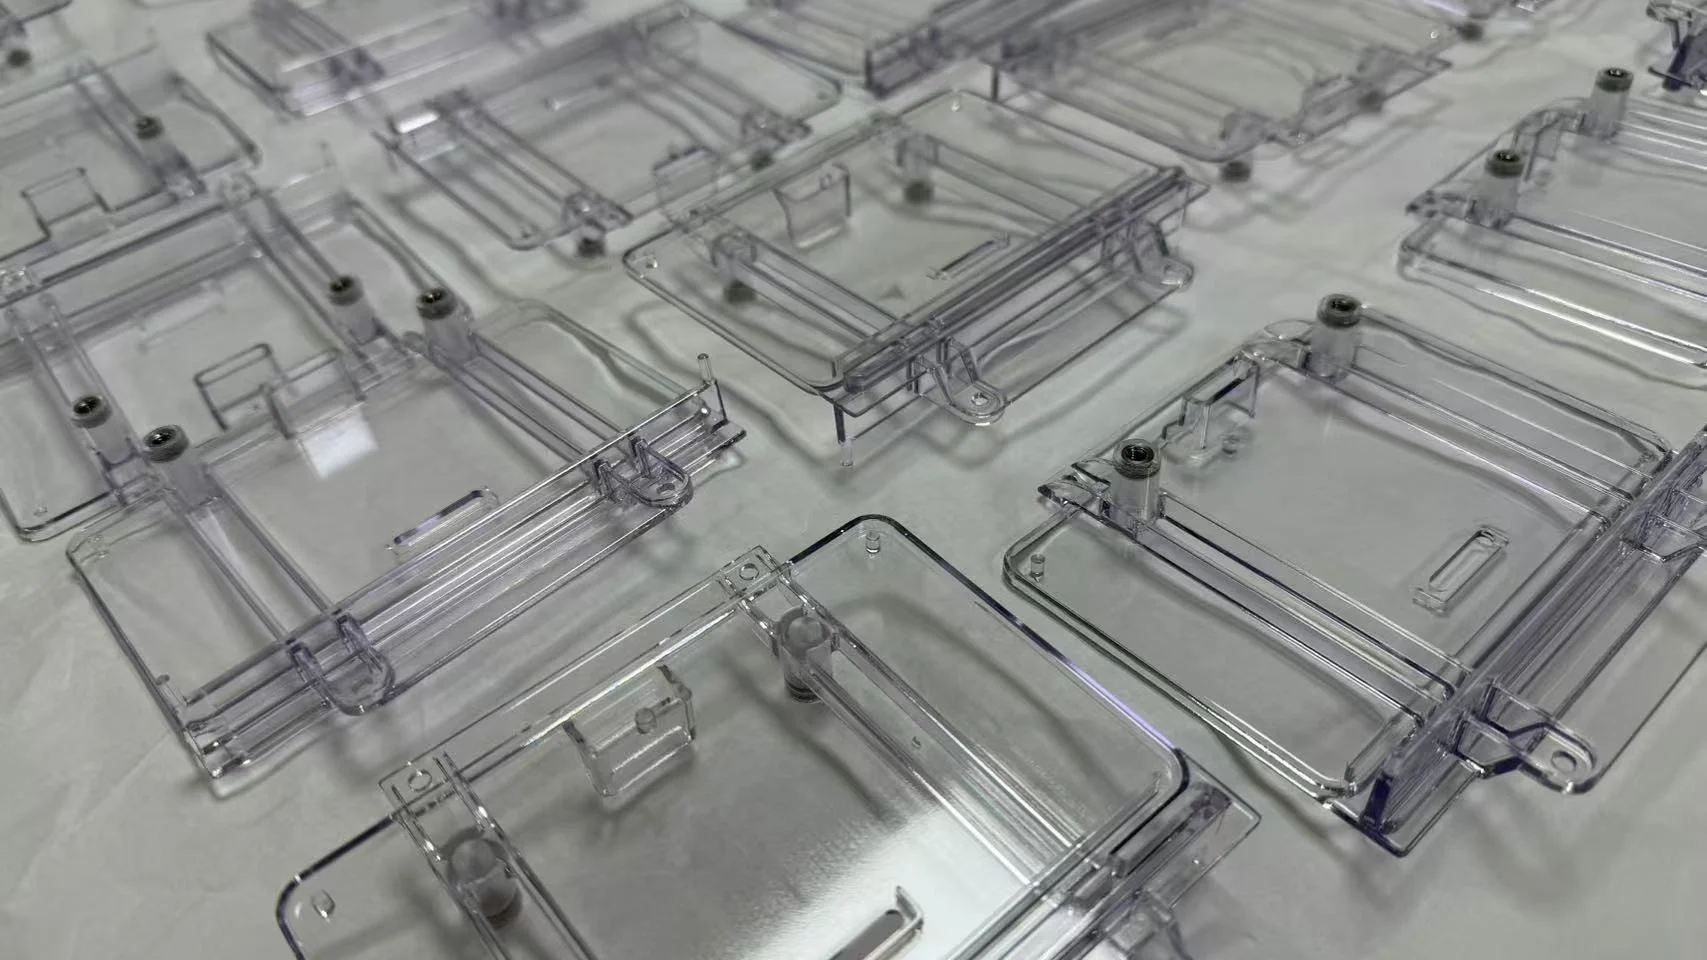
Below are the examples of before and after vapor polishing.


The solvent vapor goes back and forth onto the plastic Polycarbonate surface, removing any remaining imperfections and leaving a smooth and polished finish. The recondensation is essential for ensuring uniformity and consistency in the final polished surface.
Wash the vapor-polished Polycarbonate part with clean water, put it in a well-ventilated area, and dry it naturally.
Once the vapor polishing is complete, clean the PC part surface thoroughly to remove any remaining polishing compound. Inspect the surface for any missed scratches or imperfections.
If there are sand, water, tooling marks, we need to repeat the step 1 to step 6 above.
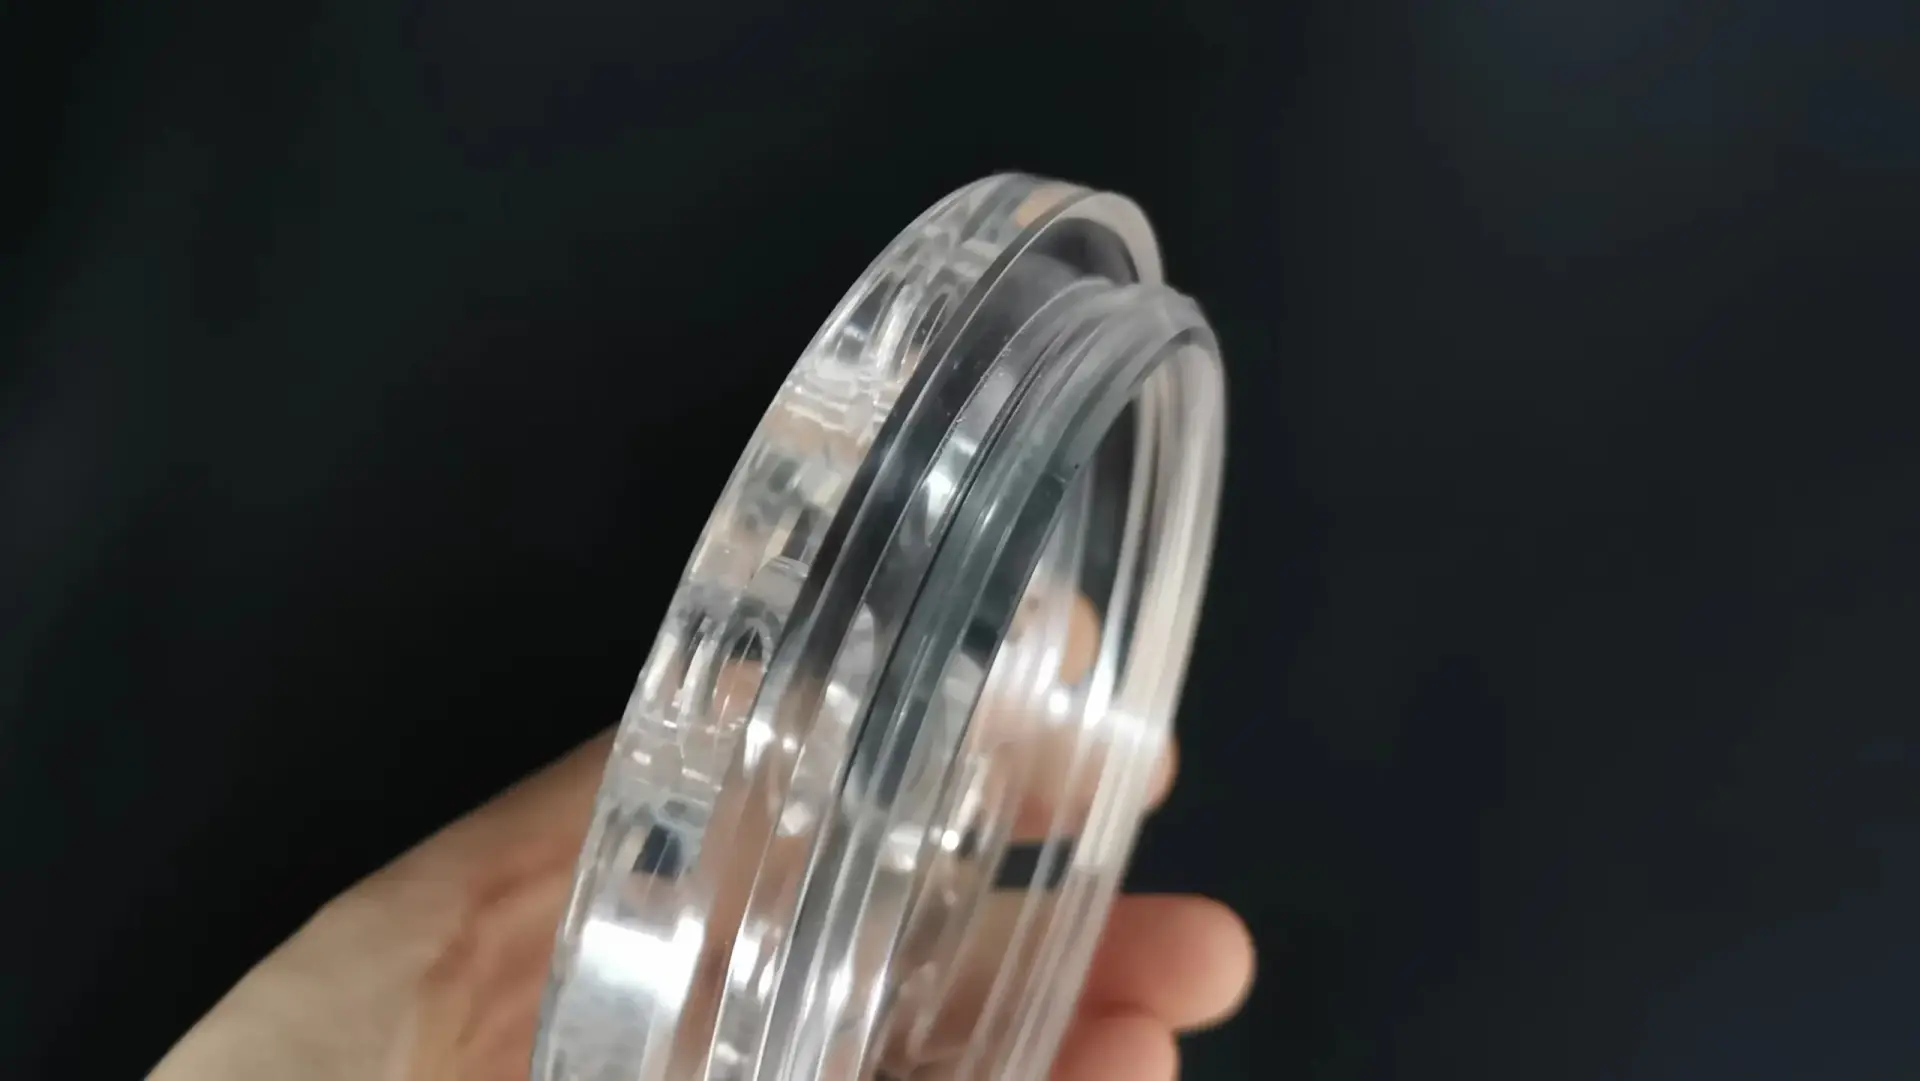
Below shows another photo of polycarbonate turned part after vapor polishing process.

While vapor polishing is frequently used for both PMMA (acrylic) and PC (polycarbonate), due to their different material hardness, different sensitivities, and dependence on vapor polish, the polishing procedures for the two materials are slightly different.
Related post: Polycarbonate vs Acrylic: What Are The Differences?
The main vapor polishing steps for polishing acrylic are listed below.
The cleaning steps for PMMA and PC before vapor polishing are generally the same.
Use a soft brush or some compressed air to get rid of any loose debris, then wash it with clean water or a mild soap solution to remove any leftover grease or oil.
Make sure the Acrylic part is clean and dry before vapor polishing.
Compared with polycarbonate, acrylic is softer, and the CNC machining tool marks are easier to handle.
You can use dry sanding or wet sanding, the latter provides a more even finish and reduces heat-melting issues.
Sandpaper can be made progressively finer from 800 grit, to 1000, then to 1200.
When polishing with sandpaper, you can also use a marker to blacken the marks and then follow one direction to remove the marks.
PMMA is ideal for buff polishing, which can achieve a mirror-like finish.
Through buff polishing, it can remove irregularities, scratches, and small imperfections on the material’s surface, surface smoothness, transparency, and appearance will be significantly enhanced.
Aluminum oxide polishing compound is the most commonly choice to buff polish PMMA. Aluminum oxide has strong abrasive properties while providing a delicate gloss finish.
The steps of buff polishing CNC machined acrylic parts are described below.
First, apply the aluminum oxide polishing compound evenly to the buffing wheel or directly to the PMMA surface.
Seond, start the buffing wheel at a moderate speed and gently contact the PMMA surface. Avoid applying excessive pressure to prevent overheating or deforming the material.
Use circular, even motions to ensure the polishing compound is evenly distributed across the surface. You can change the direction and angle of polishing as needed to ensure there are no visible lines or uneven gloss.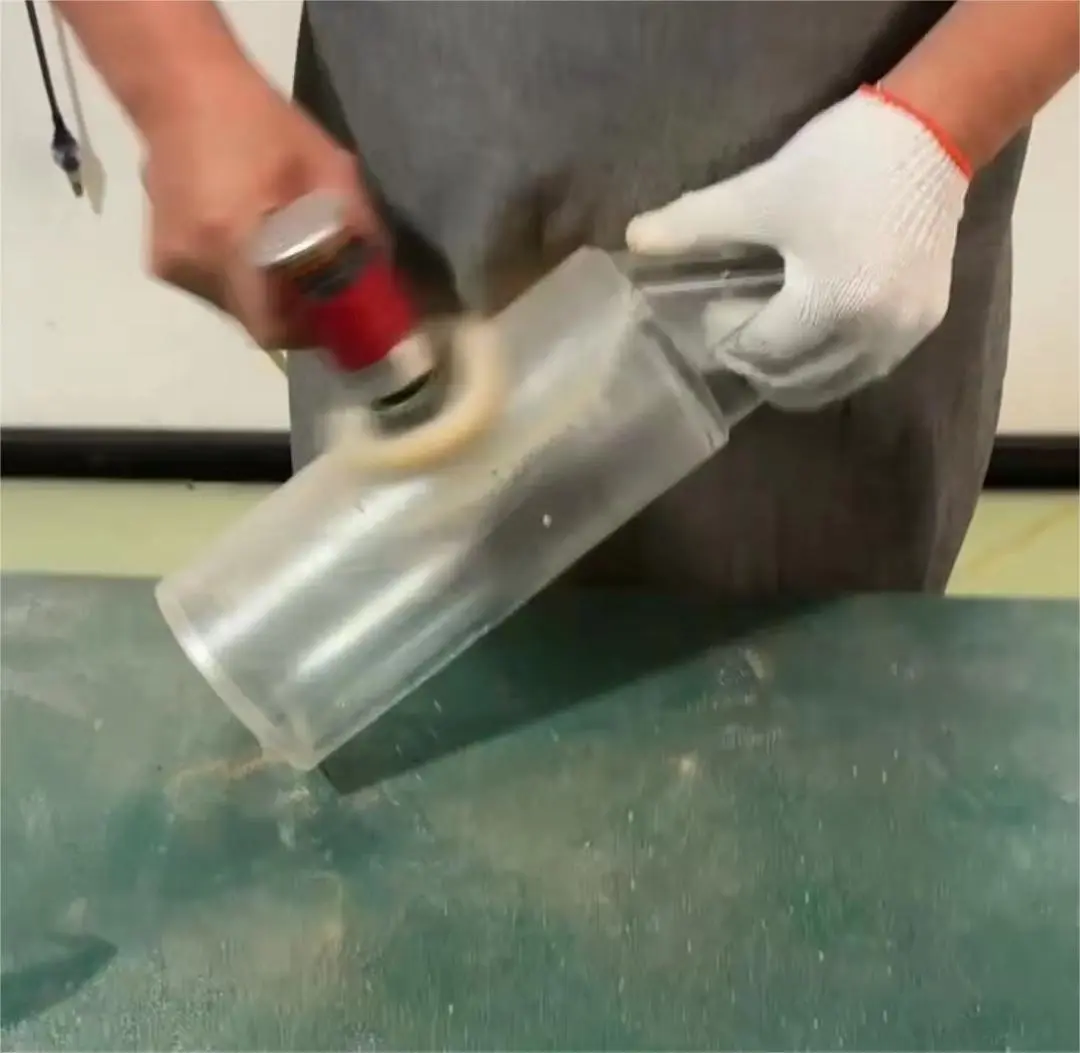
During the buff polishing process, periodically check the surface gloss and transparency to achieve the desired polishing effect.
It’s important to note that the friction heat generated during buff polishing can cause the PMMA surface to soften or slightly deform, so it’s essential to avoid concentrating the polishing on one area for too long.
After buff polishing, acrylic parts usually already have a high level of transparency, and can even achieve a mirror-like finish.
Vaopor polishing for acrylic is a final step to optimize the mirror finish. In other words, acrylic can reach a mirror finish without vapor polishing. Vapor polishing just makes it even more perfect.

Dichloromethane (DCM) and acetone are commonly used to vapor polishing acrylic (PMMA).
DCM has a strong dissolving ability and can quickly smooth the acrylic surface, removing deeper scratches and imperfections, achieving a better mirror-like finish in a short period.
Acetone is also a commonly used solvent, mildly dissolving PMMA to help remove surface flaws and enhance transparency.
DCM is the most commonly used solvent to vapor polishing acrylic.
Use a clean, heat-resistant chamber to hold the solvent and heat it until the solvent become a gas.
Place the dry acrylic parts in the vapor gas for about 3 seconds, ensuring they are fully exposed to the steam, then take them away. The acrylic part will have a mirror-like surface.
Note: Acrylic should not be exposed to vapor for too long, or it may start to bubble.
Photos before and afer vapor polishing acrylic are shown below.
Let the acrylic parts air dry in a dry, dust-free space. Make sure to wear gloves when doing the final surface and size check. If there’s any defect, you’ll need to start the whole process over.
Native ULTEM (i.e., PEI, Polyetherimide) is semi-transparent amber. After CNC machining, ULTEM parts often have a rough surface finish, about Ra 3.2. In certain applications, vapor polishing techniques can be employed to enhance their appearance.
PEI’s highly stable aromatic and imide structures makes it strong resistant to most solvents. Conventional organic solvents like acetone or ethanol are typically ineffective at dissolving PEI.
Strong polar solvents like N-Methyl-2-pyrrolidone (NMP) and Dimethylformamide (DMF) may cause slight surface swelling of ULTEM under high-temperature conditions, but such processes require strict control and temperatures well beyond typical vapor polishing settings.
These solvents also pose significant health and safety concerns due to their toxicity and low volatility.
Furthermore, high-temperature exposure may degrade the material, potentially reducing its mechanical performance, making industrial applications of vapor polishing for PEI quite rare.
Dichloroethane (DCE) can weakly dissolve PEI but requires prolonged contact.
Recommended workflow for vapor polishing PEI:
Pre-treatment: Perform meticulous manual polishing and sanding using a polishing compound to refine the surface. Before attempting vapor polishing on PEI, thorough manual polishing is essential. Fine abrasives and polishing compounds can help achieve a smoother surface before exposing the part to vapor.
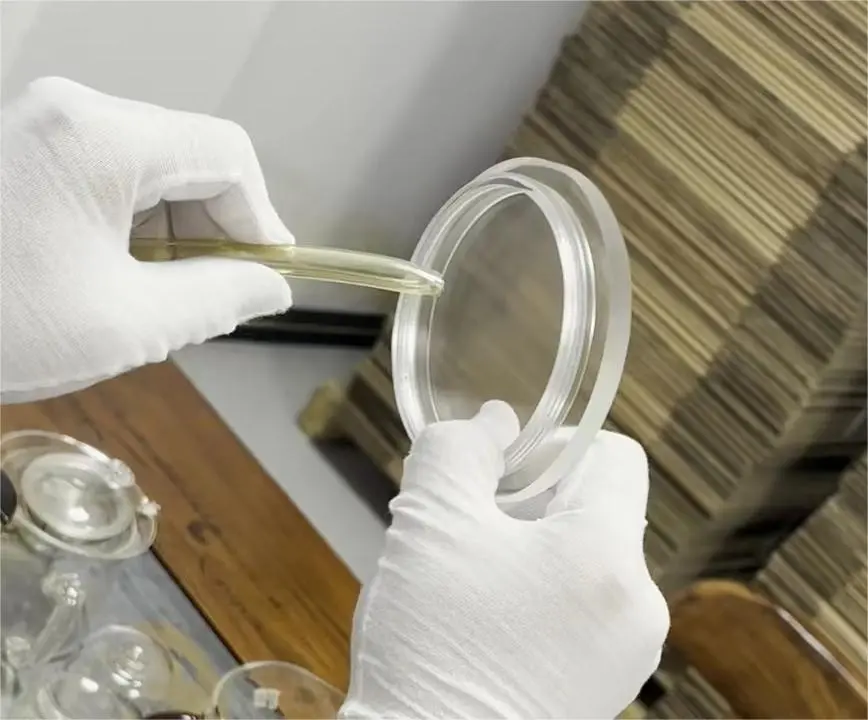
Vapor exposure: Heat the solvent to generate vapor, then suspend the PEI workpiece with tweezers in the vapor zone for 3–5 seconds.
Post-processing: Allow the part to air-dry naturally.
Vapor polishing has many applications and benefits; the three key benefits are listed below.
One of the primary benefits of using vapor polish treatment is the significant improvement in light transmission capability and optical clarity of the polished parts.
It allows for an unobstructed passage of light, making it an ideal process for parts used in light emission applications or where clear visibility is necessary.
This makes it a go-to method for improving fluid flow visibility, particularly for medical equipment, and a preferred technique for creating parts for displays, artwork, electrical components, and other items requiring high clarity and shine.
Additionally, vapor polish dramatically enhances the aesthetics of a product, providing it with an excellent water-clear finish and a high gloss. This aesthetic improvement contributes to the overall increase in the product’s value.
Vapor polishing does not only improve the looks of a product but also enhances its surface. Compared to conventional post-processing surface finishes like sanding, it eliminates all surface irregularities and markings.
This is a great advantage, especially for smoothing 3D printed parts with transparent SLA resin and CNC machined parts in acrylic and PC.
The effectiveness can be influenced by numerous factors.
Different types of plastics respond differently to vapor polishing.
For example, in our CNC workshop, we vapor polish acrylic and polycarbonate parts a lot. You can find the big differences on appearance and transparency after vapor polishing.
Acrylic achieves better transparency after vapor polishing, often restoring a glass-like visual effect. Polycarbonate also sees a significant improvement in clarity, but it doesn’t reach the same level of optical purity as acrylic.
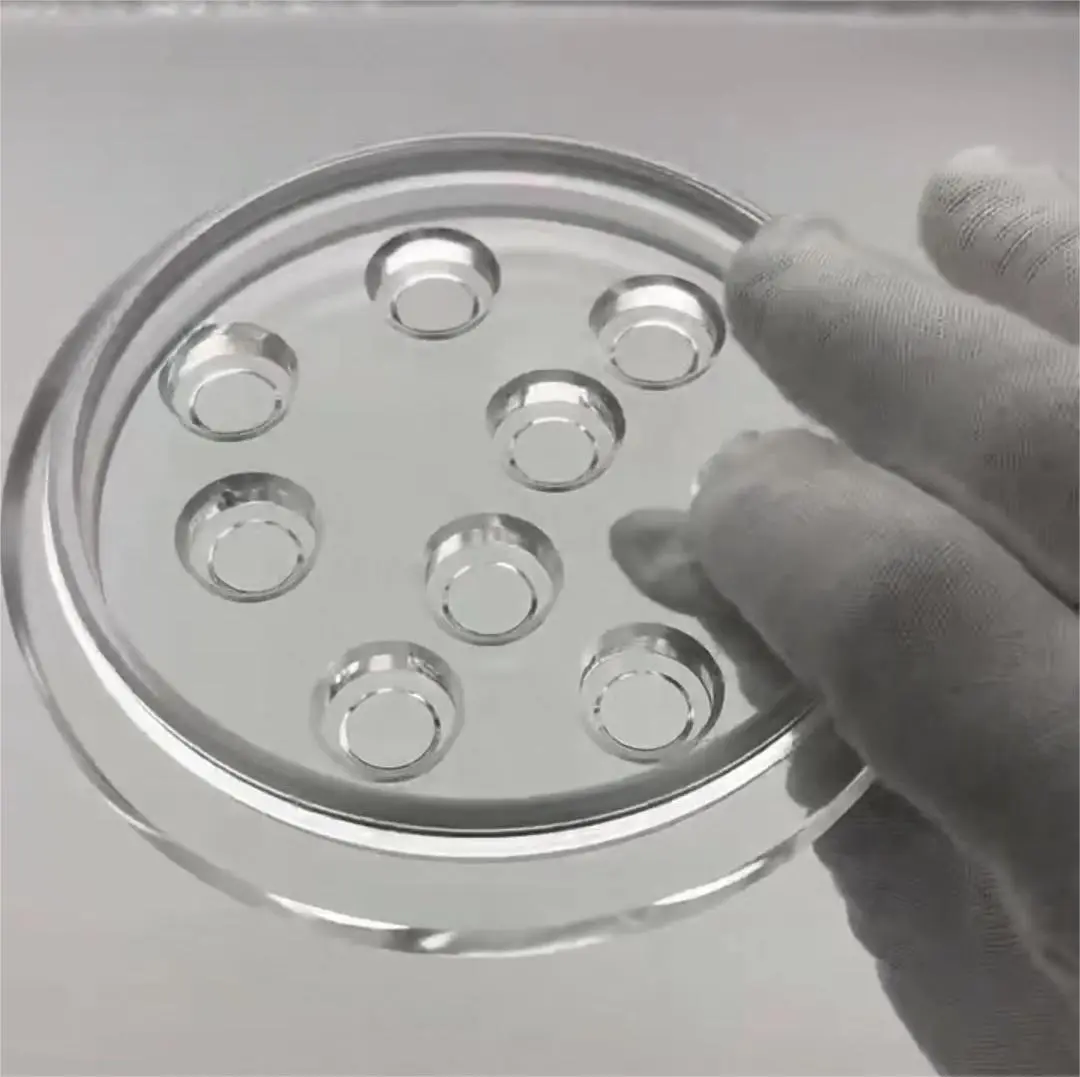
This is CNC-machined polycarbonate part after vapor polishing treatment.
This is a CNC-machined acrylic part after vapor polishing treatment.
The initial condition of the plastic surface, including any scratches, imperfections, or machining marks, can affect the overall results. Therefore, the surfaces should be adequately cleaned and sanded to reduce deeper scratches and ensure even vapor reach.
The shape and geometry of the plastic object being polished influence the effectiveness of vapor polishing. Complex shapes require careful alignment to ensure uniform polishing across all surfaces.
The solvent’s type plays a paramount role in the process, as its reactivity with specific materials affects the results.
In actual practice for vapor polishing polycarbonate and acrylic, Dichloromethane (DCM) is the best solvent for acrylic while 2-Dichloroethane (DCE) for Polycarbonate.
The vapor polishing solvent is toxic and operators shall wear must and the workshop shall have good ventilation system.
The solvent temperature impacts the rate at which the plastic softens and the effectiveness of the polishing process. Further, the concentration of the solvent vapor in the polishing chamber also has a significant bearing on the effectiveness of the process.
The duration of exposure to the vaporized solvent plays a significant role in the polishing process. Adequate exposure time should be ensured to prevent an incomplete polish or damage to the plastic.
Though from other articles, we are always told the exposure time to vaporized solvent is important. Practically, it only takes 1-2 seconds to make the parts high transparent.
Proper ventilation is necessary to ensure that the solvent vapors do not linger around the plastic surface. Adequate airflow helps in the even distribution of solvent and prevents uneven polishing.
Proper handling and placement of the plastic objects within the polishing chamber are crucial. Assurance that objects are positioned correctly and securely can contribute to uniform and consistent results.
The quality and design of the vapor polishing equipment, including the polishing chamber and heating system, impact the overall effectiveness of the process. It’s essential to use well-designed equipment to ensure better control over polishing conditions.
Vapor polishing has several effects on plastic surfaces. The below information is based on one research article Impact of Vapor Polishing on surface quality and mechanical properties of extruded ABS by Brigham Young University. Let’s discuss one by one.
Vapor polishing has a very limited effect on the dimensions.
The key motivation for using vapor polishing is to reduce the roughness. This is also the main reason why vapor polishing can improve transparency and surface finish.
By sanding and vapor polishing, it will not have significant differences in mechanical properties.
Vapor polishing can have a profound effect on alleviating surface porosity and achieving a gross hermetic seal for components.

Failed vapor polishing performances contain visible tooling marks, water remains, sand stains or other dirt.
First, make sure the manual polishing is good. Use right grit sandpaper to polish the parts at several times to remove the tooling marks. The importance of hand polishing cannot be overemphasized. Whether the tooling marks are visible or not highly depends on the manual polishing.
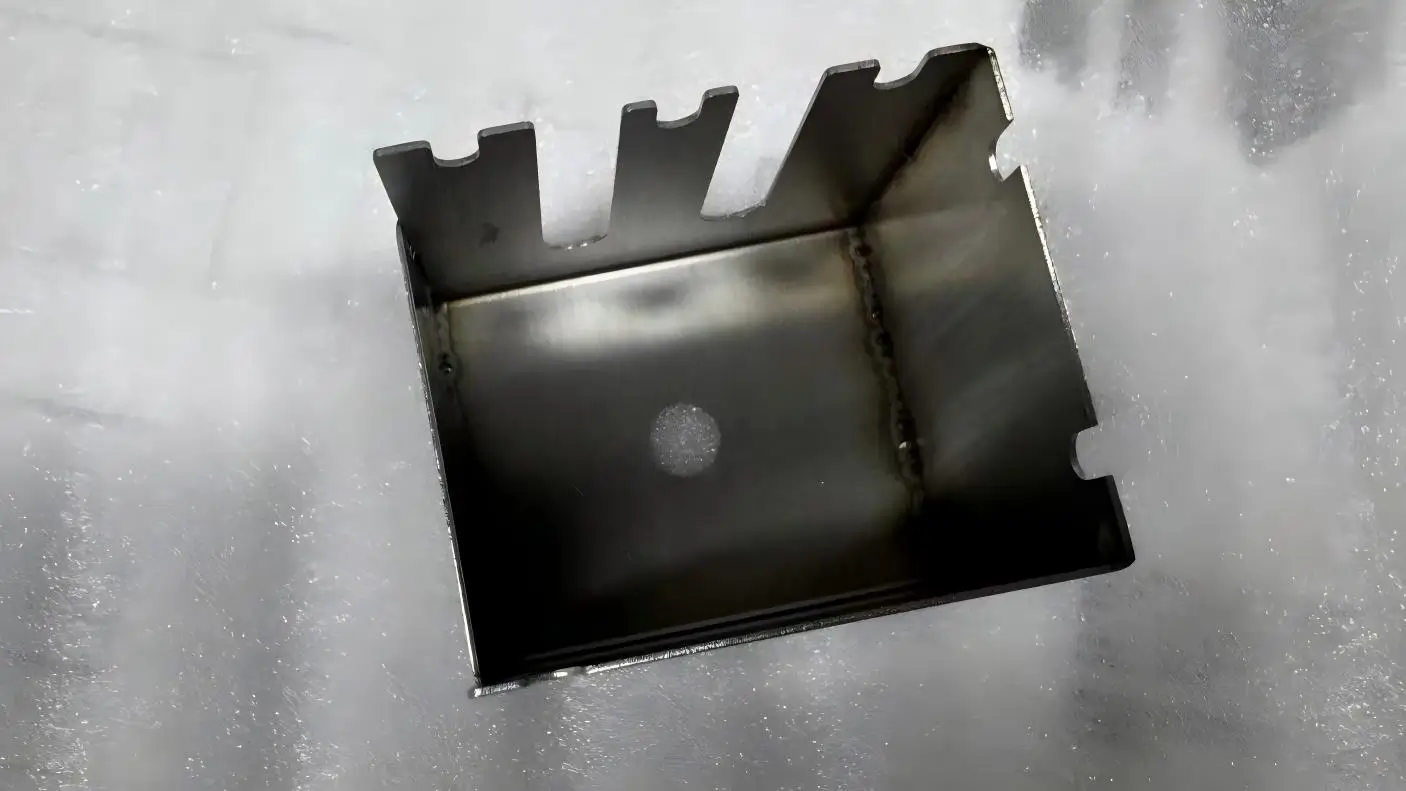
The photo below shows unpolished tooling marks becomes visable after vapor polish.
Second, clean and dry the parts thoroughly before vapor polishing.
The photo below shows the parts are not fully dried and water remains on the part. It can not be cleaned simply by washcloth now, must be repolished with sand and revapor polish.
Yes, we can vapor polish acrylic parts we machine. Acrylic vapor polishing has a higher requirement on manual polishing. Different from polycarbonate polishing, acrylic can reach very high transparency after manual polishing, while PC is frosted and matte.
For acrylic parts with complicated design, vapor polishing is not a must.
Acetone is one common vapor polishing solvent for plastics, like ABS andPMMA.
Acetone polishing is a chemical surface treatment technique commonly used to smooth and polish certain plastic materials, particularly ABS (Acrylonitrile Butadiene Styrene).
The process involves exposing the plastic surface to acetone vapor, which partially dissolves or softens the outermost layer of the plastic. As the acetone evaporates, the surface re-solidifies into a smoother, glossier finish.
For CNC machined parts, sanding is always necessary. Sanders shall be from coarse sandpaper to fine sandpaper.
In ECOREPRAP workshop, we use 200 grit sander to polish polycarbonate first, then use 400 grit sander for fine sanding.
But to acrylic part, we use 200 grit to 1200 grit sander. Polycarbonate becomes slippery for sandpapers over 400 grit.
This process can be potentially hazardous for untrained individuals due to the solvents’ toxicity. Therefore, it is strongly advised that only trained professionals carry out these procedures, which should take place within a controlled chamber. The professionals are required to wear breathing respirators for safety.
For safety reasons, it is also recommended that professionals familiar with handling solvents and safety protocols perform vapor polishing.
Attempting vapor polishing at home or in non-professional settings is strictly prohibited. Always recommend a professional workshop.
Generally speaking, it is a relatively quick process. Once the vapor is applied to the plastic, the material becomes apparent within a few seconds.
While vapor polishing only takes a second or two, a lot of hand sanding is necessary to get good vapor polish results. Also, note that water stains or sand should be removed promptly. The parts shall be dried completely.
Due to stress generation, cracks might occur in the g process of PMMA (Acrylic) and PC (Polycarbonate).
During this process, the rapid evaporation of the solvent from the surface of the part can cause excessive cooling and consequent thermal stress.
Additionally, internal stress might be induced when the material particles expand at high temperatures and then contract while cooling. These stresses can lead to micro-cracks in the plastic material, sometimes called “crazing.”
One way to address this issue is through annealing the treated parts, which involves precise heating and cooling to eliminate the stresses within the plastic.
This not only can prevent crazing but may also enhance the dimensional stability of the parts, improve the integrity of the product, reduce shrinkage and swelling, and improve the chemical resistance of the parts.
Other factors that may cause cracks are solvent exposure, poor ventilation, aggressive solvents, unstable temperatures, and plastic impurities.
Tests on samples can help control exposure time, solvent concentration, and ventilation to reduce cracks.
Below photo shows crazing.