This is my complete guide about PLA glue for 3d prints 2021.
In this all-new guide, you’ll learn:
- What is plastic glue?
- How to choose the right glue for PLA
- Common PLA glue we use
- PLA gluing step by steps
- Finishing process
- Tips for gluing with PLA 3d prints
So if you want to get good bond quality with gluing PLA parts, you will love today’s guide.
Let’s get started.
Chapter 1: What Is Plastic Glue?
Traditional adhesives can not bond with plastic effectively due to their smooth and non-porous surface. To glue plastic, you need to use special glue.
Plastic glues are best known for their bond strength and durability. It also has better resistance to temperature, chemical, and moisture exposure than standard adhesives. When working with plastic, it is essential to use plastic glue.
Chapter 2: How To Choose Right PLA Glue
There are many different kinds of plastic glue. However, only a handful of them works well with PLA plastic. Choose the right type is essential for PLA prints. Here are the tips about how to choose the suitable types.
First, make sure the plastic glue you intend to use is compatible with PLA. Otherwise, you might deform your project or burn a hole through it. You can check the product box or ask your local hardware store if it is compatible with PLA before buying it.
Second, weigh your priorities. Do you prefer a quick turnaround time? Then a fast-curing plastic glue may be best for you. If precision matters more, a slower curing time would be more beneficial.
Third, consider where the final product will use. Will it be used both indoors and outdoors? If yes, you might want to use a temperature-resistant and waterproof adhesive.
Will your project be subject to frequent vibrations–like in a vehicle? If yes, choose an adhesive with a high bond strength and good impact and stress resistance.
Chapter 3: Common PLA Glues We Use
Below is a list of commonly-used PLA glues. All of them have a unique feature. We also write down the pros and cons for each type.
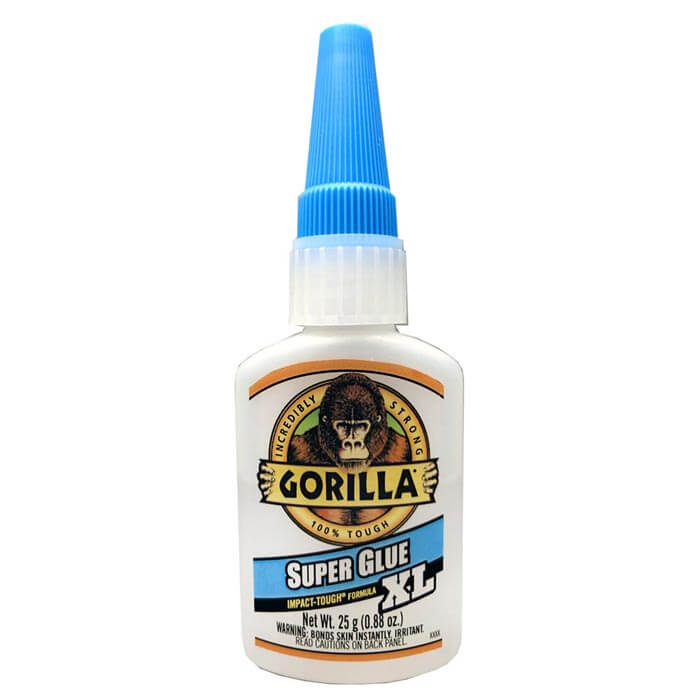
1. Cyanoacrylate Glue
Cyanoacrylate is a fast-acting and strong glue that works well with almost any material (including PLA). How fast is fast? Cyanoacrylate can bond two surfaces in as few as 10-20 seconds. If you are working on a rush project, this might be a suitable plastic glue for you.
Cyanoacrylate is also very popular. You have probably already used this at least once in your life. You may know it as “crazy glue,” “instant glue,” or “super glue.” It is commonly used for general home repairs, industrial needs, and even medical emergencies. Regardless if you will choose this glue for your PLA project, it is a good idea to have this at home.
Pros
- Compatibility
- Cost-effective
- Bond strength
- Bond speed
Cons
- Brittleness
- Poor peel strength
- Poor temperature resistance
- Poor solvent resistance
- Rapid bonding to skin
2. Two-Part Epoxy
Epoxy glues are best known for their extraordinary strength and load resistance. Epoxy glues are so strong. They are used to bind the blades of helicopters and wind turbines. If they can glue steel, they can glue PLA plastic.
There are two kinds of epoxy glues. Two-part epoxy, also called two-component epoxy, will require you to mix a resin and a hardener manually. One-component epoxy comes pre-mixed but requires heat to activate the hardener. Since PLA has low heat resistance, using one-component epoxy with PLA is not ideal. Stick to two-part epoxy if you are gluing PLA.

Pros
- Impressive bond strength
- Good for filling gaps
- Waterproof
- Chemical resistant
- Solvent resistant
- Temperature resistant
- Shock and impact resistant
- High tensile strength
Cons
- More expensive
- Requires accurate mixing
- Short pot-life when mixed
- Long curing time
- Hazardous to health
3. Urethanes
Urethane and polyurethane adhesives, also called PU adhesives, are known to be strong and versatile. Just like epoxy, they are called “reaction adhesives” because they cure through chemical reactions.
Urethane adhesives have unique characteristics that set them apart from other plastic glues. For one, PU adhesives are waterproof and UV resistant, making them perfect for outdoor projects. Moreover, they can be sanded, painted, and stained. If aesthetics matter to your project, you may wish to work with urethanes.
Urethane adhesives may not be as strong as epoxy, but they have impressive impact resistance. If urethane adhesives are good enough to hold a car’s windshield in place, surely they can effectively glue your PLA project too.
Pros
- Fast and strong initial adhesion
- Fast curing
- Stress and impact resistant
- Paintable
- Temperature resistant (maximum 125 degrees celsius)
- Chemical resistant
- Water and moisture resistant
- Suitable for both indoor and outdoor use
Cons
- Lower bond strength compared to epoxies
- Maximum shelf life of 1 year
- Hazardous to health
- Hazardous to environment
- Subject to government regulation
4. Acetone
While acetone always uses as a cleaning or paint-stripping tool, some claim it is also possible to glue PLA together with acetone. However, PLA in its pure form is not reactive to acetone. Only impure PLA with traces of ABS plastic can be solvent-weld with acetone.
Moreover, the strength of the bond depends on how much ABS is in the PLA material and the amount of acetone applied. It can also distort or warp the plastic being bonded. You may choose to use acetone as a bonding agent as an experiment, but it may be wiser to use the suitable adhesive for PLA plastics.

Pros
- Cost-effective
- Invisible seams
Cons
- Questionable bond strength
- Will not work with pure PLA
- May distort plastic
- No prescribed curing time
Chapter 4: PLA Gluing Step-By-Step
1: Prepare your model
Whether you are designing one from scratch or downloaded a pre-designed template, check which parts you need to bond. Prepare all components and supplies required for the next steps.
2: Prepare the surface for bonding
Adhesives work best with rough surfaces. Use sandpaper or steel wool to roughen up the body you’d like to bond. Brush off or wipe the dust from the surface.
3: Check if your model is ready for gluing
Remove excess or uneven parts or edges with the help of flush cutters and needle-nose pliers. Make sure pieces fit well together. If not, you may need to sand them down.
Remove all dirt, dust, and debris by wiping the surface clean. Avoid touching parts with your bare hands after.
4: Hold components in place
The last thing you would want when you are putting on glue is for your project to fall apart. That is why it is crucial to secure all components before gluing.
This is similarly true for the curing process. Most adhesives take time to cure. Your project must keep its shape while curing. Otherwise, the glue may harden incorrectly, and your project may end up deformed.
Depending on your project, you may use rubber bands, clamps, straps to secure each part together. For larger projects, you may need to use a combination of these.
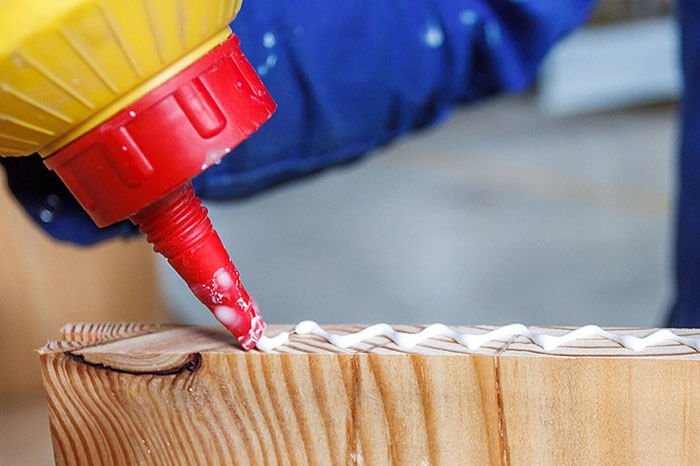
5: Start gluing
Apply glue evenly throughout your model. Spot glue by putting a small amount of adhesive at regular intervals around your model. Use just the right amount of glue to avoid having to clean up the excess.
Start from the middle and work your way towards the edges. Make sure you have put glue on all seams.
6: Check all seams to make sure they are properly glued.
If there are seams that do not seem fully bonded and secure, apply step 5 to those seams.
7: Fill seams if needed
This step is completely optional. You can use Bondo to seal and smoothen gaps for a better-looking final product.
8: Use an accelerating agent
This step is entirely optional. Use an accelerating agent if you want to speed up curing.
9: Wait for the curing process to finish
Check the glue box for the curing time of your adhesive. If you don’t follow the prescribed curing time, it may lead to a weakened bond. Do not move your project or remove fasteners while curing is not yet complete.
10: Inspect your final product
Once the curing process is complete, remove the fasteners and inspect your final product. Test the strength of the bond to see if it fits your quality standards. Look at the aesthetics: are there rough edges that need sanding or excess glue that needs cleaning up?
Improve what needs to be improved. Repeat steps 4 to 9 if required. Don’t stop until you satisfy your quality standards.
Chapter 5: Finishing Process
Finishing is the process of polishing your work to make it look as good and professionally done as possible. For gluing PLA, this can mean any of the following:
1. Friction Welding
You can use a Dremel rotary tool to friction weld PLA. Spin the two surfaces fast enough to melt into each other, creating a strong bond without adhesives. This is very useful when two printed parts don’t fit well together. By the end of the process, it will be hard to tell where each surface ends and begins.
2. Filling and Sealing
You can also use a Dremel or similar rotary tool to close gaps. Gently drag a spinning piece of PLA onto the seams you wish to weld. The heat will dissolve the PLA onto the seams, filling the gaps successfully. This process is called friction surfacing.
3. Sanding and Polishing
To smoothen out the edges and surfaces of your project, sand them down. You can use 100-150 grit sandpaper.
After sanding, you can smoothen its appearance with the help of superglue or a heat gun. Use a heat gun with caution as PLA is more sensitive to heat than other plastics.
Chapter 6: Tips for Gluing with PLA 3D Prints
Some last-minute reminders to make gluing your PLA parts easy and effective:
1. Make sure your surface is clean and dry
Remove all dust, dirt, oils, and residue with alcohol or a plastic cleaning agent. Once the plastic surface is clean, do not touch the surface with your bare hands to avoid oil transfer.
2. Roughen the surface.
Use sandpaper (120 to 200 grit) or steel wool. You can also use Loctite’s two-part plastic bonding system, as that comes with an activator that helps roughen up the surface. As with step 1, remove excess dust and debris by using a brush or gently wiping the surface clean.
3. Apply the right amount of glue
To avoid putting too much glue, use a smaller squeeze bottle or applicator. You can even use a paintbrush or needlepoint as an applicator.
4. Prepare the glue as stated in the manual
Read the instructions carefully. Some glues come with two parts and require manual mixing. Follow the exact mixing ratios displayed in the box to maximize the effectiveness of the adhesive.
5. Follow the curing process
It is crucial to secure components and rubber bands, straps, or clamps while the curing process is ongoing. Read your instruction manuals to find out how long you have to wait for the glue to dry and cure completely. Do not touch or move your project before the curing process is complete.
6. Keep safe
Follow the safety precautions stated in the instruction manual. When in doubt, use gloves, eye protection, a mask, and protective clothing. It is also preferable to glue in a well-ventilated area.
7. Protect the surrounding area
Wipe off any excess glue immediately before it hardens using isopropyl or denatured alcohol. Ensure your plastic adhesives are properly sealed and stored in a cool and dry location, preferably with a temperature between 75°F (24°C).
Summary
So that’s it for my guide to gluing PLA 3d prints. Now I’d like to hear what you have to say: Which type of glue from this guide are you going to try first? Do you plan on glue PLA parts right now? or do you have another problem in action?
Either way, let me know by leaving a comment below right now.
ECOREPRAP’s main business has shifted from 3D printing filaments manufacturing to 3d printing services and CNC machining services since 2023. We will continue to share related blogs about filaments and CNC machining.