3D printing is described as being able to turn any digital model into a real-world object. However, it also has some limitations in structure. Such as 3d printing overhang and bridge.
If your model has crucial overhang elements, then don’t worry too much. Successful 3d prints with overhang is possible by following a few rules.
What Is Overhang In 3D Printing?
3D printing is a process that relies on building an object layer by layer based on the slices of a digital model. As each layer cools down and solidifies, it supports the weight of the back layer. It is a reasonably simple mechanism with a few fundamental limitations.
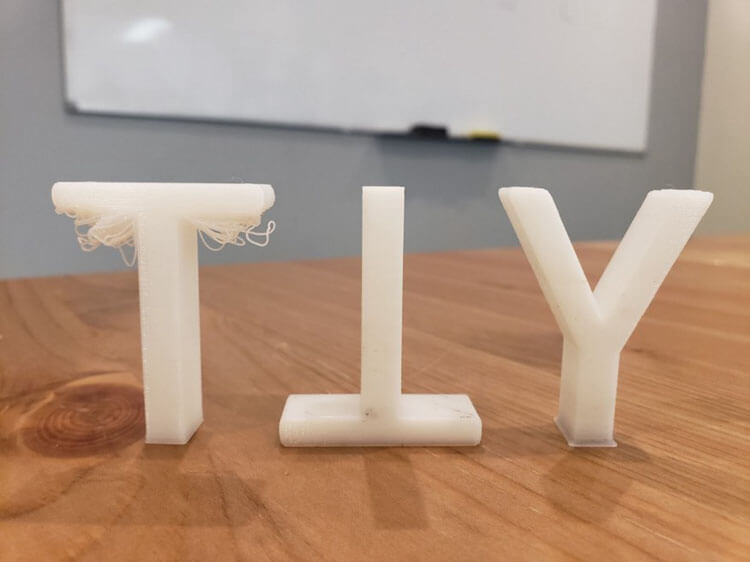
Overhang is the feature in the 3D printing model that extends outward from the previous layer. This structure is not directly supported by any system underneath. Overhangs can be problematic as they can collapse under their weight when printing not in ideal conditions.
In some cases, overhangs do not collapse entirely but end up sagging or curling. Although less catastrophic, this can still ruin your 3D print visually and reduce its mechanical integrity.
Rules For Overhangs
Although overhangs can be a challenge in 3d printing, they are necessary for a lot of projects. If trying to print a complex design, overhangs are practically unavoidable. You will need to work around them to prevent them from collapsing or sagging.
The basic rule to follow is that it should not exceed an angle of 45 degrees from the vertical. At precisely the 45-degree point, an overhang still has a 50% support from the preceding layer and should not yet collapse. It is not an absolute rule as different types of filaments and printer settings can result in variations in the point of failure.
Beyond 45 degrees, you will have to resort to more creative solutions to prevent an overhang’s failure. These measures can range from adding support structures to your model or altering your model entirely.
How to Improve 3D Printing Overhang
If your model contains overhangs, it is prudent to make corrections or adjustments before 3D printing starts. After all, an overhang’s collapse is not the type of 3D printing error that you can recover.
Here are some precautions you can take to avoid wasting your time and filament.
Revise The Model
Maybe it is the most drastic thing you can do to improve your overhangs – make changes to your model.
While you change the orientation in slice software, the print performance will be much different.
Model Rotation
If the overhang features go beyond the 45-degree threshold, Rotating to a different orientation may be enough to make these overhangs more vertical. You can make them less prone to collapsing or sagging.
Some slicer software, such as Cura, comes with an auto-orientation feature that can rotate your model to minimize supports. This function essentially reduces overhangs. In most cases, the optimal solution is a combination of both – reorientation of the models and limited use of supports.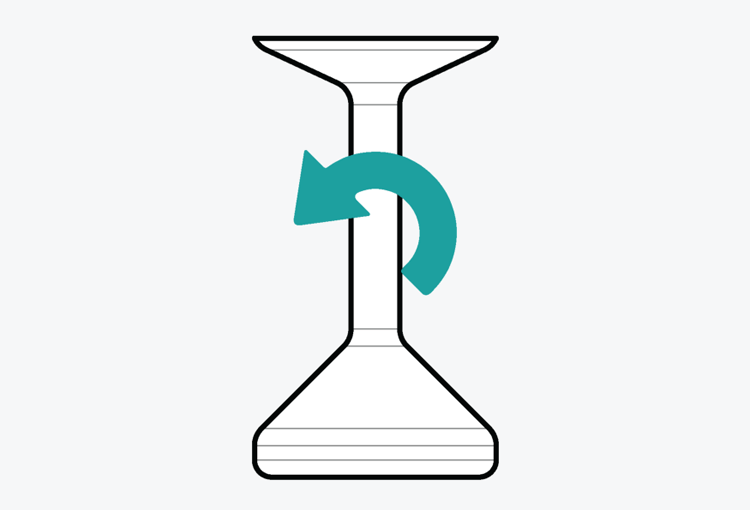
Angle Deforming
Suppose you are familiar with some 3d design software, such as Solidworks, Sketchup. You could revise the angle of overhangs.
This will save you the effort of tweaking with slicer settings to make sure that the prints do not collapse.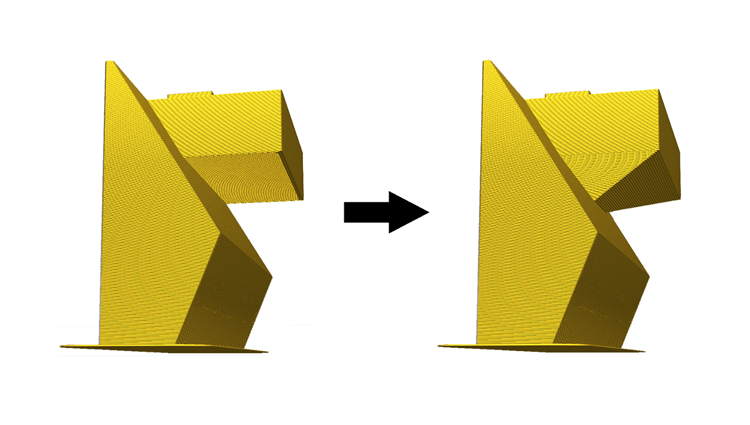
Use Support Structures
A model with overhangs will need support structures. These are pieces of filament printed with the sole purpose of providing mechanical support to overhanging features. Supports can be auto-generated by slicer software and may have different shapes, including linear, accordion, or tree-like.
Using too many supports has a significant downside. Supports consume a lot of extra 3d filament, which you will need to dispose of later. They can also be tough to remove, especially if they are rigid materials like PETG or Nylon. For these reasons, it is good practice to use as few supports as possible.
The best way is to use soluble filaments such as PVA (Polyvinyl Alcohol) or HIPS (High-Impact Polystyrene). These filaments can be submerged in the appropriate solvent after 3D printing to remove them effortlessly. PVA dissolves entirely in water, while HIPS requires a limonene solvent.

Tuning the 3D Printer
Overhangs can be challenging for any 3D printer. To make sure that it is up to the task, do a general fine-tuning of your 3D printer before printing a model with lots of overhangs.
To maximize the performance of your 3D printer. Doing a bed calibration, cleaning your nozzle, relubricating motors and shafts, using a new build plate can be a huge help.
Tuning your 3D printer isn’t specifically useful for 3d print overhang but is generally good practice for any challenging job.
Print in Multiple Pieces
In some complex models, overhangs cannot be addressed by simply changing the model’s orientation. Another solution is to break down an overly complicated model into smaller and simpler parts.
Working with smaller parts gives you more freedom to play around with the models and reduce overhangs. This is also a great strategy if you’re anticipating complicated models to fail during printing. Dividing them into smaller parts makes the challenges more manageable and lowers the stakes in potentially wasted time and filament.
Just keep in mind that you will inevitably need more post-processing work when splitting models up into several parts. You will have to glue the pieces together and sand the seams to be so visible. It may take a bit of practice to develop the crafting and post-processing skills needed to pull this off.

Use chamfers
A chamfer is a way to create overhangs that seem to defy the 45-degree rule. Dividing the overhang into smaller segments, each one angled less than or equal to 45 degrees from the vertical. The angle then tapers off closer to being horizontal.
The downside of using chamfer is that it can drastically alter the appearance of a model. This may not be acceptable for your project, depending on its application.

Tweaking The Slicer Settings
If you’re still having problems with curling overhangs despite following the 45-degree rule, then your slicer settings may need some work.
Increase Fan Cooling
Cooling is your most powerful tool to keep your overhangs from collapsing.
Cooling the filament as quickly as possible helps it develop the strength to support its weight. Try to print with the cooling fan at maximum setting and without an enclosure. You can even try augmenting your cooling fan with a separate desk fan.
Decrease Layer Height
Collapsing overhangs happen when the filament cannot support its weight. An excellent approach to solving this problem is to make the layers as light as possible by reducing the layer height settings. This reduces the likelihood of the layers collapsing.
The drawback of this solution is that it will undoubtedly increase the printing time of your project.
Reduce Printing Speed
Reducing the printing speed gives filament more time to cool down and develop rigidity. Before it gets weighed down by succeeding layers on top of it, this strategy goes perfectly with a cooling fan set at maximum to strengthen your layers as quickly as possible.
As with reducing layer height, you are slowing down the printing speed will increase your model’s printing time.
Lower Printing Temperature
If you’re having a hard time keeping your overhangs up, then you may try reducing the printing temperature by increments of 5 °C. Make sure to stay within the recommended temperature range for your filament.
By printing at lower temperatures, you can help the filament establish rigidity faster after exiting the nozzle. This makes it more capable of supporting its weight and less prone to collapse. Please take note that it may be necessary to reduce the printing speed accordingly to ensure consistent extrusion.
The optimal slicer settings can vary widely based on the filament you are using and the dimensions of the overhangs that you are printing. It will likely take some trial and error before figuring out the perfect settings for your application.
Summary
If you want to get quality 3d prints, dealing with 3d printing overhang curling is essential you need to know.
Preparation is a crucial component in avoiding catastrophic failures because of overhangs. Depending on your circumstances, you may have to make a few changes to either your model or printer settings.
As with most 3D printing issues, expect a healthy amount of trial and error before you achieve success.
ECOREPRAP’s main business has shifted from 3D printing filaments manufacturing to 3d printing services and CNC machining services since 2023. We will continue to share related blogs about filaments and CNC machining.