3D printing is rarely a perfect process, especially when dealing with an unfamiliar machine or filament. One of the problems is the pillowing. Because it only comes up when printing the top layer – or when 3d prints will be finished.
As with most 3D printing problems, pillowing can be fixed by tweaking your printer settings. Check out our guide on pillowing and how you can avoid it.
What is 3D Printing Pillowing?
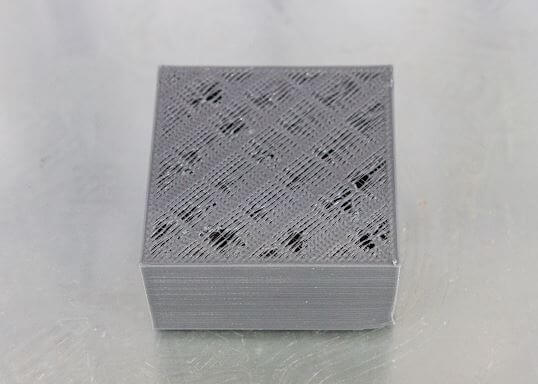
Pillowing is a typical 3D printing problem characterized by the top layer having an uneven surface. This feature can manifest as a series of small bumps, a very rough surface, or even small gaps and holes.
What makes pillowing particularly frustrating is that it comes up only when a print is almost done. By the time the top layer is printing, you would have already spent a lot of time and filament material. It leads to a lot of waste and the need to start over with the entire project.
Pillowing can happen regardless of the type of 3D printer or filament you are using. The silver lining in this is that solving it also does not require any fancy equipment or accessories.
Considering the stakes, it is in your best interest to avoid pillowing at the start of 3d printing. You will save a lot of time, effort, and filament.
Causes for 3D Printing Pillowing
To put it briefly, pillowing happens when the top of object fails to cool properly. Several factors can cause this issue.
Identifying each one of them is the key to addressing the problem even before it happens.
Filaments with High Melting Point
Thermoplastic printing filament has a different performance from 3d printers. They have different print temperatures, particularly those that tend to warp, also have an increased tendency to exhibit pillowing.
Warping of the top layer happens as the filament cools down. The stress generated by thermal contraction pulls the material towards the infill pattern directly below the top layer. If the top layer isn’t strong enough, this effect will create prominent holes or an uneven surface.
Improper Cooling
The pillowing also happens when the top layer is not strong enough to resist thermal stress or support its weight.
An easy way to avoid this is rapid cooling. Cooling makes the material rigid faster, giving it strength to hold its form.
Not Enough Support Material
In some cases, the top layer develops holes simply because the filament material falls through the gaps.
There is not enough infill to support the top layer, the filament with poor bridging performance will more likely suffer pillowing because of this reason.
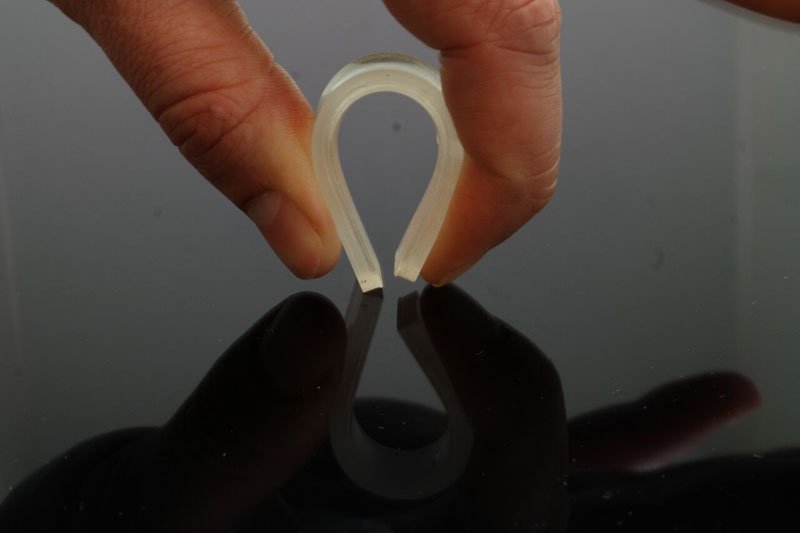
Soft Filament
Soft or flexible filament, like TPU, are more prone to pillowing.
They lack the rigidity to hold their shape during cooling, especially when sparse support materials anchor them. When working with soft filament, cooling the molten material as quickly as possible becomes even more critical.
How to Avoid it? Try These Solutions
To avoid pillowing, we need to address its root causes. This involving reinforcing the top layer, either by providing it support underneath or helping it become rigid as quickly as possible.
If you’re still encountering issues with pillowing, here are some solutions you can try out.
Increase Top Layer Thickness
Building a thicker top layer makes it more mechanically robust. Hopefully, this will be enough to counteract the thermal stresses that can lead to warping.
A good rule of thumb to follow is to build the top layer about five or six times thicker than the other layers in the project.
Increase Infill Percentage
Another option to consider is the infill structure. The benefit of this is two-fold. Not only do you provide more support for the top layer, but your prints generally get more robust and heftier. A minimum of 25% infill is usually accepted to prevent pillowing. For the flexible filament, you need a higher setting.
While this is a reasonably effective solution to pillowing, increasing the infill percentage has a significant consequence. It also heavily increases the amount of filament going into any print – even more so than improving the top layer thickness. If you’re offering this service commercially, make sure to adjust your prices not to end up short-changed.
Decrease Speed of Printing
Slow and steady wins the race – keep this in mind when trying to prevent pillowing.
Slowing down the print speed can give the filament more time to cool down and develop rigidity. This allows it to better support its weight and the weight of the succeeding layers.
Take note that reducing the printing speed goes in tandem with lowering the printing temperature. We will go into more detail on that later on.
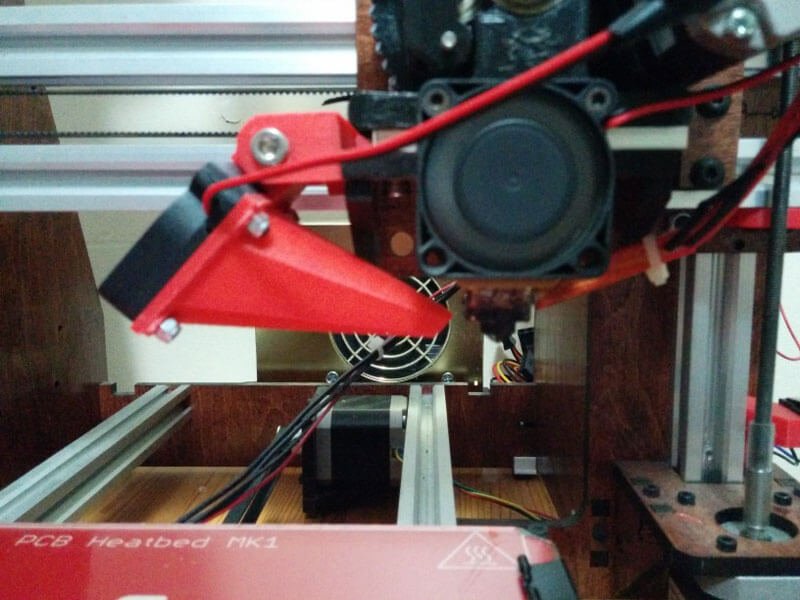
Improve Cooling
One of the most straightforward solutions to prevent pillowing is to maximize cooling for your project’s top layer. This action can develop strength and rigidity quickly before it becomes deformed because of warping or buckling.
In some cases, even setting the cooling fan to maximum might not be enough to prevent pillowing. If you find yourself in such a situation, then even a standard desk fan could help. Make sure to print in an area with good ventilation – cold fresh air from outdoors can speed up the filament’s cooling.
Lower Printing Temperature
If cooling is the problem, then why heat the filament in the first place? A smart strategy is to reduce the printing temperature for the top layer of your print. It helps to reduce thermal stress during cooling and relieves the filament’s develop rigidity earlier.
As mentioned, reducing the printing temperature goes hand-in-hand with lowering the printing speed. Make sure to adjust both these parameters simultaneously, so you do not run into an extrusion problem.
Be careful only to do this when the top layer has started printing. Layer adhesion tends to suffer when reducing printing temperature. However, layer adhesion is no longer as important in the top layer of a print.
Increase the Distance Between Print Head and Build Plate
A subtle solution to pillowing is to increase the z-offset of the print head while printing the top layers.
The heat emanating from the nozzle itself tends to slow down the filament’s cooling process that has already extruded. Just adjusting to 0.05 to 0.1 millimeters can profoundly affect reducing the effects of pillowing.
Just as with printing temperature, you are increasing the print head z-offset can also compromise layer adhesion.
Keep this in mind with every preventive measure that you take. You do not want to reduce layer adhesion to the point that the layers start splitting.
Change Filament Size
If you’ve done all the above measures but still suffer from pillowing, then consider changing over to another filament size. This is admittedly almost a shot in the dark, but it has worked in some situations.
Specifically, changing over from 2.85 millimeters from 1.75 millimeters may be the solution to your pillowing problem.
This method works because a larger-diameter filament can more reliably deliver the filament mass needed for consistent extrusion. That is particularly true when you’re using a wide-diameter nozzle.
This solution is worth exploring if you can observe signs of poor extrusion along with your issues with pillowing.
Summary
As far as 3D printing problems go, pillowing isn’t precisely one of the most complexes. However, it can be very disheartening because pillowing happens when a printing job is just about to finish.
Fortunately, pillowing also have relatively simple solutions. Just be ready to jump in as your print approaches the top layer. You may have to play it by ear, but the solution should not be too complex as long as you understand the fundamentals of how filament behaves as it cools.
ECOREPRAP’s main business has shifted from 3D printing filaments manufacturing to 3d printing services and CNC machining services since 2023. We will continue to share related blogs about filaments and CNC machining.