According to MIL-PRF-8625F, there are six anodic coating types.
Type I anodizing is chromic acid anodizing. The conventional coatings is produced from chromic acid bath.
Type IB anodizing is chromic acid anodizing with low voltage process 22 ± 2 V.
Type IC anodizing is non-chromic acid anodizing, as a alternative use for Type I and IB coatings.
Type II anodizing is sulfuric acid anodizing, and the conventional coatings are produced from sulfuric acid bath.
Type IIB anodizing is thin sulfuric acid anodizing, as a alternative for non-chromate for Type I and IB coatings.
Type III is hard anodic coatings (hard coat anodizing).
For the MIL-PRF-8625F standard, there is only a general description covering Type I, Type IB, and Type IC anodizing, without detailed individual specifications for each. We’ve gathered additional information for better understanding.
Type I Anodizing refers to the conventional anodizing process using a chromic acid electrolyte.
The anodic coating formed through Type I anodizing is thin, soft, and dense, providing good corrosion resistance, protection, and electrical conductivity. The coating weight should be ≥ 200 mg/ft², and once sealed, it can be processed to either Class 1 (non-dyed) or Class 2 (dyed) finishes.
MIL-PRF-8625F Type IB is a version of chromic acid anodizing that runs at lower voltage — about 22 ± 2 volts, compared to the 30–40 volts used in regular Type I anodizing.
It’s basically a gentler process. The coating you get in Type IB is still soft, dense, and protective, but because the voltage is lower, it puts less stress on the part and has less impact on fatigue strength.
Type IB was created as a solution for situations where traditional Type I anodizing might slightly weaken the part due to internal stress from the coating process.
MIL-PRF-8625F Type IC is non-chromic acid anodizing, as a non-chromate alternative for Type I and IB coatings.
Traditional Type I and IB processes use hexavalent chromium (Cr⁶⁺), which is highly toxic and carcinogenic, posing serious risks to human health and the environment.
Because of Cr⁶⁺ toxicity, many countries have introduced strict regulations on Cr⁶⁺ emissions in wastewater, exhaust gases, and workplace safety.
Type IC uses non-chromate electrolytes, typically based on mineral acids or combinations of mineral and organic acids.
Despite of being more eco-friendly, Type IC is still less widely adopted because of performance stability, long-term durability, and limited recognition.
MIL-PRF-8625F Type II is sulfuric acid anodizing and conventional coatings are produced from sulfuric acid bath.
Type II anodizing is the most commonly used sulfuric acid anodizing process for CNC machined aluminum and aluminum alloys. The sulfuric acid electrolyte concentration is 15% to 20%.
The anodic coating produced has a porous structure, and its thickness is generally greater than that of Type I (chromic acid anodizing).
The coating thickness of Type II is typically classified into two classes:
Class 1: 0.00007–0.0003 inches (approximately 1.8–7.6 microns)
Class 2: 0.0003–0.0010 inches (approximately 7.6–25.4 microns), often used for dyeing or sealing
Type II anodizing offers good corrosion resistance and is well-suited for both decorative and protective finishes.
After anodizing, the surface usually undergoes a sealing process—such as hot water sealing—to close the pores and further enhance corrosion resistance.
 3.5. Type IIB Anodizing
MIL-PRF-8625F Type IIB is thin sulfuric acid anodizing, as a non-chromate alternative for Type I and IB coatings.
Like Type II anodizing, Type IIB anodizing also uses a sulfuric acid electrolyte, but the resulting anodic layer is significantly thinner. Like other anodizing types, sealing is still required.
Typical coating thickness of type IIB anodizing is approximately 0.00005–0.0001 inches (about 1.3–2.5 microns) — offering moderate corrosion protection while minimally affecting part dimensions.
Type IIB is ideal for precision components that need a thin but protective coating where dimensional tolerances are critical.
For most CNC-machined aluminum parts, Type II anodizing is widely used. Type IIB is more specialized and typically used in high-precision applications where even small dimensional changes must be avoided.
MIL-PRF-8625F Type III is hard anodic coatings (hardcoat anodizing).
According to MIL-PRF-8625F,Type III anodizing (hardcoat anodizing) is the electrochemical process of aluminum and aluminum alloys to create a thick, dense oxide layer on the surface.
Hard anodizing is typically performed under strictly controlled low-temperature conditions using a sulfuric acid-based electrolyte. The resulting oxide layer is much thicker than standard anodizing (Type II).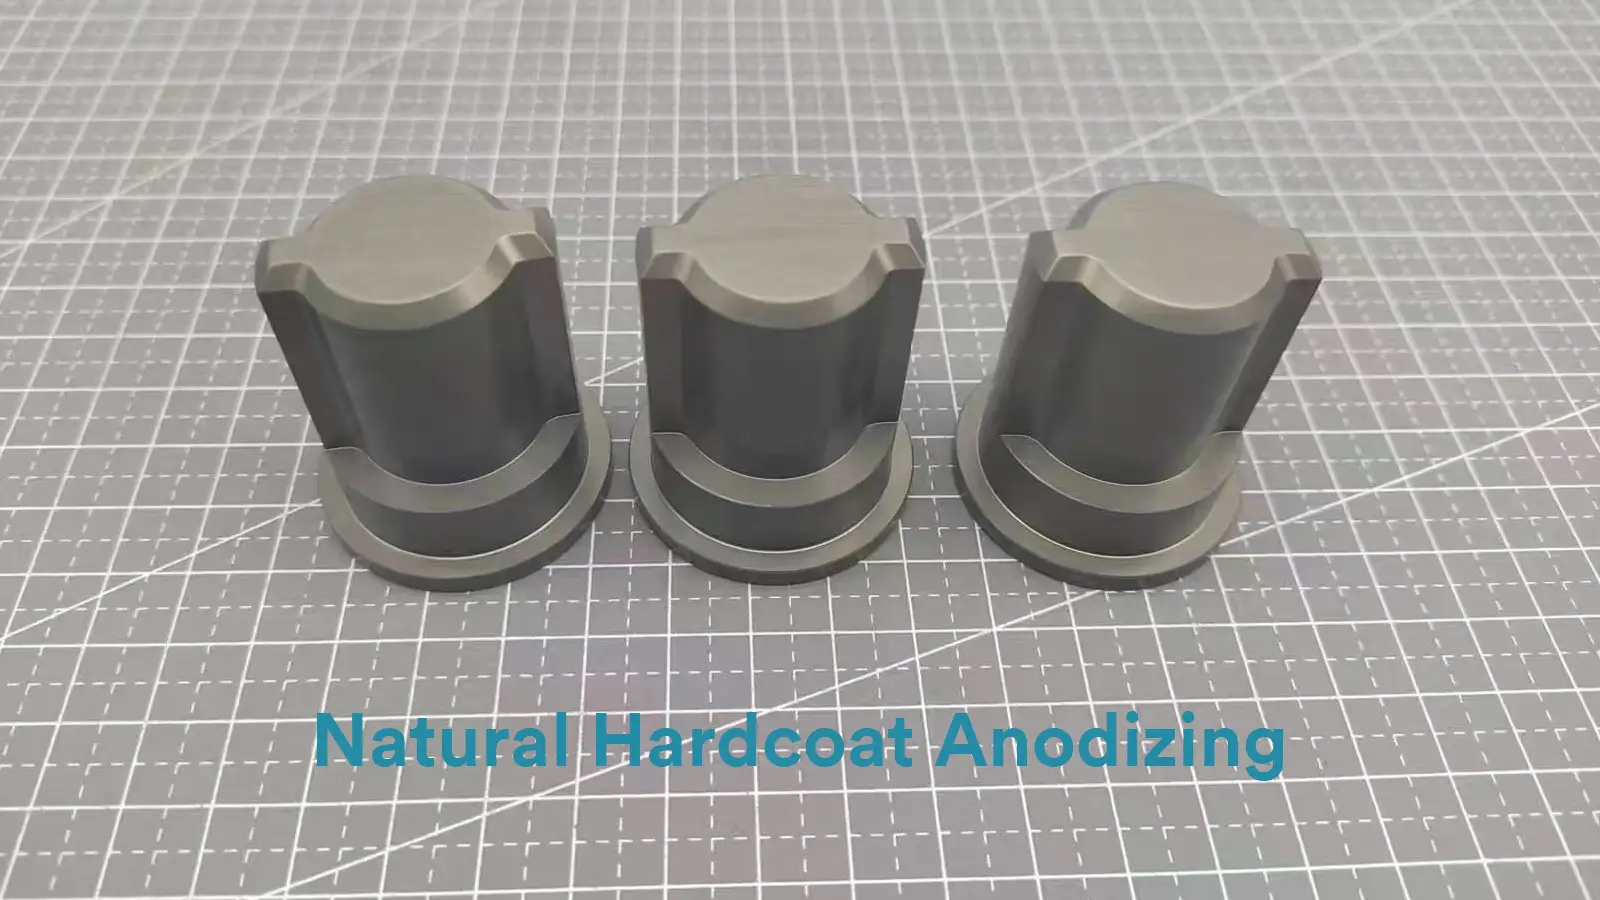 To ensure best results, aluminum alloys used for Type III coatings shall meet certain chemical requirements.
For example:
Alloys with more than 5% copper or 8% silicon by weight are generally not suitable unless special approval is given.
Heat-treatable alloys should be in a heat-treated condition such as T4, T6, or T73 before anodizing.
| Comparison of Anodizing Types under MIL-PRF-8625F | ||||||||
| No. | Type | Name | Electrolyte Type | Typical Thickness | Performance Features | Sealing Required | Environmental Status | Notes |
| 1 | Type I | Chromic Acid Anodizing | Chromic acid | 0.00002–0.00007″ (0.5–1.8 µm) | Excellent corrosion resistance, thin and flexible | Yes |  Toxic (contains Cr⁶⁺) Toxic (contains Cr⁶⁺) | Often used in aerospace, dull gray appearance |
| 2 | Type IB | Thin-Film Chromic Acid (Low Voltage) | Chromic acid (low voltage process) | Similar to Type I | Similar performance to Type I | Yes | Toxic | Produces thinner and more uniform coatings |
| 3 | Type IC | Non-Chromic Acid Alternative | Mineral/organic acid (Cr-free) | Similar to Type I | Environmentally friendly replacement for Type I/IB | Yes |  Cr-free Cr-free | Developed for military/environmental compliance |
| 4 | Type II | Sulfuric Acid Anodizing | Sulfuric acid (room temperature) | 0.00007–0.001″ (1.8–25 µm) | Good appearance, dyeable, moderate wear resistance | Yes | Compliant | Common for commercial/industrial decorative use |
| 5 | Type IIB | Type II Environmental Alternative | Cr-free replacement for Type II | Similar to Type II | Suitable for light-duty applications | Yes | Cr-free | Not for heavy industrial use |
| 6 | Type III | Hard Anodizing (Hardcoat) | Sulfuric acid (low temperature) or approved electrolyte | ≥ 0.001″ (≥ 25 µm) | High hardness, excellent wear and corrosion resistance | No | (if Cr-free) | Ideal for aerospace, military, and wear-critical parts |
Additional Notes:
Sealing is often used to improve corrosion resistance and lock in color after dyeing.
Type III (Hardcoat) provides a dense, hard layer that can also offer limited conductivity if required.
Type II and III are dye-compatible, but Type III has low porosity, making dyeing more difficult.

There are two anodizing classes, Class 1 Non-dyed and Class 2 Dyed.
Class 1 coating is non-dyed, meaning no additional coloring agents are added during or after the anodizing process. The color is clear or natural finish.
In the drawings sent from foreigner customers, “anodized clear,” “anodized transparent,” or “anodized natural” to refer to Class 1 finishes.
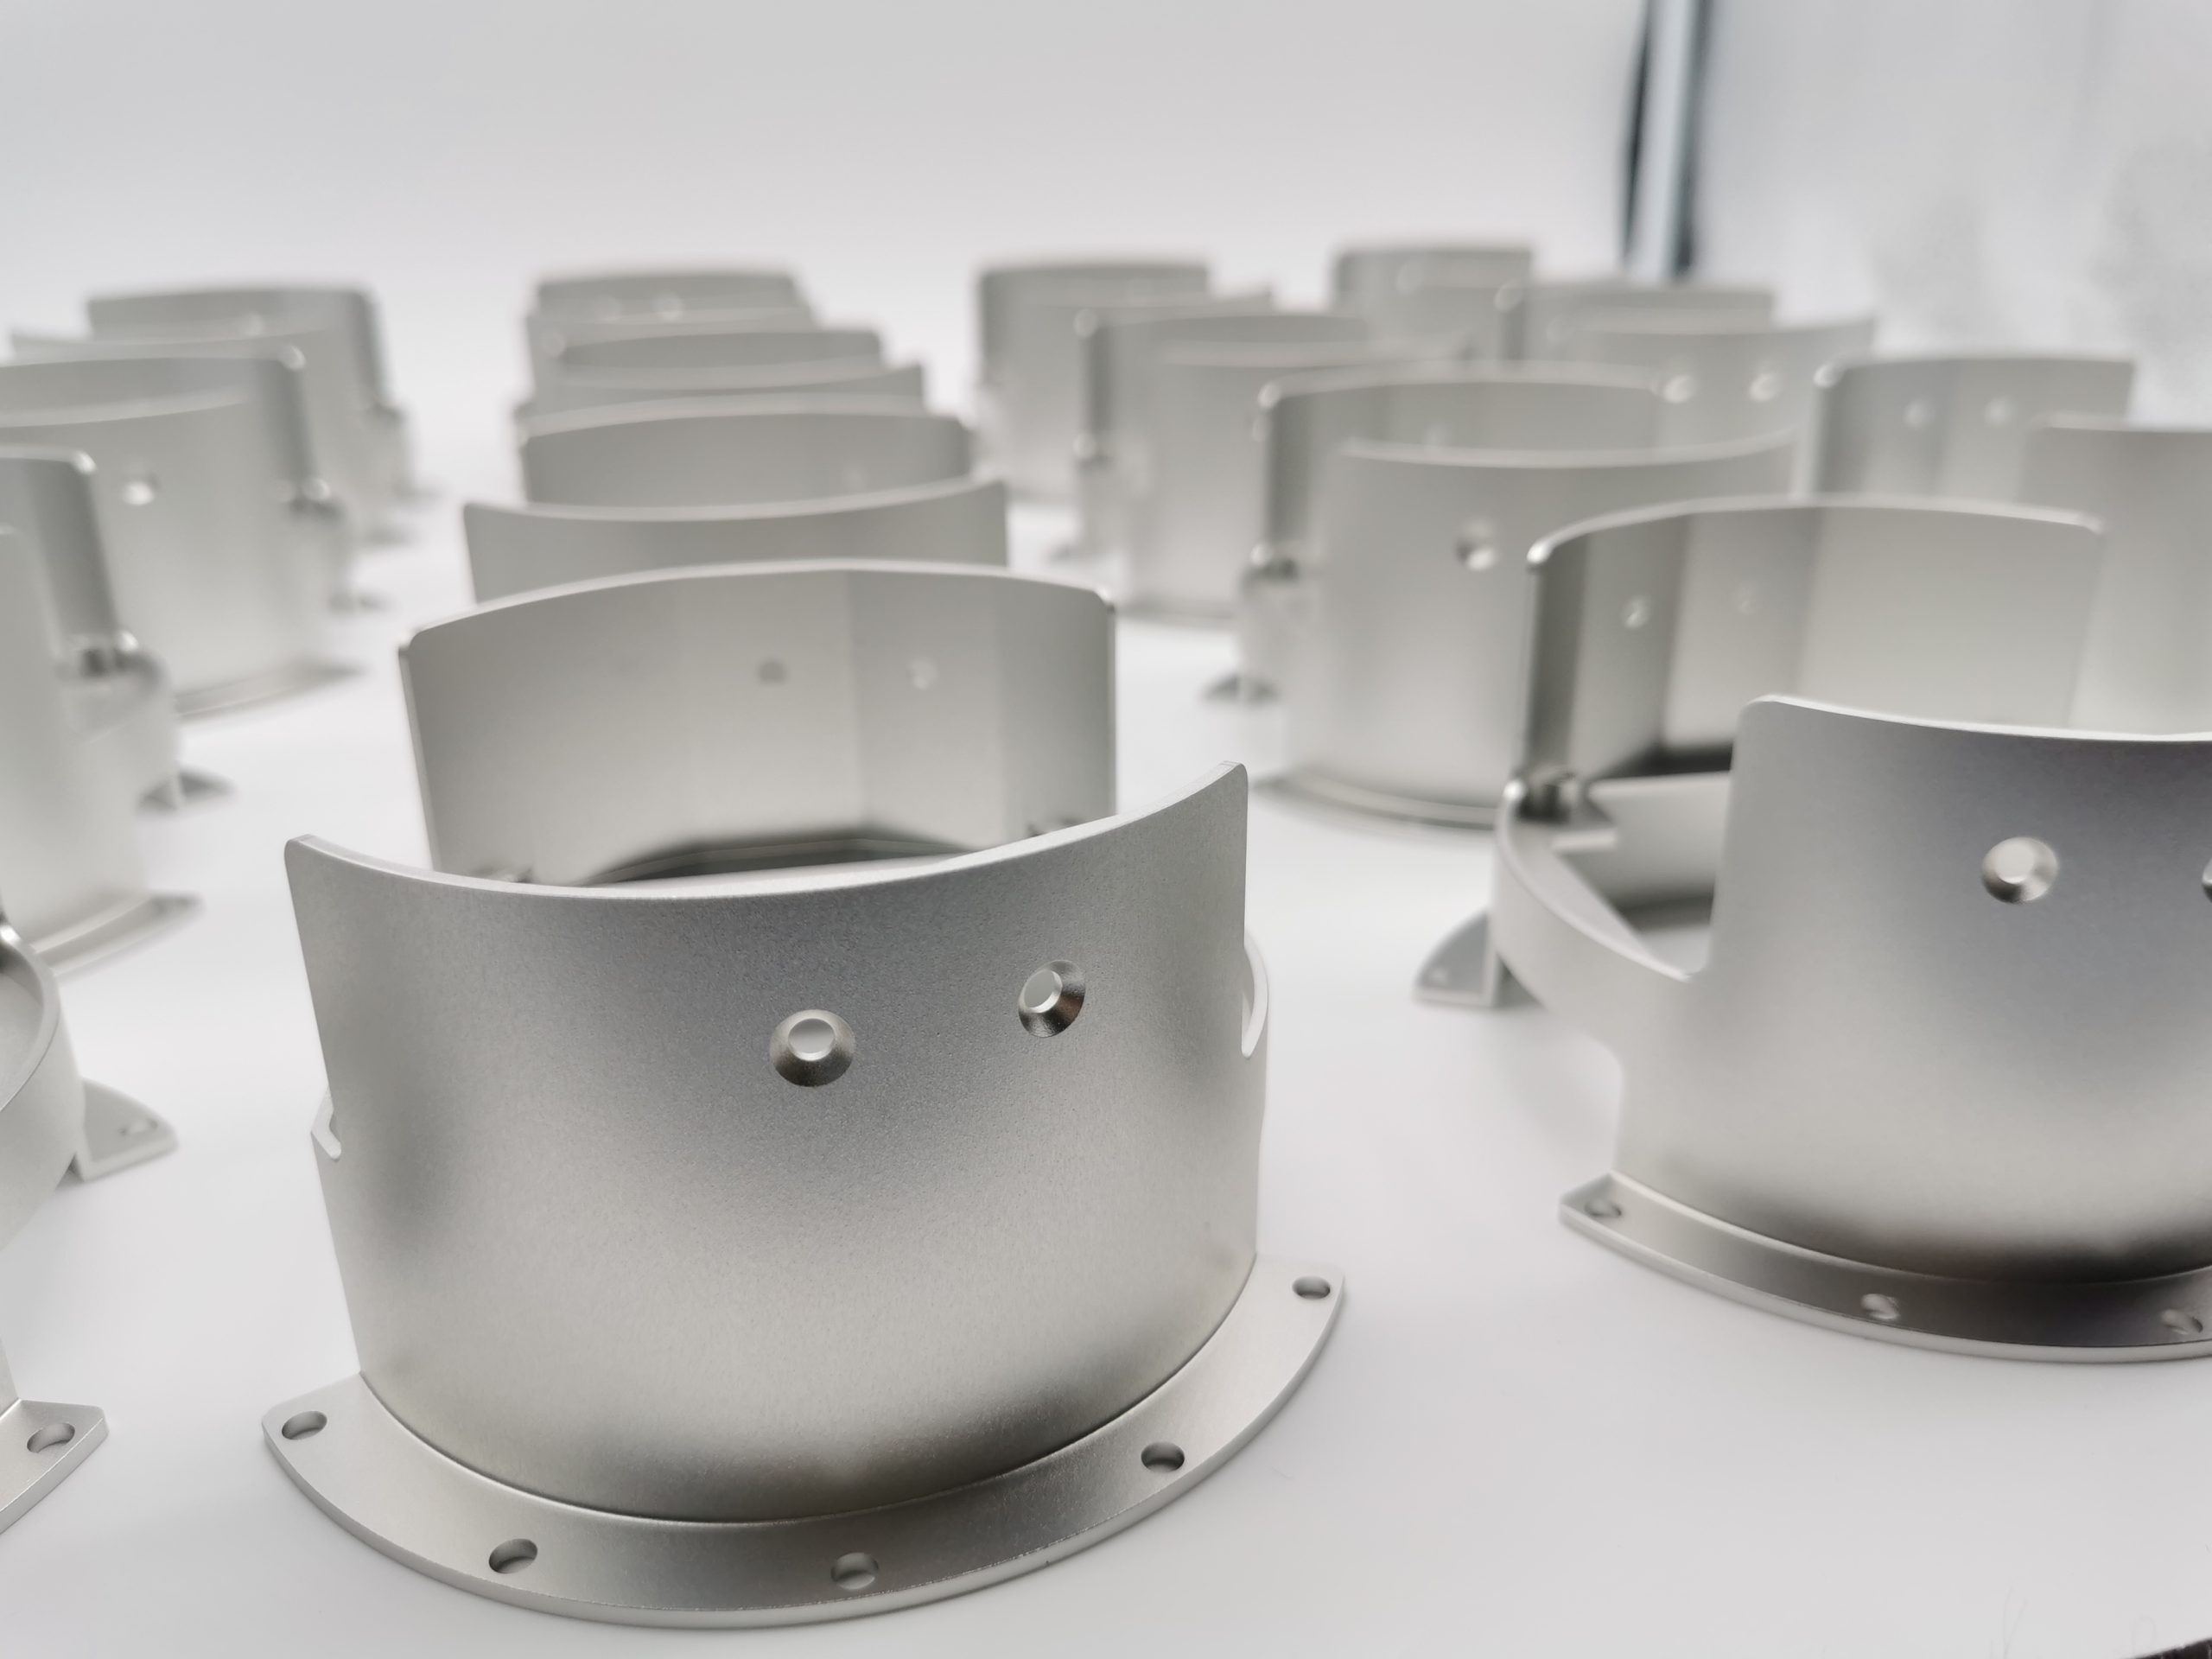
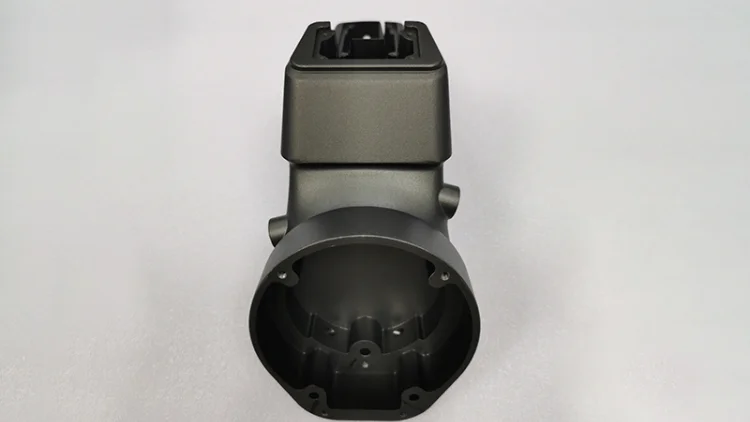
Type II sulfuric acid anodizing, Class 1 typically appears silver or natural aluminum in color.
Below is clear anodizing on 6061-T6 aluminum photo.
For Type III Class 1 anodizing, the color is dark gray to dark brown, depending on the thickness of the oxide layer.
Below is a hard anodized Class 1 finish on 6061-T6 photo.
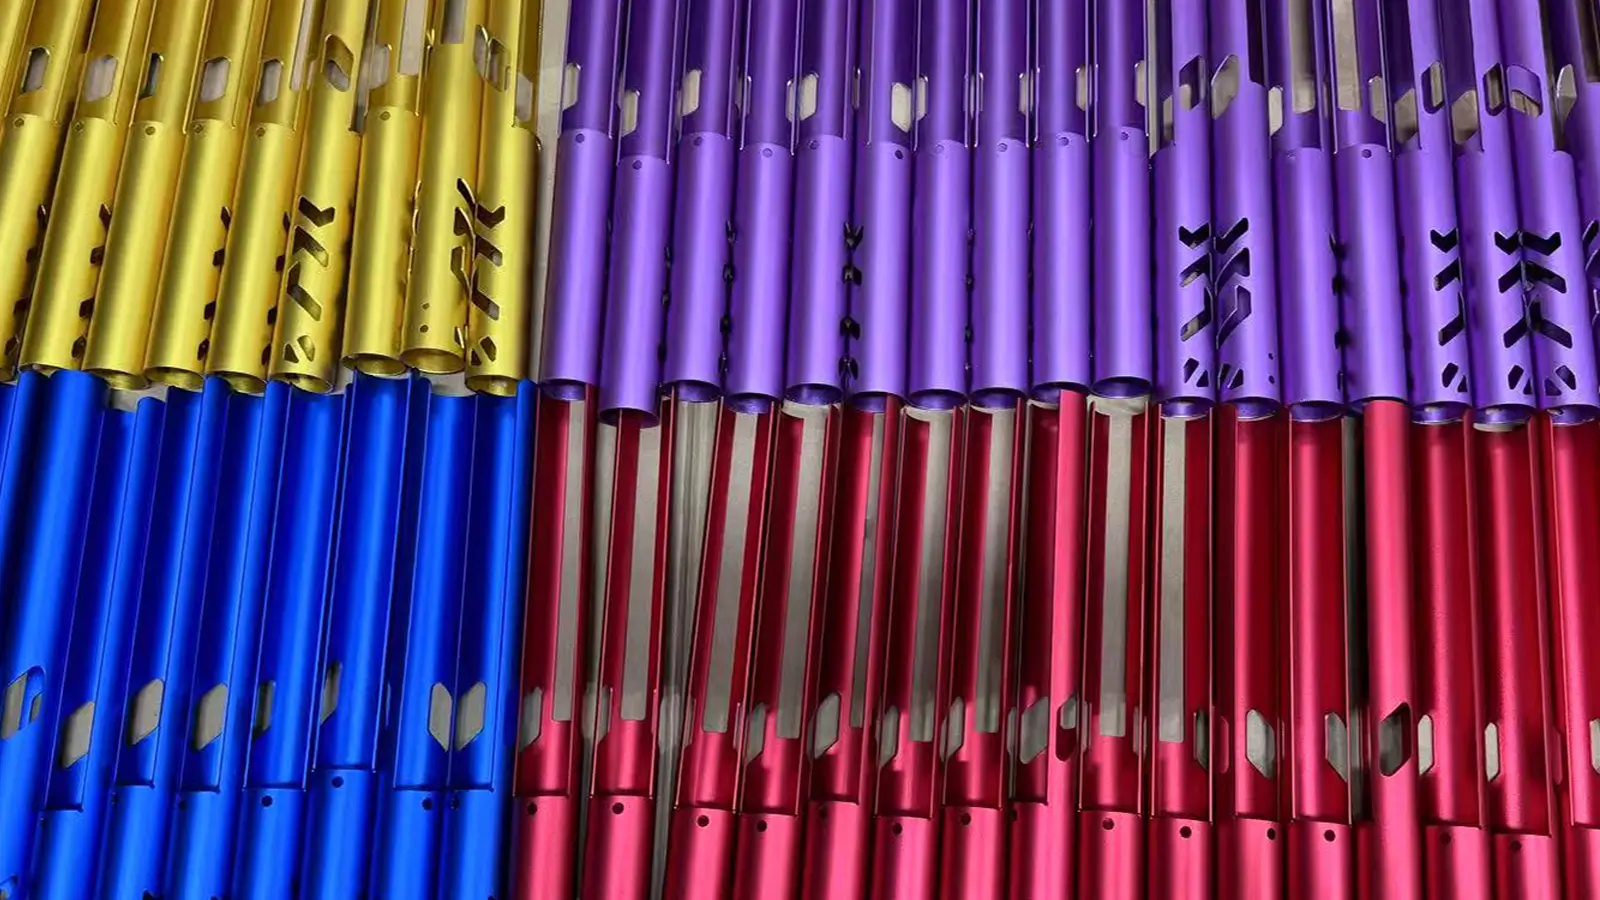
Class 2 coating is dyed or pigmented, coloring either during anodizing or in a post-treatment step (e.g., dye bath).
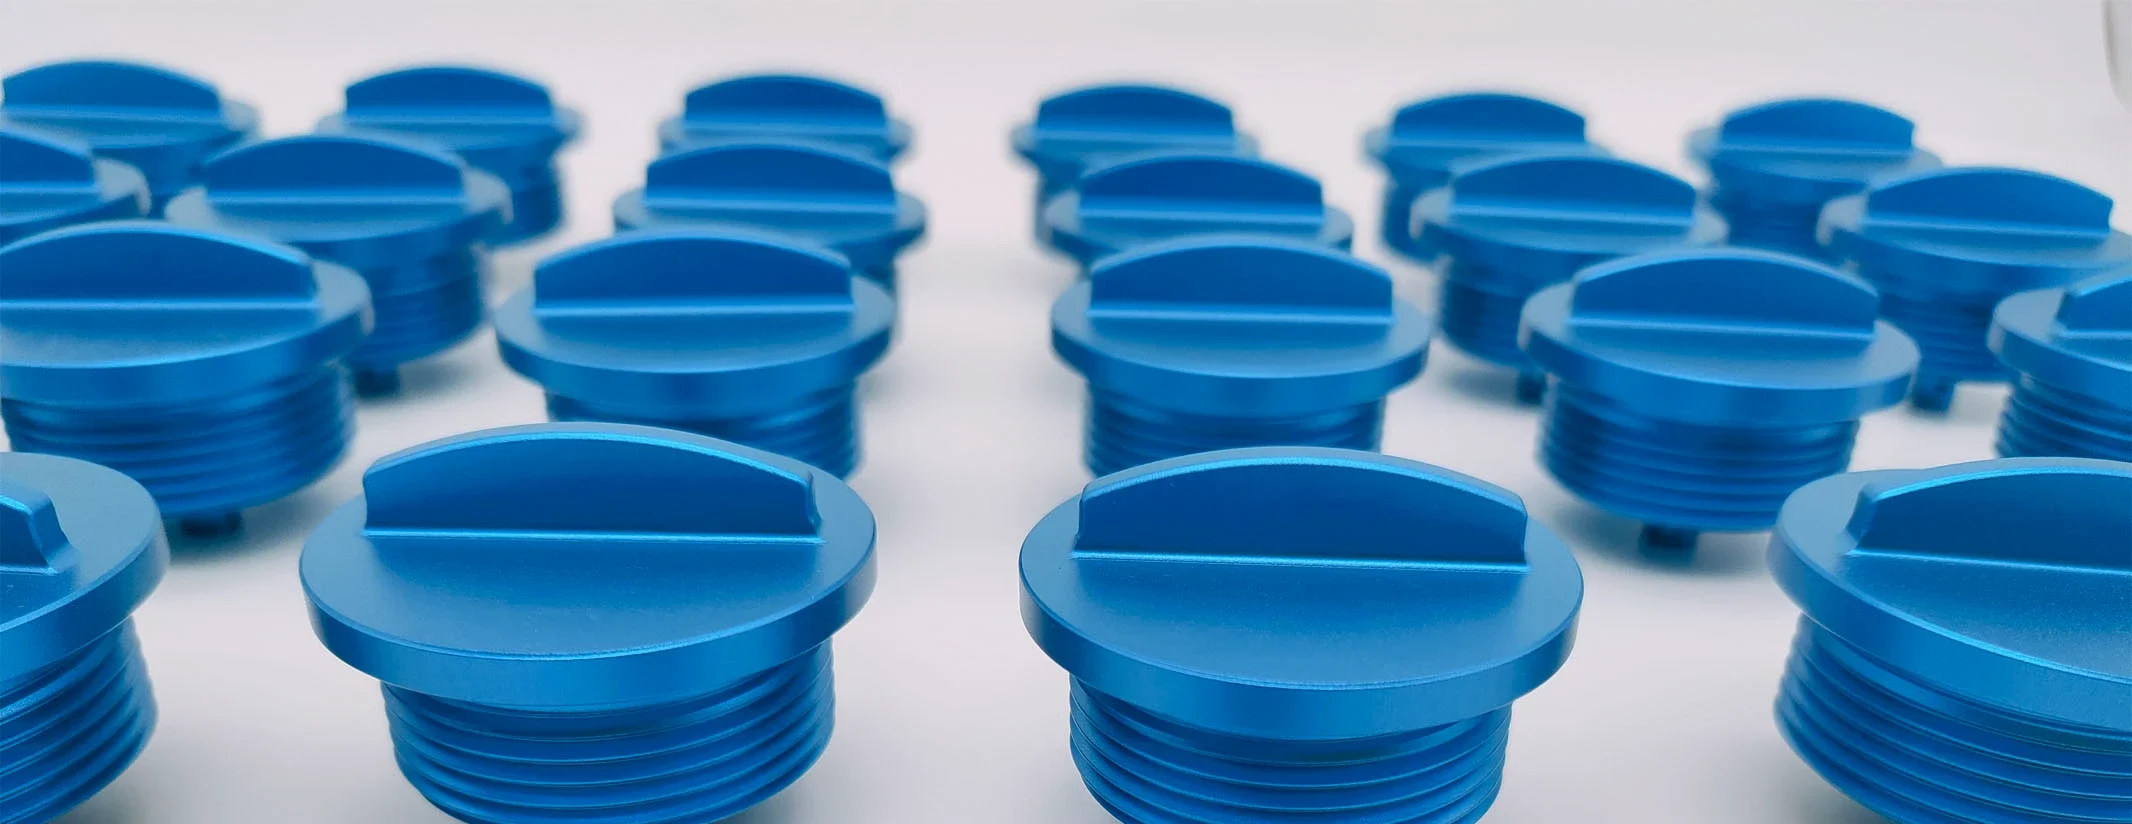
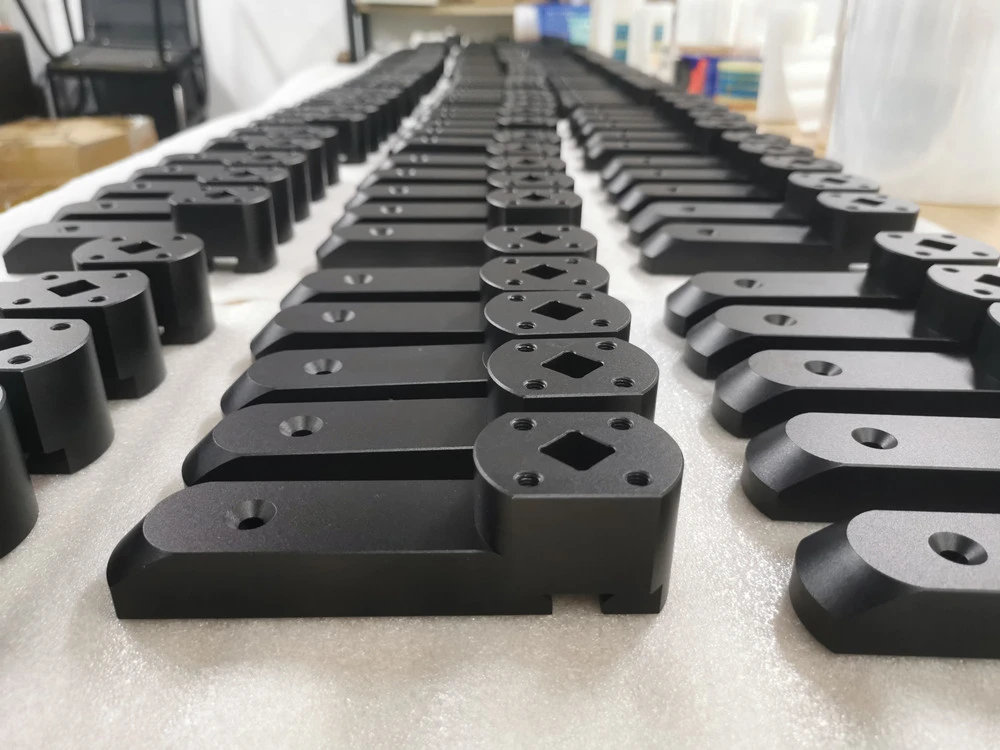
Class 2 anodizing colors can be white, black, red, blue, gold, purple and other custom anodizing colors, depending on the type of dye used and the porous structure of the anodic coating.
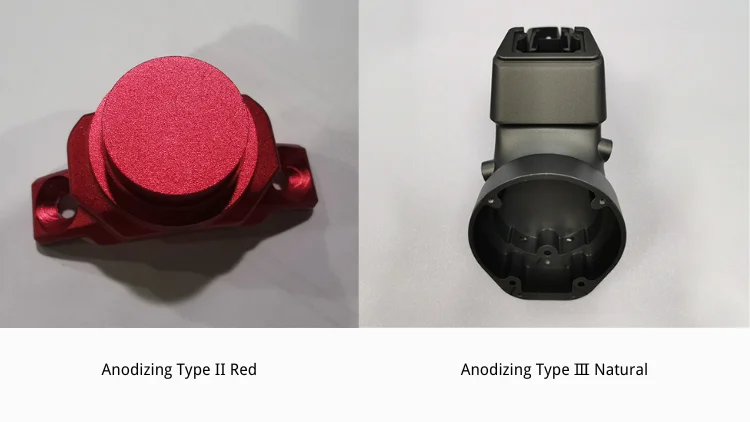
Type II Class 2 anodizing photos are shown below.
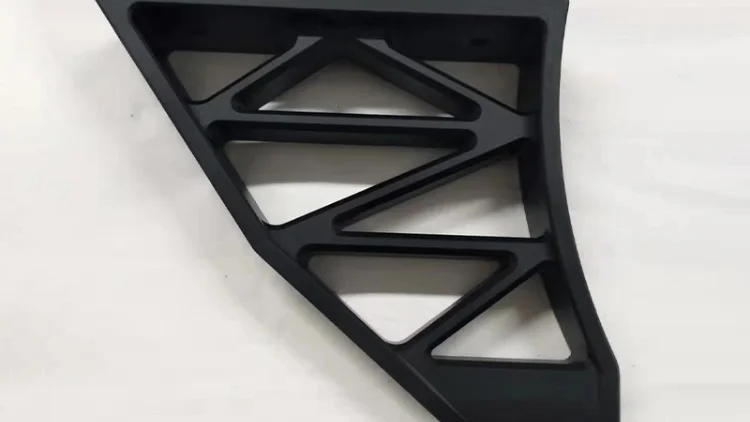
Both Type II and Type III anodizing can have Class 2. However, dyeing Type III coatings is more challenging due to the denser and less porous oxide layer.
Type III Class 2 anodizing photos are shown below.
Based on MIL-PRF-8625F and our visits to anodizing facilities, we divide the anodizing process for aluminum parts into the following five steps. Please refer to the flowchart below:

Before anodizing, aluminum parts should be free from surface defects. Whether they’re CNC machined, laser cut, or cast, they should not have burrs, oil, or any leftover residue.
Below are the steps how to clean the aluminum parts.
Degreasing is the first and most basic step in anodizing preparation. It’s typically done using an alkaline solution — like sodium hydroxide, sodium carbonate, or phosphates — to remove oils, fingerprints, cutting fluid, and other organic contaminants. The goal is to make sure the surface is clean so the oxide layer can form evenly.
Typical settings of degreasing are below:
Degreasing temperature is at 40–60°C (104–140°F) about 2 to 10 minutes at pH: 9–13.
After degreasing, parts must be thoroughly rinsed with clean water to make sure no alkaline solution is left behind — any residue could interfere with the next steps.
For reference: MIL-PRF-8625F §5.3.1 and ASTM B481 (Aluminum Cleaning Standard).
Etching removes surface oxides, scratches, and minor machining marks. It also roughens the surface slightly to help the anodic layer form evenly later on. The most common method uses sodium hydroxide (NaOH), typically at temperature: 40–70°C (104–158°F) at time from 30 seconds to 2 minutes.
This process creates a lot of hydrogen gas and foam, so good ventilation is critical.
Etching can leave behind gray films or dark smudges — especially on high-silicon or high-copper aluminum alloys. That’s why this step is always followed by an acid dip to clean off those residues.
Rinse thoroughly with water after etching.
This step removes insoluble residues (smut) left after degreasing or etching — like embedded particles of copper, silicon, or iron — to expose a clean, reactive aluminum surface.
Common acid blends include Nitric + hydrofluoric acid or Sulfuric acid + fluorides.
Desmutting t ime is from 10 seconds to 2 minutes at room temp to 40°C (104°F).
After desmutting, the part must be rinsed completely to avoid acid residues that could keep corroding the surface. The acid mix should be tailored to the alloy — high-silicon and high-copper grades are especially prone to gray residues.
In the earlier sections, we talked about the six types of anodizing. Depending on the customer’s needs, different anodizing types are applied.
In theory, to start the anodizing process, the parts are placed into an electrolyte bath and connected to a power source.
At the anodizing shop, CNC-machined parts aren’t powered directly. Instead, they’re suspended in the anodizing tank using special fixtures—usually conductive clamps or racks made of aluminum or titanium.
These fixtures are connected to the positive terminal (the anode), allowing electricity to flow through the parts during the entire anodizing process.
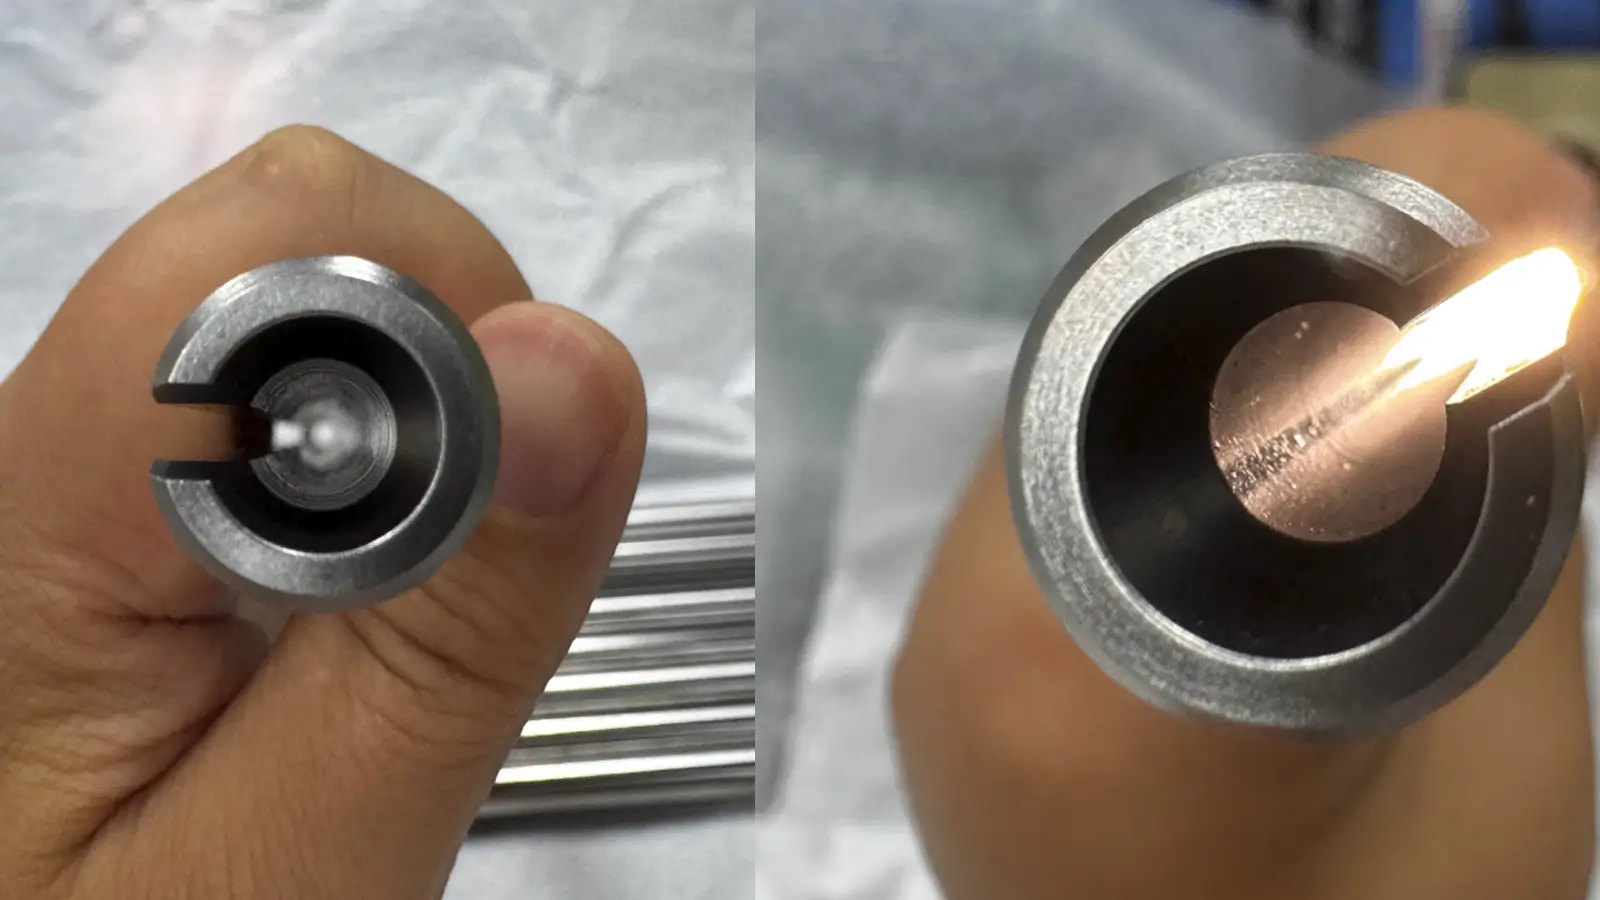
Below is the photo to show the CNC parts are put on the fixtures and the contact marks.

Contact mark shown below.
Then setup parameters based on the type of anodizing and the performance required, like bath composition, temperature, current density, voltage, and processing time.
Let’s take Type II anodizing, the most common aluminum anodizing process, as an example. We will explain in theory.
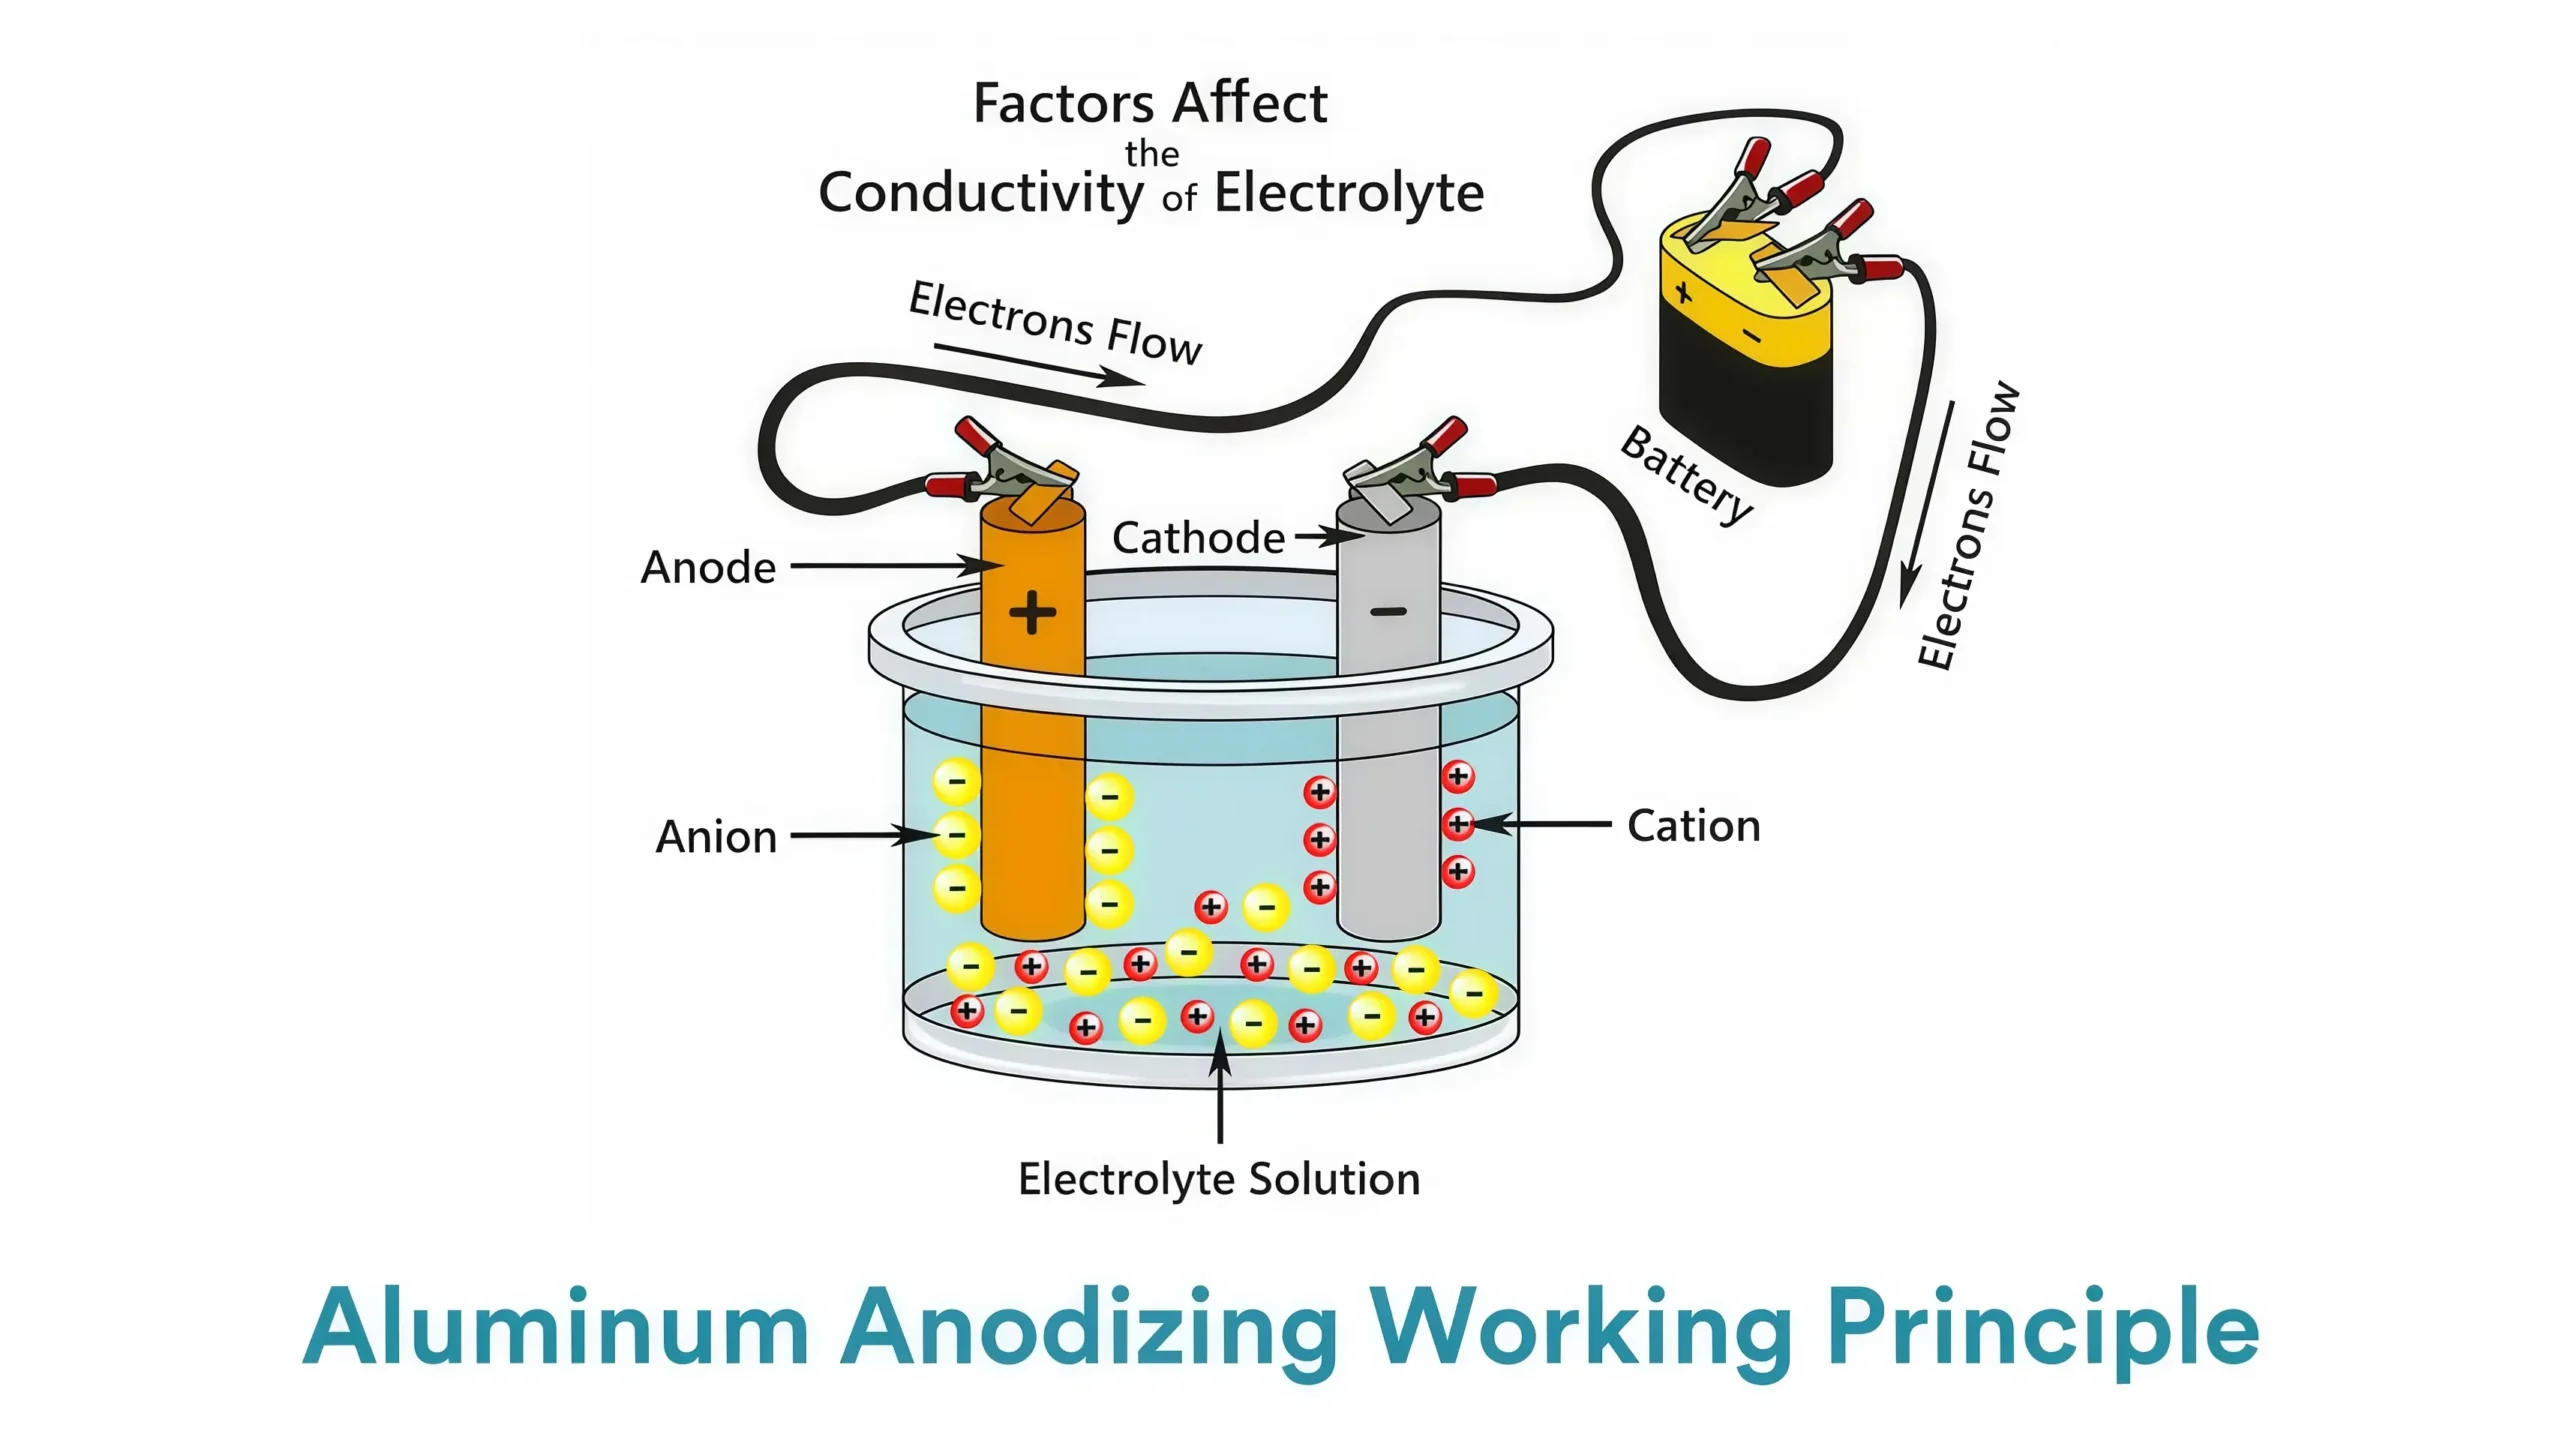
In a typical Type II setup, the aluminum part acts as the anode (positive electrode) and is submerged in a sulfuric acid bath (usually 10–20% concentration).
An inert cathode — often made of lead, titanium, or stainless steel — is also placed in the bath. Once the DC power is turned on, the aluminum surface begins to oxidize, forming a thin, dense, and porous layer of aluminum oxide (Al₂O₃·H₂O).
Here’s what’s happening during the process:
At the anode, the aluminum gives up electrons and becomes aluminum ions (Al³⁺). These ions react with water in the electrolyte to form the oxide layer right on the surface. On the cathode side, hydrogen ions (H⁺) gain electrons and release hydrogen gas (H₂).
In the simplified chemical reactions
At the anode (positive side):
Al → Al³⁺ + 3e⁻
2Al³⁺ + 3H₂O → Al₂O₃·H₂O (oxide layer) + 6H⁺
At the cathode (negative side):
2H⁺ + 2e⁻ → H₂↑ (hydrogen gas)
The anodic coating that forms has two layers:
The inner layer, also called the barrier layer, is thin, dense, and tightly bonded to the base metal. It provides solid corrosion resistance and adhesion.
The outer layer is more porous, which is helpful for post-treatment like dyeing and sealing.
In real anodizing shop, the CNC parts are hanged in the fixture, then the fixtures are connected to the positive terminal (the anode), which allows the electrical current to pass through the parts during the entire process. The photo below shows CNC parts mounted on the fixtures.
The principle of dyeing is because of the porous structure of the anodized layer. After anodizing, the surface forms a sponge-like oxide film with capillary channels that can absorb dye molecules before sealing.
Once sealed, the dye or pigment is locked into the coating, resulting in a stable and long-lasting color.
Right after anodizing, the parts should be thoroughly rinsed with deionized water to remove any residual electrolyte. This step is crucial to ensure proper dye absorption.
Next, the parts are immersed in a dye bath. The dye bath temperature is usually kept between 40°C and 60°C (104°F–140°F), with treatment times ranging from 5 to 15 minutes.

Dyes typically fall into two categories: organic dyes and inorganic metallic salt dyes.
Black dyeing is mainly done with inorganic dyes or metal salts. In this process, metal ions react with the oxide layer and deposit color through a chemical reaction—not just physical absorption. This results in excellent lightfastness, corrosion resistance, and color durability.
Colorful anodizing (such as red, blue, green, purple, gold, orange, pink, etc.) primarily uses organic dyes, which easily absorb into the oxide film’s pores. This method offers a wide range of vivid, vibrant colors.
After dyeing, the parts are rinsed again, ideally within five minutes, to remove any surface dye residues and prevent staining or cross-contamination.
Both Type II and Type III anodizing can be dyed, though dyeing Type III is more challenging due to its denser coating.
According to MIL-PRF-8625F, when dyed or pigmented coatings are required, the color should appear uniform. Slight variations in casting alloys are acceptable due to their different material properties.
Sealing the anodized layer is done to close the pores in the anodic film, which improves corrosion resistance and helps maintain colorfastness after dyeing. MIL-PRF-8625F provides very specific guidelines regarding sealing procedures.
For all Types I, IB, IC, II, and IIB coatings, sealing is required unless the customer specifically requests otherwise.
Class 1: When Class 1 is specified, sealing must be done by immersing the anodized parts in a sealing solution.
The sealing solution can be:
A: A 5% aqueous solution of sodium dichromate or potassium dichromate (pH between 5.0 and 6.0), held at 90°C to 100°C (194°F to 212°F) for 15 minutes;
B: Boiling deionized water;
C: Cobalt or nickel acetate solution;
D: Another approved chemical sealing solution.
Class 2: When Class 2 is specified, sealing must take place after dyeing, using one of the following:
A: A hot aqueous solution containing 0.5% nickel or cobalt acetate (pH 5.5 to 5.8);
B: Boiling deionized water;
C: A dual solution containing nickel acetate and sodium dichromate;
D: Another suitable chemical alternative.
For Type III coatings (hard anodizing), sealing is not required unless explicitly requested by the customer. While sealing can help improve corrosion resistance by hydrating or chemically filling the pores, it can also reduce the hardness and wear resistance of the coating.
Since wear resistance is a critical property of Type III anodizing, leaving the coating unsealed is the standard approach. Avoiding sealing helps maintain the mechanical strength and hardness of the anodized surface.
Below is a brief overview of some common sealing methods we use:
Hot Water or Steam Sealing: The anodized aluminum parts are immersed in deionized water or exposed to steam at approximately 85°C to 95°C (185°F to 203°F) for a set period of time. This process causes the aluminum oxide to hydrate into boehmite (AlO(OH)), effectively closing the pores in the oxide layer.
Nickel Acetate Sealing: The anodized parts are soaked in a heated nickel acetate solution. Nickel compounds deposit into the pores, enhancing the coating’s corrosion resistance.
Cold Sealing: This method uses a chemical solution at room temperature—often containing dichromates or proprietary additives—to seal the pores in the anodized layer without the need for heat.
Drying is the final and critical step after the sealing process. It directly effects the appearance, corrosion resistance, and overall quality of the anodized coating.
Drying should begin immediately after sealing, with the main goal being to quickly remove moisture from the surface of the part. This helps prevent issues like water spots, streaks, corrosion, or uneven dyeing.
Below is a cnc parts with improper drying anodizing. 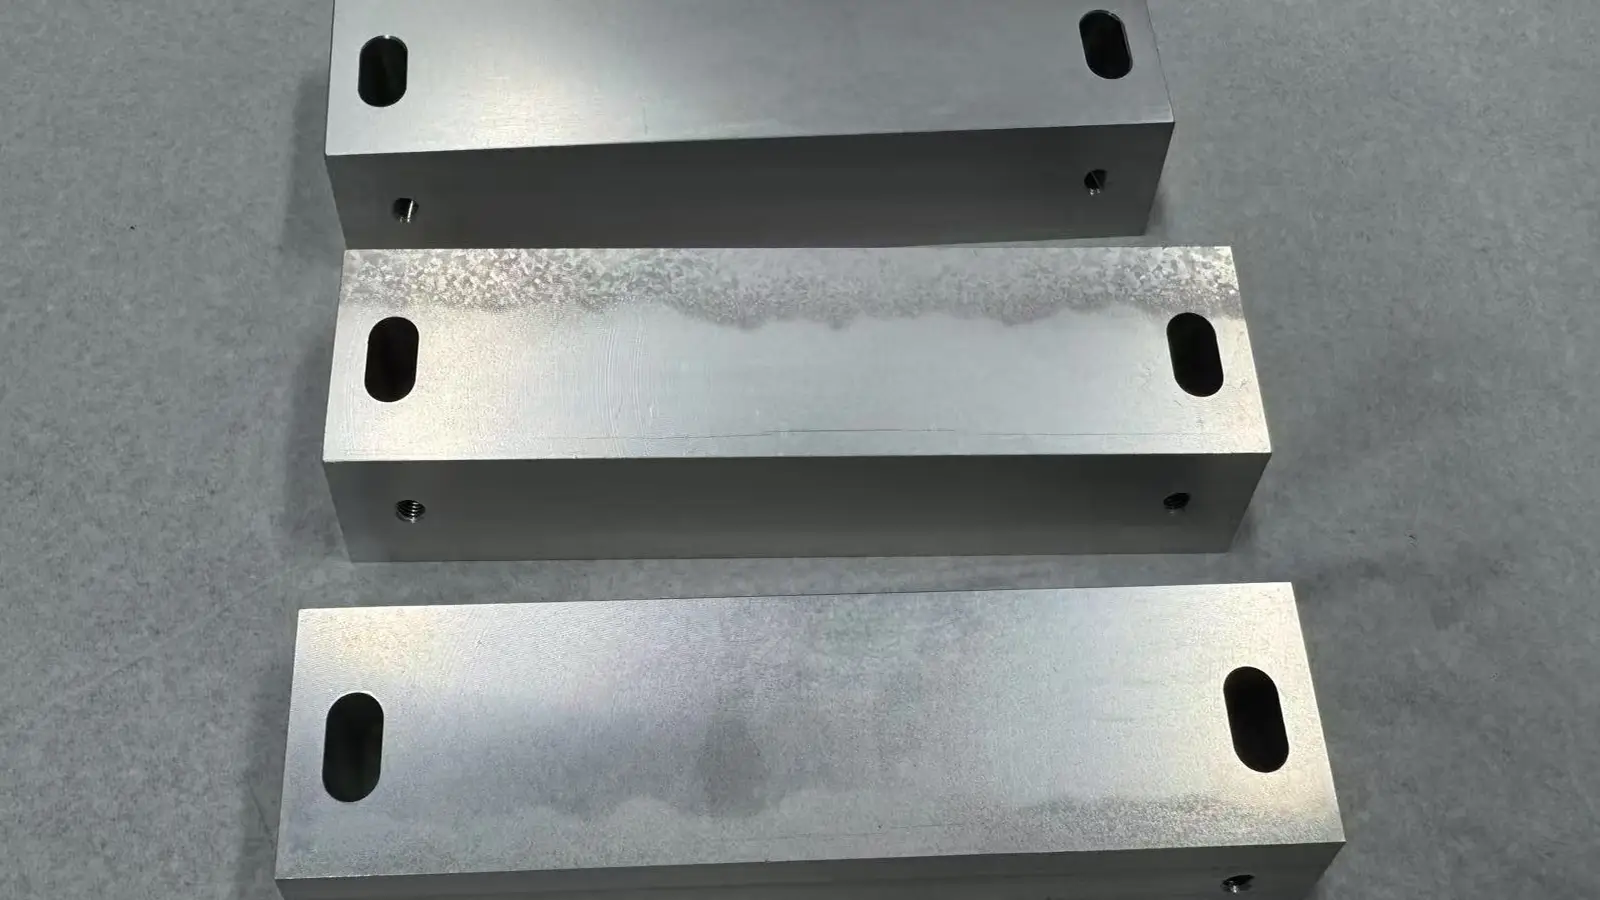 Here are the most common drying methods in the anodizing shops:
This method involves hanging the parts in a clean, well-ventilated area, either indoors or in a designated drying zone, and allowing the surface moisture to evaporate naturally.
Pros: No special equipment needed, simple to operate, and energy efficient.
Cons: Drying takes longer, and in high humidity or poor airflow, water spots or color variations can occur—especially noticeable on dyed parts.
Therefore, this method is best suited for non-dyed Class 1 parts or precision components where appearance is secondary to dimensional accuracy.
This method uses hot air tools—such as heat guns, industrial blowers, or hot air tunnels—to blow warm air (typically 60–80°C / 140–176°F) over the parts, rapidly evaporating surface moisture.
Compared to natural air drying, hot air drying significantly reduces drying time, minimizes surface defects like watermarks or blotching, and improves production efficiency. It is especially effective for Class 2 dyed parts or components requiring a high-quality finish.
It’s important to maintain even temperature control to prevent fading or discoloration, particularly when working with dark dyes.
For larger batches, care must be taken to avoid stacking or overlapping parts, ensuring even heating and consistent drying across all surfaces.
How do we measure the quality of anodizing? There are several key indicators that help evaluate whether the anodized finish meets performance and appearance standards. We’ll go over each of these factors in detail below.
According to MIL-PRF-8625F, Section 3.7.1.1, the coating weight of anodized parts—measured before sealing or dyeing—must meet the following minimums:
| Coating Type | Minimum Coating Weight |
| I, IB | ≥ 200 mg/ft² |
| IC | 200–700 mg/ft² (or more, if specified) |
| II | ≥ 1000 mg/ft² |
| IIB | 200–1000 mg/ft² (or more, if specified) |
| III | ≥ 4320 mg/ft² per 0.001 inch of unsealed thickness |
Coating weight is measured in accordance with ANSI/ASTM B137. The procedure of weighing the weight includes the following steps:
After anodizing (but before dyeing or sealing), the part is weighed using a precision scale capable of detecting at least a 10% change in coating weight. The sample must be cleaned, dried in hot air at 93 ± 6°C for 30 minutes, and then cooled to room temperature before weighing.
The anodized layer is chemically removed by immersing the part in a phospho-chromic acid solution (35 mL phosphoric acid + 20 g chromic acid, diluted to 1000 mL total) at 100 ± 6°C for 5–6 minutes.
After stripping, the sample is rinsed, dried, and reweighed. If the coating is not fully removed, the process is repeated until the weight stabilizes. The stripping solution should be replaced for every 5 g of oxide removed per liter of solution.
Once the final (bare) weight is recorded, the surface area of the part is accurately measured. The coating weight is calculated in mg/ft².
Note: Coating weight measurement typically applies to Types I, IB, IC, II, and IIB. For Type III (hardcoat anodizing), thickness is usually measured instead—unless otherwise specified by the customer.
Coating thickness refers to the total depth of the anodized layer, including both the portion that extends outward from the surface and the portion that penetrates into the metal substrate. It’s typically measured in mils (thousandths of an inch) or microns (μm).
According to MIL-PRF-8625F Amendment 2, the following table outlines the thickness ranges for anodic coatings on aluminum and aluminum alloys:
| Coating Type | Thickness Range (inches) | Thickness Range (microns) |
| Type I, IB, IC, and IIB | 0.00002 – 0.0007 | 0.5 – 18 |
| Type II | 0.00007 – 0.0010 | 1.8 – 25.4 |
| Type III | 0.0005 – 0.0045 | 12.7 – 114.3 |
The thickness of Type III hard anodized coatings can be controlled with high precision. In fact, thickness tolerances can be as tight as ±0.0001 inch (0.1 mil).
MIL-PRF-8625F also provides minimum typical coating thickness values for various aluminum alloys. Show it below.
| Aluminum Alloy | Type I / IB / IC | Type II Class 1 |
| 1100 | 0.000029 in (0.74 μm) | 0.000093 in (2.36 μm) |
| 2024T4 | — | 0.000125 in (3.18 μm) |
| 2024T6 | 0.000044 in (1.12 μm) | — |
| 3003 | 0.000035 in (0.89 μm) | 0.000103 in (2.62 μm) |
| 5052 | 0.000033 in (0.84 μm) | 0.000098 in (2.49 μm) |
| 5056 | 0.000021 in (0.53 μm) | — |
| 6061T6 | 0.000034 in (0.86 μm) | 0.000099 in (2.51 μm) |
| 7075T6 | 0.000040 in (1.02 μm) | — |
| Alclad 2014T6 | 0.000045 in (1.14 μm) | — |
| Alclad 7075T6 | 0.000041 in (1.04 μm) | — |
| 295T6 | — | 0.000107 in (2.72 μm) |
| 356T6 | — | 0.000102 in (2.59 μm) |
| 514 | — | 0.000086 in (2.18 μm) |
The thickness of the anodic coating should be measured using ASTM B244 or ASTM B487, or by any metallographic method approved by the customer or purchasing authority.
All sealed anodic coatings for Types I, IB, IC, II, and IIB must meet the following salt spray resistance requirements:
A: After 336 hours of exposure to ASTM B117 salt spray testing, no more than 5 corrosion pits are allowed within the inspected area.
B: The diameter of any individual pit must not exceed 0.031 inches (approximately 0.79 mm).
Suppose the anodized part is to be painted after anodizing. In that case, the sealed coating must also pass the adhesion test per ASTM D3359 following the salt spray test: There must be no delamination between the coating and the substrate. The adhesion rating must be at least 4A, with no blistering observed.
| Item | Requirement Content |
| Salt Spray Testing (ASTM B117) | 336 hours continuous salt spray exposure |
| Pit Count | ≤ 5 pits per 30 in² |
| Maximum Pit Diameter | ≤ 0.031 in (≈ 0.79 mm) |
| Paint Adhesion Test (if applicable) | ≥ 4A rating, no delamination or blistering in peel test (ASTM D3359) |
| Recommended Additional Testing (Type II/IIB) | ≥ 1000 hours salt spray testing vs. standard performance |
Type III (Hardcoat Anodizing) is primarily for wear resistance rather than corrosion protection.
Light fastness refers to a material’s ability—especially dyed anodized coatings—to resist fading or color changes when exposed to natural sunlight or artificial light sources like xenon arc lamps or UV light over a long period.
For dyed Type II Class 2 anodized parts, light fastness directly affects the appearance lifespan and overall quality rating. All dyed Class 2 parts should use light-fast dyes to ensure the color coating doesn’t noticeably fade during extended use.
Typically, a minimum light fastness rating of 6 out of 8 is required, especially for darker colors like black and blue.
Below is how to test light fastness.
| Item | Content |
| Testing Standard | ASTM G155 (Xenon Arc Lamp); ISO 105-B02 (Blue Wool) |
| Light Source | Xenon arc lamp, simulating sunlight spectrum |
| Exposure Time | Typically 200-1000 hours, depending on the grade |
| Evaluation Method | Compared with the original sample, using “Blue Wool Fade Scale” |
| Judgment Grade | Generally requires ≥ 6 (Blue Wool Grade 1–8, with higher numbers indicating greater lightfastness) |
Abrasion resistance is a material’s ability to withstand mechanical wear on its surface—such as friction, scratching, or impact—that causes surface damage or material loss.
In anodized aluminum, abrasion resistance mainly depends on the thickness, structure, and hardness of the oxide layer.
Generally, the thicker the oxide layer, the better the wear resistance, since a thicker coating can endure friction and abrasion for longer periods.
Type III (hard anodizing) typically has a thicker coating—usually between 25 and 75 microns—and offers significantly better wear resistance than Type I and Type II.
However, it’s important to note that if the thickness exceeds about 3 mils (approximately 75 microns), wear resistance can actually decrease.
Why hard coating is more abrasion resistant?
Hard anodized coatings can reach hardness levels of 60 to 70 HRC, comparable to hardened steel, which explains their strong wear resistance. In contrast, typical Type II coatings are much softer, usually around 15 to 20 HRC, and have poorer wear resistance.
Type III hard anodizing meets the highest wear resistance standards and often undergoes wear tests (like the Taber abrasion test) to ensure durability in use.
Types I and II have lower wear resistance, relying mainly on coating thickness and sealing treatments, making them more suited for corrosion resistance rather than high-wear applications.
According to the MIL-PRF-8625F standard, the anodized coating must be free of pinholes, bubbles, cracks, peeling, and inclusions. Any defects that affect performance or appearance can lead to rejection. Visual inspection and relevant tests must be conducted to ensure the coating meets the specifications.
The color should be uniform and firmly adhered, with a smooth surface that is not excessively rough.
Additionally, when dyed or pigmented coatings are required, the color must be consistent throughout. Conformance inspections are critical after anodizing and should include visual checks of workmanship, color uniformity, and thickness measurements—especially for Type III coatings.
A contact mark, also called a racking point or contact point, refers to the area where the workpiece physically touches the conductive rack/fixture. The contact mark is crucial because it completes the electrical circuit needed for anodizing.
Ideally, contact marks should be placed where they won’t affect the part’s function or appearance—for example, inside cavities, on the backside, on non-assembly surfaces, non-sealing areas, or locations with looser tolerance requirements.
Learn more about CNC machining tolerances, covering loose tolerance and tight tolerance.
For parts with threaded or through holes, contact marks can be positioned inside or around the holes to hide any marks.

For parts with high surface finish demands or those requiring dyeing, contact points should be avoided on visible or decorative surfaces to prevent unsightly bare spots.
Because no oxide layer forms at contact marks, and they cannot be dyed, these areas naturally remain as defects.
Therefore, if a specific location for contact marks is required, it should be clearly indicated on the drawing.
A “lot” typically refers to a batch of parts produced under the same process conditions and at the same time, which helps streamline inspection and quality tracking.
A lot shall include all items of the same part number that are anodized in the same tank using the same process, coating type, and class, and offered for acceptance together. Additionally, the lot size must not exceed the number of parts processed in one shift.
Sampling for visual inspection shall be performed.
Anodizing rate refers to the speed at which an oxide layer forms on aluminum or aluminum alloys in an electrolyte under current, usually measured in microns per minute (μm/min).
It indicates how quickly the oxide film grows on the material’s surface under specific voltage, current density, and temperature conditions.
You can think of it as how fast the aluminum’s “skin” thickens. Different aluminum alloys “grow skin” at different rates—some faster, some slower—depending on their chemical makeup and structure.
If you anodize a batch of parts made from different alloys together, be aware that some “slow-reacting” alloys require longer anodizing time to reach the desired thickness.
However, extending the time can cause the “fast-reacting” alloys to develop oxide layers that are too thick or brittle, which leads to failure.
For example, 6061 and 2024 alloys have significantly different anodizing rates; 2024 has a higher copper content, which slows its oxidation.
Therefore, it’s important for anodizing shops to set up appropriate and well-balanced processes to accommodate these differences.
Color match refers to the visual consistency of color across multiple anodized parts, especially in Type II (sulfuric acid anodizing, dyeable) and Type III (hard anodizing, partially dyeable) processes.
It doesn’t require an exact match—since anodized coloring can be influenced by many factors—but the colors within the same batch or assembly should appear harmonious and show no obvious differences.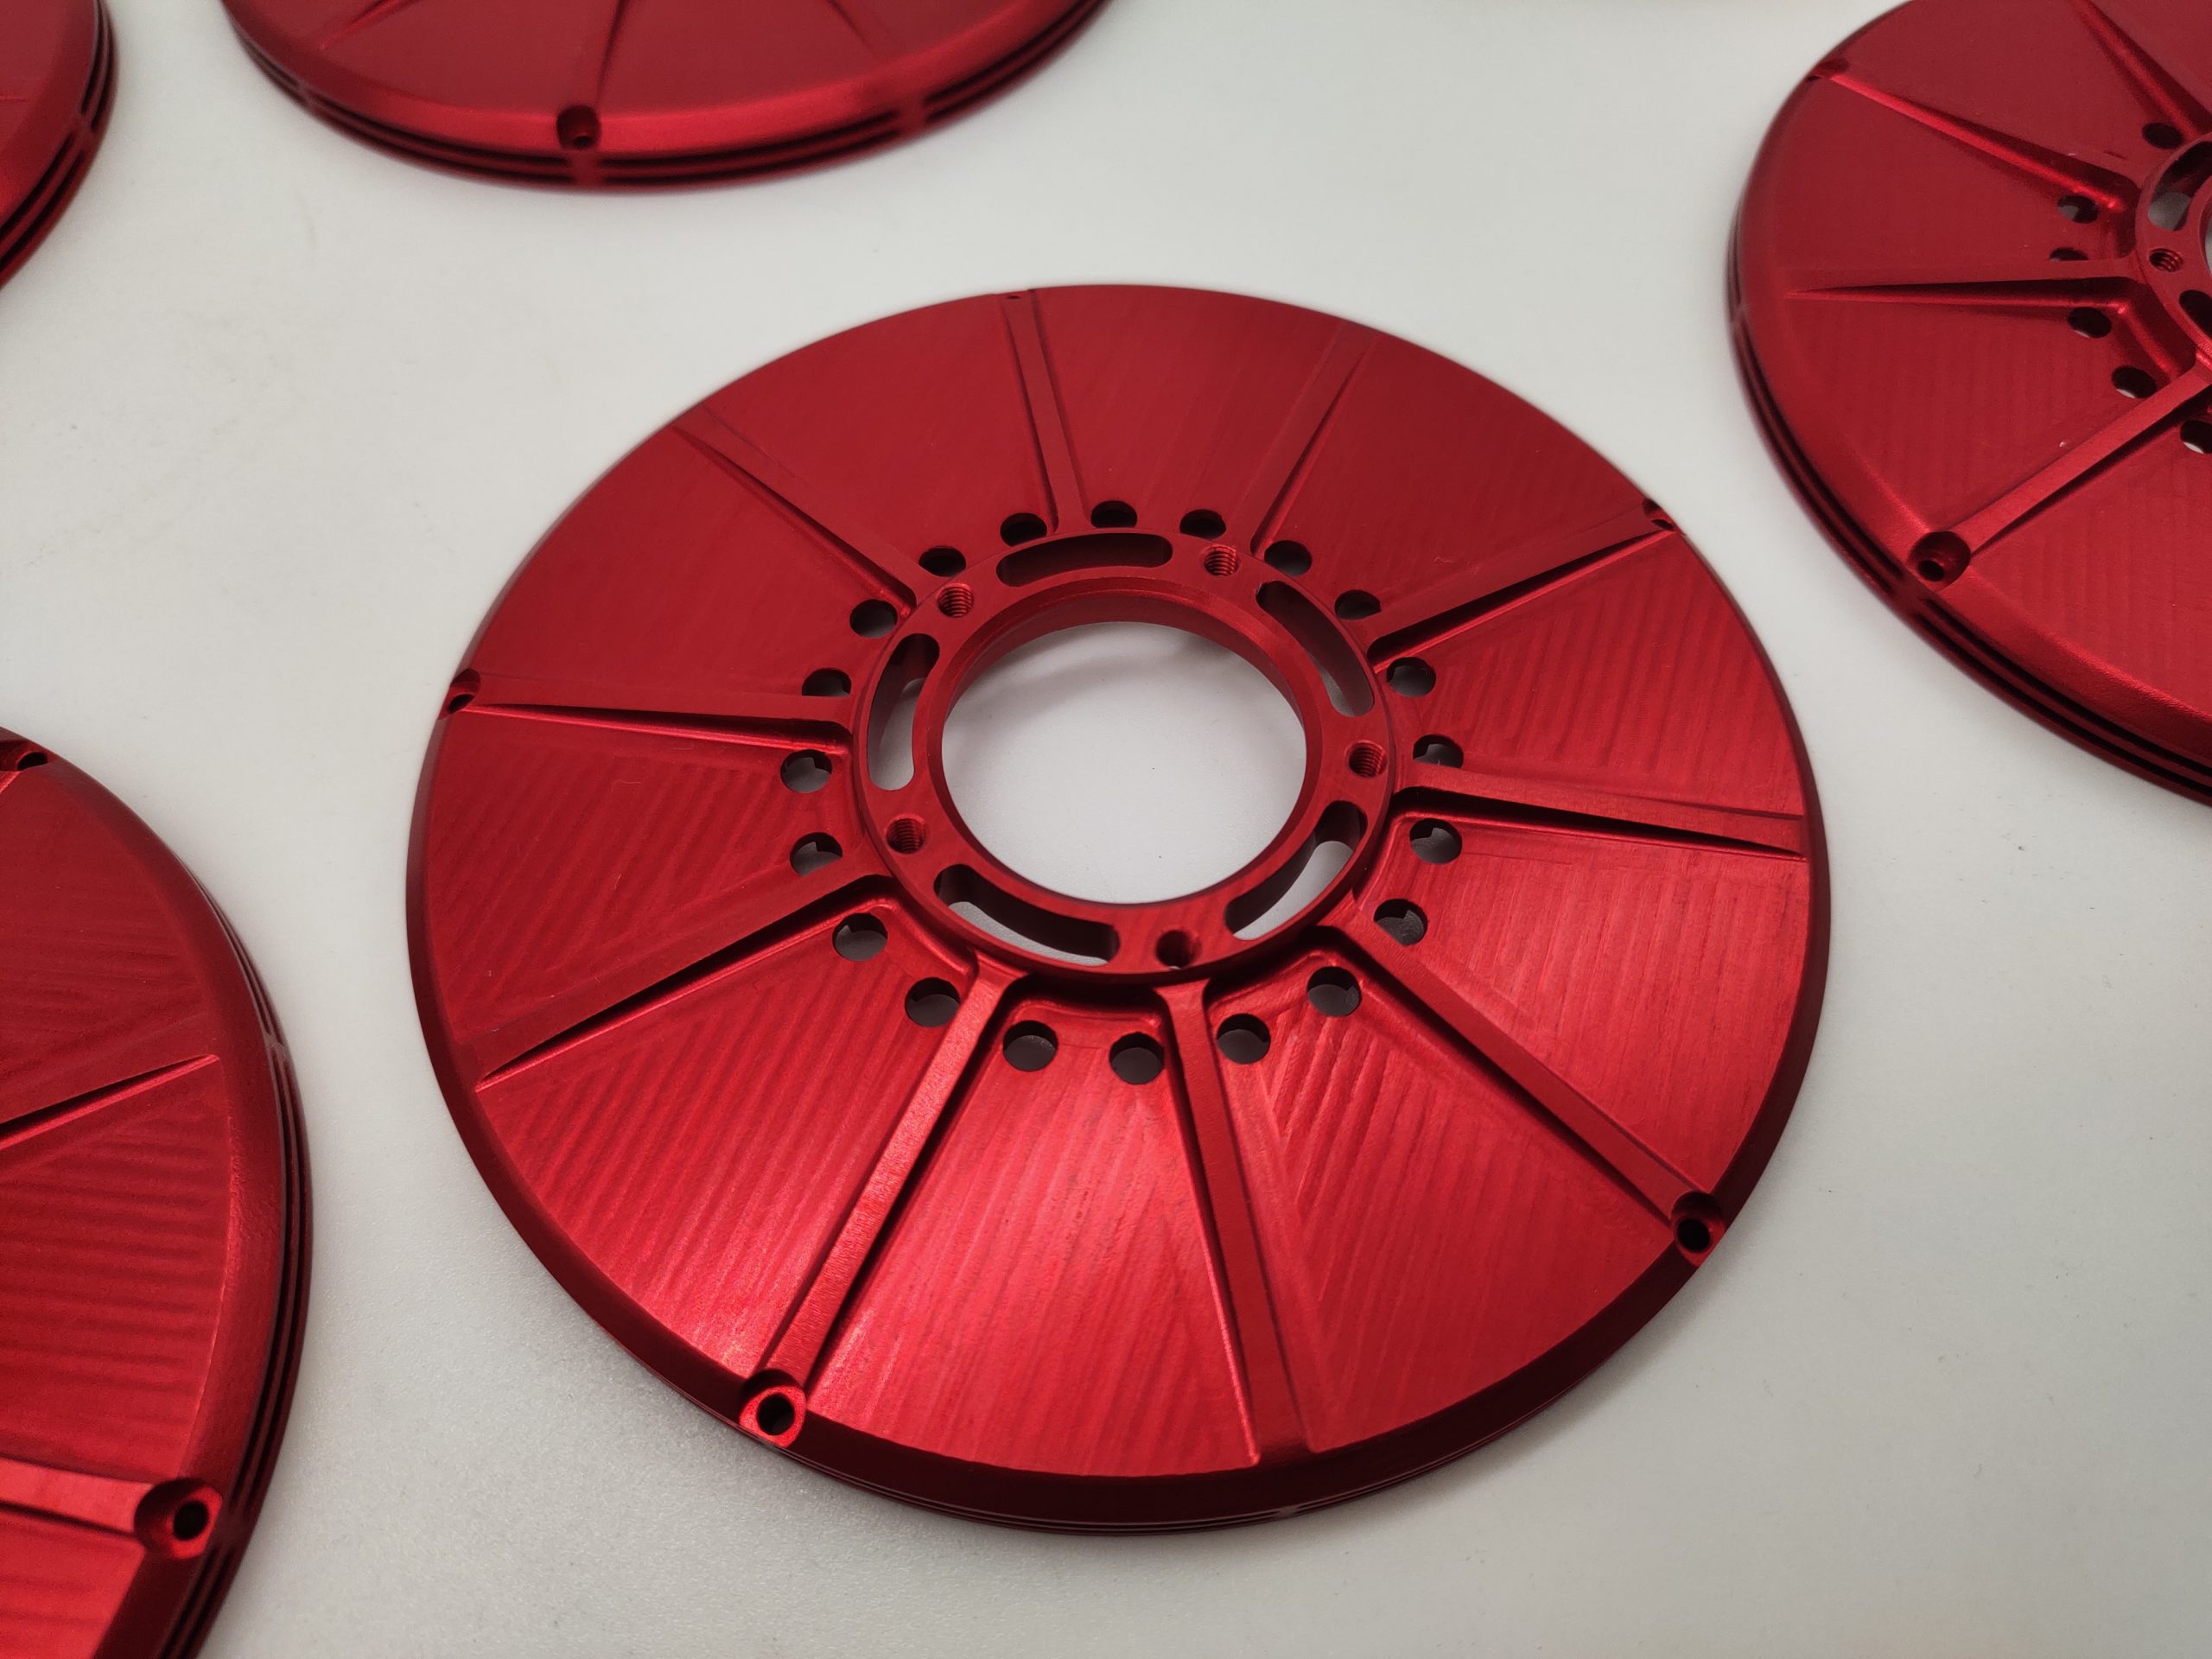
The inspection standard calls for a visual evaluation under daylight or an equivalent light source, from about 0.91 meters (3 feet) away.
Anodized colors, especially for Type II Class 2, can be vibrant and varied, such as black, white, red, green, purple, and more.
How these colors are achieved, and whether Type III can also produce colors, as well as how this differs from coloring on titanium alloys, will be covered in a detailed blog post coming soon.
When anodized parts require post treatment like painting or coating, it’s best to dry them promptly and apply the finish as soon as possible to reduce exposure to contaminants.
Before painting, avoid any wiping, polishing, or mechanical handling that could damage the surface of the anodic layer and compromise coating adhesion.
Sealing the anodized surface can significantly reduce the bond strength between the primer or polymer coatings and the anodic layer, and may also affect the durability of the oxide film itself. For this reason, anodized aluminum parts that will be painted or coated are typically left unsealed.
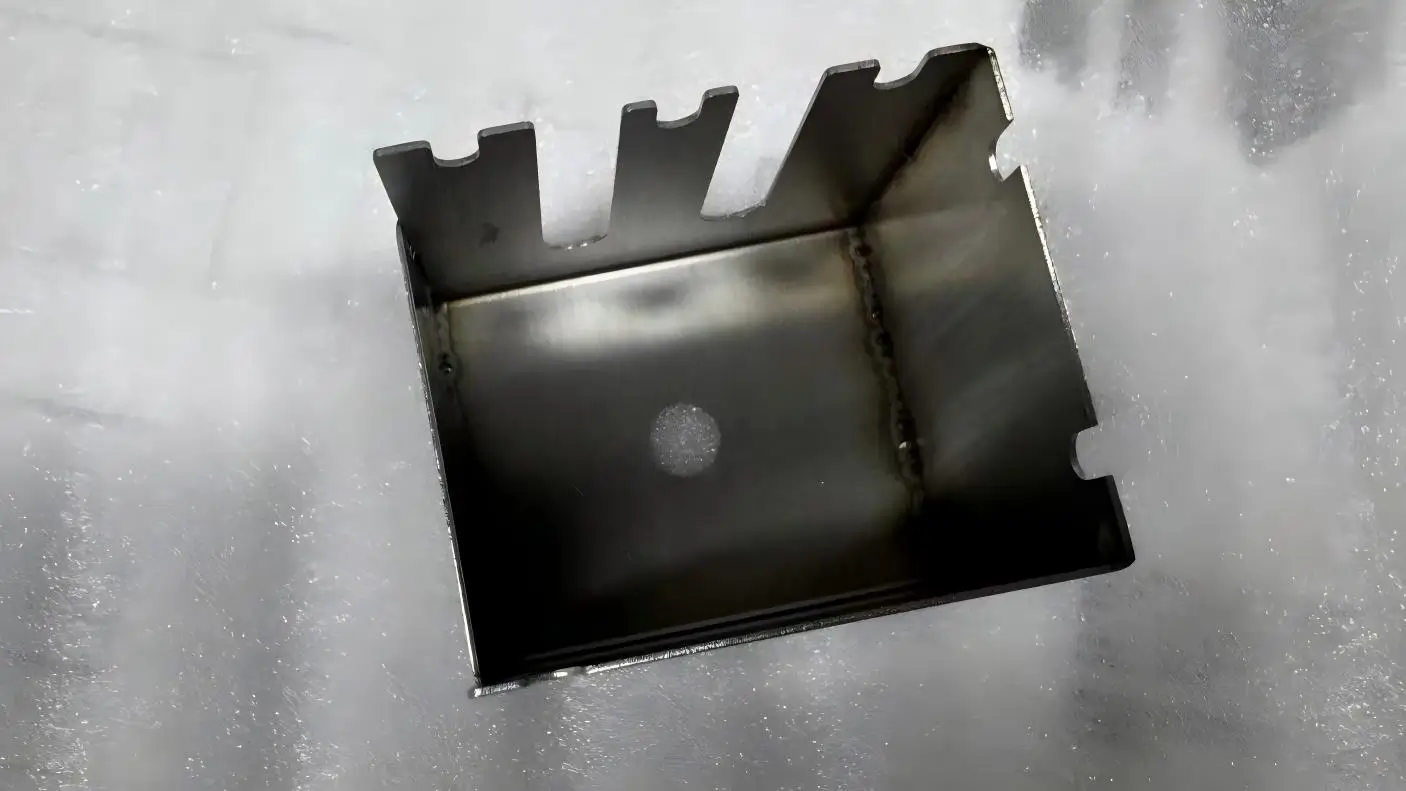
On cast or welded parts, the electrolyte can sometimes lead to severe corrosion. This usually happens due to poor casting quality, improper welding techniques, or differences in composition between the weld and base material.
During sulfuric acid anodizing, electrolyte may get trapped in cracks, pores, or uneven surfaces—especially in castings or weld seams—and cause localized corrosion.
Contaminants in the electrolyte, particularly chloride ions, as well as improper racking or fixturing, can also trigger serious corrosion issues.
As we’ve mentioned earlier, sulfuric acid is the most commonly used electrolyte in anodizing.
However, some traditional anodizing processes use other types of electrolytes—such as solutions containing oxalic acid, boric acid with ammonium borate, or even nitrates in water.
For Type III (hardcoat anodizing), several proprietary processes use alternatives to sulfuric acid. Famous brands like Alumilite, Martin Hard Coat, Sanford, and Hardas, each has their own formulations.
One variation of the Alumilite process, for example, uses a blend of sulfuric acid and oxalic acid as the electrolyte.
There are also some specialty electrolytes developed for unique applications—such as sulfosalicylic acid, sulfamic acid, or sulfophthalic acid solutions.
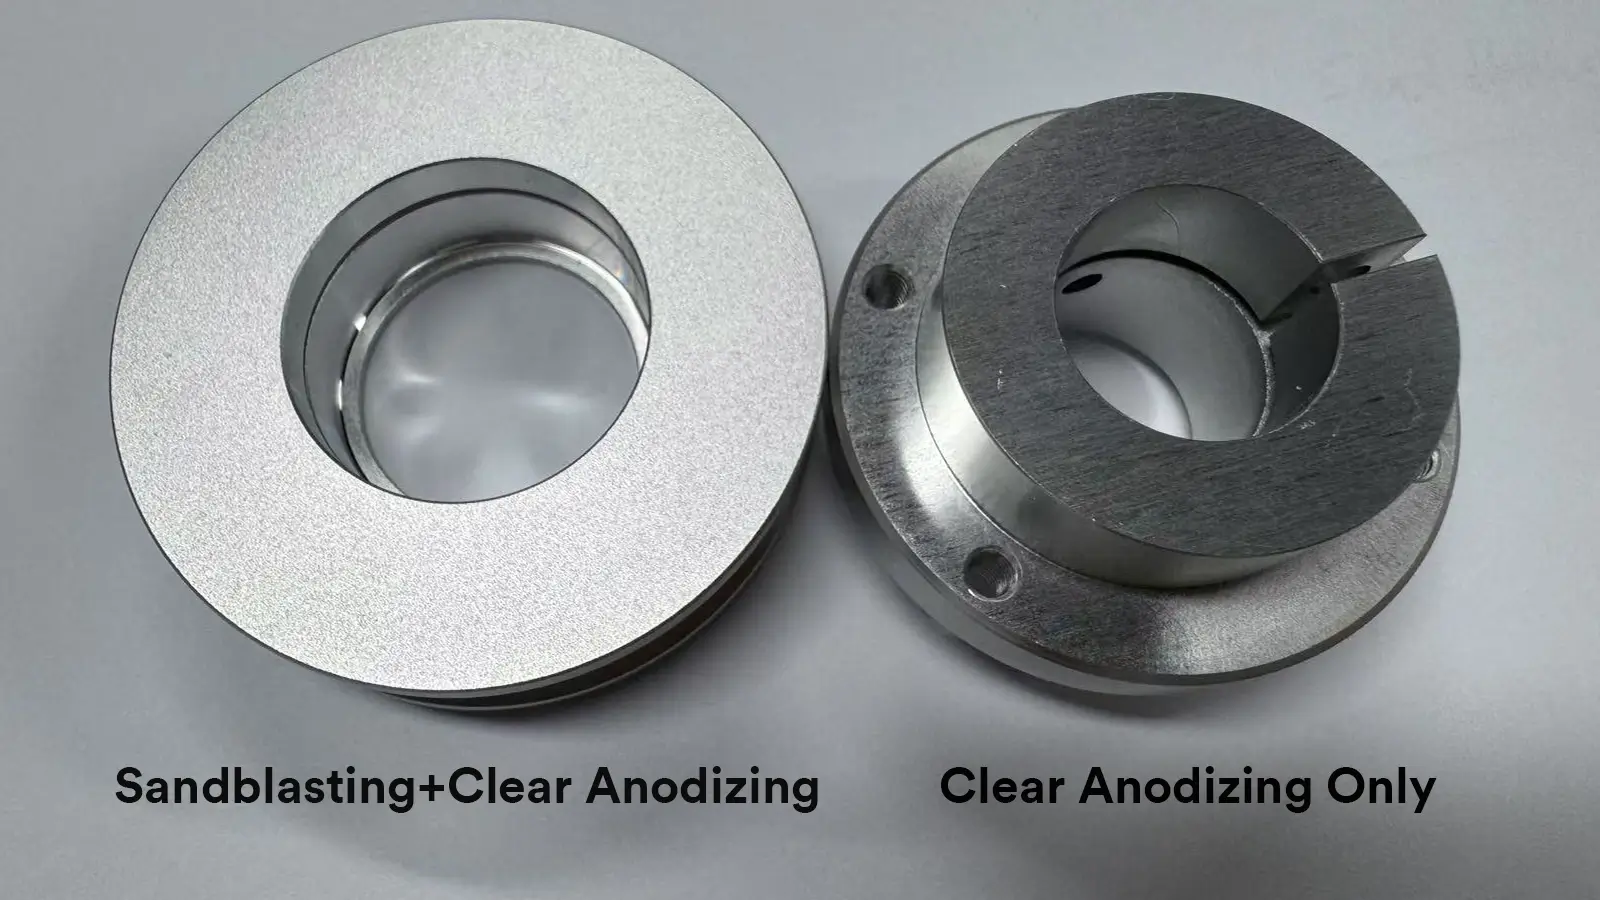
Before anodizing, chemical brightening and polishing of the aluminum surface helps to improve the uniformity and adhesion of the anodic coating to improve its appearance.
When designing parts that will have anodizing treatment, it’s important to keep a few key points in mind — many of which we’ve discussed before, such as coating thickness, weight per area, and contact marks. Addressing these issues early in the design phase can save time and trouble later on.
When designing parts, it is necessary to consider that the anodized film thickness, which will make the surface of the product thicker.
Allowance must be made for dimensional increase. In this way, the parts can still be installed and used normally after anodizing, and the fit will not be affected by the anodic film thickness.
Hole diameters will also be affected by anodizing. For holes with tight tolerances, make sure to oversize them slightly in the design to compensate for the oxide layer.
For blind holes, it’s especially important to design proper venting and drainage paths — otherwise, the electrolyte might not reach all surfaces, resulting in uneven or incomplete coating and sealing. 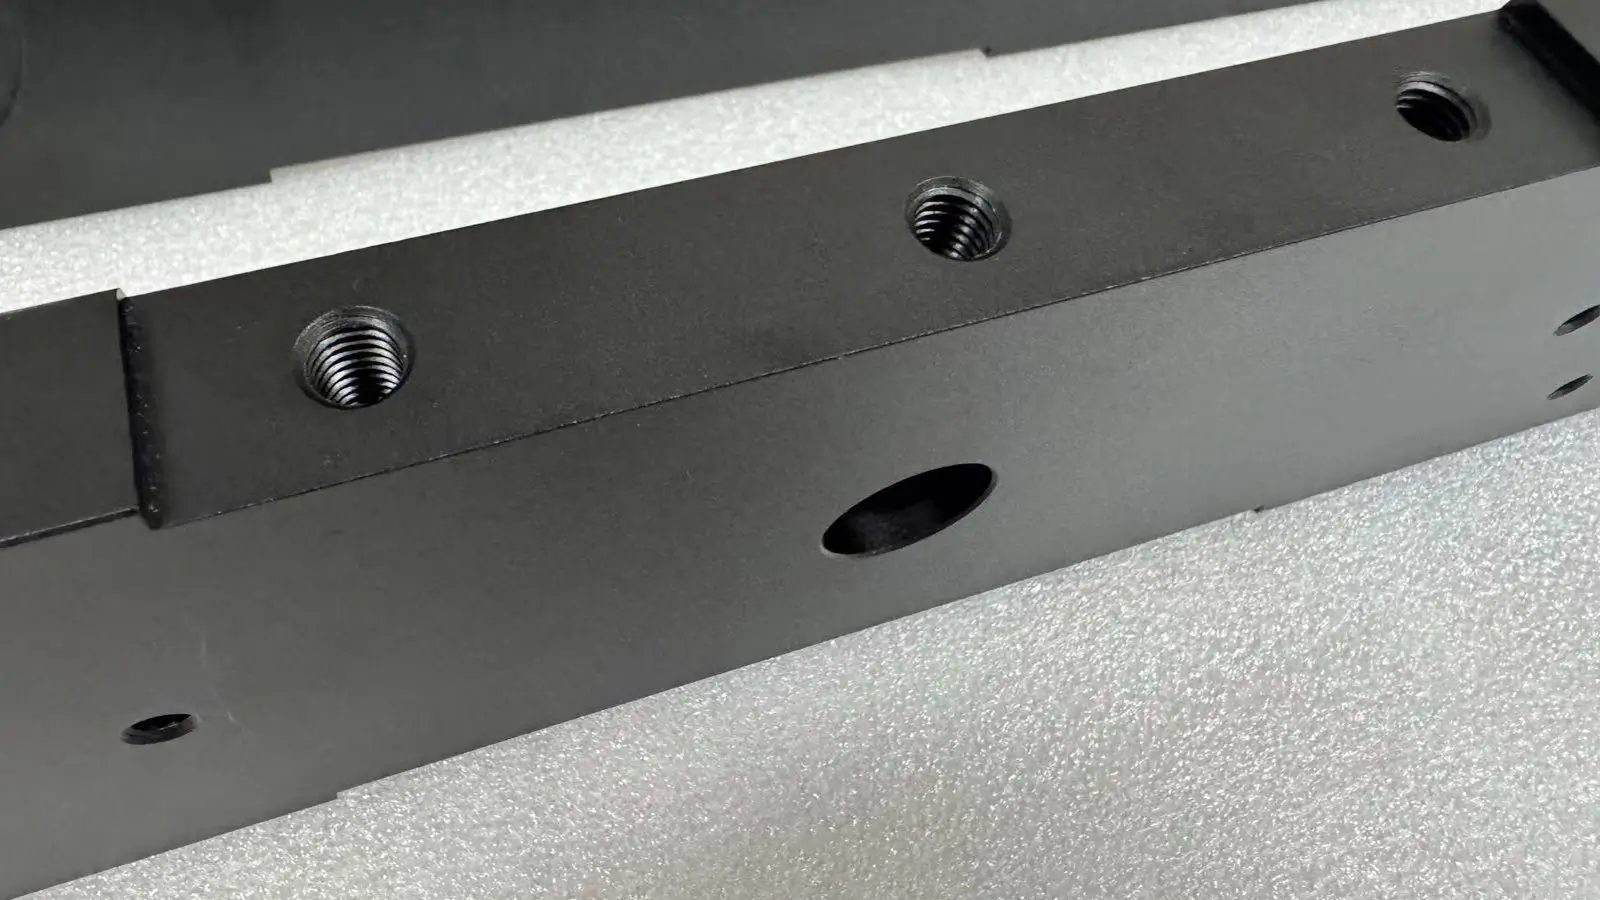
When designing threads, it is important to consider that the thickness of the anodized coating will tighten the threads, affecting the fit and function of the threads.
In order to ensure that the threads can be screwed in and used normally, it is usually necessary to machine the threads slightly looser before anodizing, or to trim the threads (such as tapping and thread trimming) after anodizing to ensure that the dimensions meet the requirements.
Since anodizing process forms an oxide film through an electrochemical reaction, it is difficult for the film to grow evenly at sharp edges and corners, and it is easy to produce weak or film-free gaps, which will affect the protective performance.
When designing products, sharp edges and corners should be avoided and replaced with rounded corners to ensure that the coating can be fully and evenly covered. The inner corners must be rounded in advance, and the edges after chamfering also need to be rounded.
| Nominal Coating Thickness | Minimum Radius of Curvature (Edge & Inside Corner) |
|---|---|
| 0.001 inch (25.4 μm) | 1/32 inch (0.79 mm) |
| 0.002 inch (50.8 μm) | 1/16 inch (1.59 mm) |
| 0.003 inch (76.2 μm) | 3/32 inch (2.38 mm) |
| 0.004 inch (101.6 μm) | 1/8 inch (3.18 mm) |
The thicker the anodic coating is, the higher the requirement for edge protection.
If the edge is too sharp, the film layer will be difficult to fill, and “open edges” or “oxidation dead corners” will appear. Therefore, the thicker the film, the larger the recommended minimum radius of curvature.
Anodized coatings significantly reduce the fatigue strength of aluminum alloys. The exact amount of reduction varies depending on the process used. Generally speaking, the thicker the coating, the greater the impact on fatigue performance.
For dyed parts, especially Type II and Type IIB parts anodized with sulfuric acid bath, double sealing with sodium dichromate solution can be performed before or after conventional nickel acetate sealing to further improve corrosion resistance.
For Type II/IIB dyed parts, double sealing is an effective way to improve salt spray and chemical media durability. If the customer wants the color to be exactly the same, double sealing should not be used.
Type I/IB/IC/IIB films are thin and have small pores, which are not easy to retain dyes. Therefore, if black oxidation is mandatory in the contract, please give priority to Type II, which will be more stable.
The copper content in aluminum alloys has a significant impact on anodic oxide layer formation and performance.
In particular, alloys with copper levels around or above 2% — such as the 2xxx series, 7050, and 7178 — tend to produce anodic films that are thinner, less uniform, and less dense. These coatings often suffer from poor adhesion and discontinuities, which compromise both corrosion resistance and wear performance.
Similarly, for high-silicon cast aluminum alloys like 360, 380, and 383, achieving a hard anodized coating thickness above 2 mils is extremely difficult due to the alloy’s microstructure and the interference from the silicon content.
Anodizing pit refers to localized corrosion that results in small holes or voids in the anodic coating or the underlying aluminum substrate.
These pits may form due to improper sealing, environmental exposure, or mechanical damage to the coating surface.
The size, depth, and number of pits are key indicators used to assess coating quality and corrosion resistance.
Anodizing converts the aluminum surface into aluminum oxide, forming a hard and durable anodic coating. This anodic coating is not a simple coating applied on the surface, but is formed in combination with the metal surface itself, so it is more wear-resistant and longer-lasting than ordinary coatings.
Anodizing will wear off in the following situations.
Situation 1: When the surface of the aluminum part is frequently in contact, rubbed or scratched with hard objects for a long time, the oxide film will gradually be worn thin or even peel off.
Situation 2: The impact of hard objects or scratches of sharp objects will cause the oxide layer to partially crack or fall off, exposing the aluminum matrix underneath.
Situation 3: In certain chemical corrosive environments or extreme temperatures, the oxide film may degrade, causing the surface to weaken and be more susceptible to wear.
The anodized layer formed on aluminum is essentially aluminum oxide (Al₂O₃), which is a strong electrical insulator. It has extremely high resistance and does not conduct electricity. Under normal conditions, the anodic coating blocks current flow and protects the substrate from corrosion.
Conductive anodizing refers to a specialized process that modifies the standard anodizing technique to create an oxide layer with controlled electrical conductivity. This is achieved by introducing conductive components or structures into or onto the anodic film, allowing current to pass through.
One common method involves metal doping—co-depositing metallic ions like tin (Sn²⁺) or nickel (Ni²⁺) into the pores of the anodic layer during sulfuric or oxalic acid anodizing. These ions form a conductive network within the film.
Conductive anodizing is widely used in applications such as aircraft electronic enclosures, radar mounts, MRI shielding rooms, operating tables, fuel cell bipolar plates, and semiconductor wafer-handling arms.
Two-Tone Anodizing is a precision surface treatment that creates two distinct colors on separate areas of an aluminum part. It’s achieved through sequential masking, selective anodizing, and dyeing, and is often used for decorative or functional contrast.
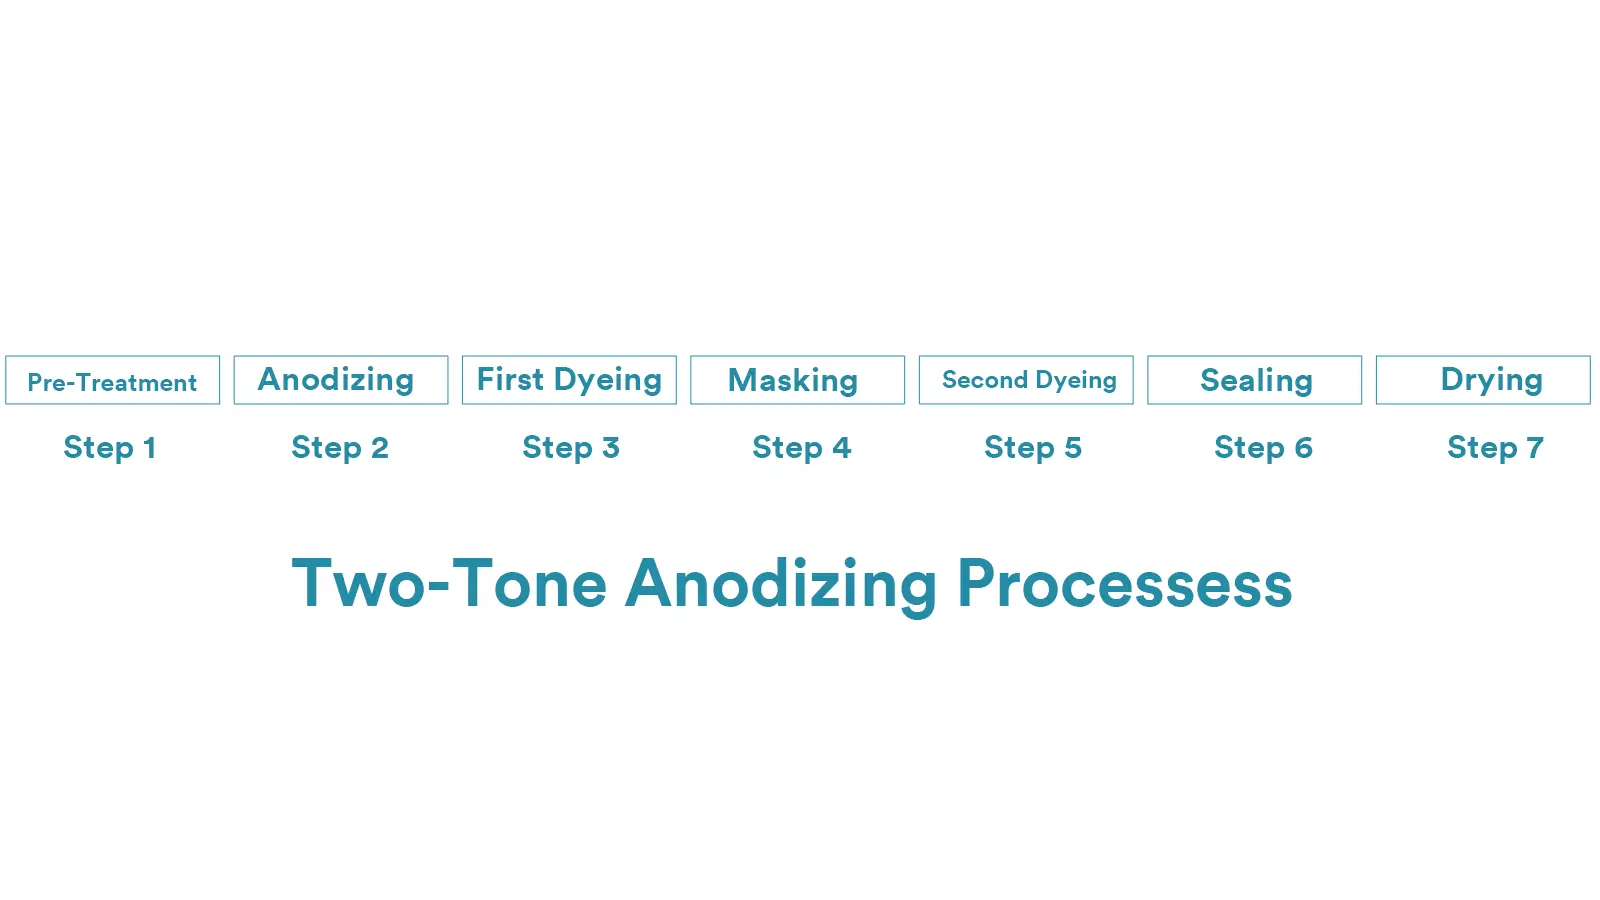
The processes of the two tone anodizing are as follows.
Pre-treatment:
The part undergoes alkaline cleaning, acid etching, degreasing, and impurity removal to prepare the surface.
Anodizing:
The entire piece is anodized in one step to form a uniform porous oxide layer.
First Dyeing:
The part is fully dyed with the first color. The dye penetrates into the pores of the anodic film.
Masking:
Areas meant to retain the first color are masked off using film, paint, or liquid photoresist. These masked zones will not absorb the second dye.
Second Dyeing:
The unmasked areas are dyed with a second color. The new dye enters the open pores of the anodic layer. If needed, the first dye in these areas can be removed using a decolorizing agent before applying the second dye.
Sealing:
Finally, the part is sealed—typically in hot water, nickel acetate, or other sealing solutions—to close the pores and lock in the dyes.
Yes, heat-treated aluminum alloys can be anodized. Typical anodizable heat-treated alloys include:
2xxx series (e.g., 2024-T4)
6xxx series (e.g., 6061-T6)
7xxx series (e.g., 7075-T6)
However, there are some important considerations:
Copper-rich alloys like 2024 may show dark spots or uneven coloring after anodizing, and tend to have lower corrosion resistance.
7xxx series, such as 7075, contain zinc and magnesium. They offer high strength but relatively poor corrosion resistance. The anodized finish is often less uniform or aesthetically pleasing.
Alloys with high levels of silicon or iron (e.g., die-cast aluminum like ADC12 or A356) can produce a rougher, more porous oxide layer, often with visible pitting.
The temper (hardness) condition of the alloy also affects anodizing quality. If the material is too soft or too hard, micro-cracks or uneven coating thickness may occur. The T6 temper (such as 6061-T6) generally offers a good balance for achieving consistent, high-quality anodized finishes.
It really depends on the application.
If your goal is to achieve a dense, corrosion-resistant oxide layer with consistent and attractive coloring, then 1050 / 1060 (pure aluminum), 5005, or 6063 are excellent choices. These alloys produce smooth, uniform anodized finishes and are ideal for decorative or protective purposes.
If you’re looking for a balance between good anodizing results and higher strength or better machinability, then 6061-T6 and 5052-H32 are great options. While they may not produce finishes as visually perfect as pure aluminum, they offer strong mechanical properties and still respond well to anodizing.
As a CNC shop, we often receive orders for 7075 aluminum parts—especially for aerospace components, firearm parts, and other high-strength applications.
7075 is commonly hard anodized (Type III) to improve wear resistance and add some level of corrosion protection. The finish is usually dark gray or black, and because of the alloy’s composition, it’s difficult to dye.
Regular (Type II) anodizing can also be done on 7075, but it’s not ideal for decorative purposes. Due to the high zinc and copper content, the oxide layer often turns dark gray or brownish, and can be uneven in color. Dyeing is tricky—it’s prone to blotching or pinholes, which makes it a poor choice for parts where appearance matters.
So Type III hard coat anodizing is the best anodizing type for 7075 Aluminum.
Below is 7075 aluminum hard coat anodizing photo.

The answer is No, steel can’t be anodized the same way as aluminum.
When placed in an electrolyte, steel forms a loose, porous layer of iron oxide—basically rust. This oxide doesn’t stick well to the surface, flakes off easily, and offers little to no protection.
In fact, it makes things worse by allowing air and moisture to penetrate deeper, which speeds up corrosion.
In typical sulfuric acid electrolytes used for anodizing aluminum, steel would corrode rapidly. You’ll see bubbling, pitting, rusting—and in some cases, the surface might even blister or peel. There’s no protective layer formed, and the part may be permanently damaged.
For this reason, steel is not anodized. Instead, it’s treated with other surface finishes like black oxide (bluing), electroplating (zinc, nickel, chrome), or phosphating to improve corrosion resistance and surface durability.

5-Axis CNC machining is a manufacturing process that uses computer numerical control systems to operate 5-axis CNC machines capable of moving a cutting tool or a workpiece along five distinct axes simultaneously.

China is the best country for CNC machining service considering cost, precision, logistic and other factors. Statistical data suggests that China emerges as the premier destination for CNC machining.

Selecting the right prototype manufacturing supplier in China is a critical decision that can significantly impact the success of your product development project.

Machining tolerances stand for the precision of manufacturing processes and products. The lower the values of machining tolerances are, the higher the accuracy level would be.