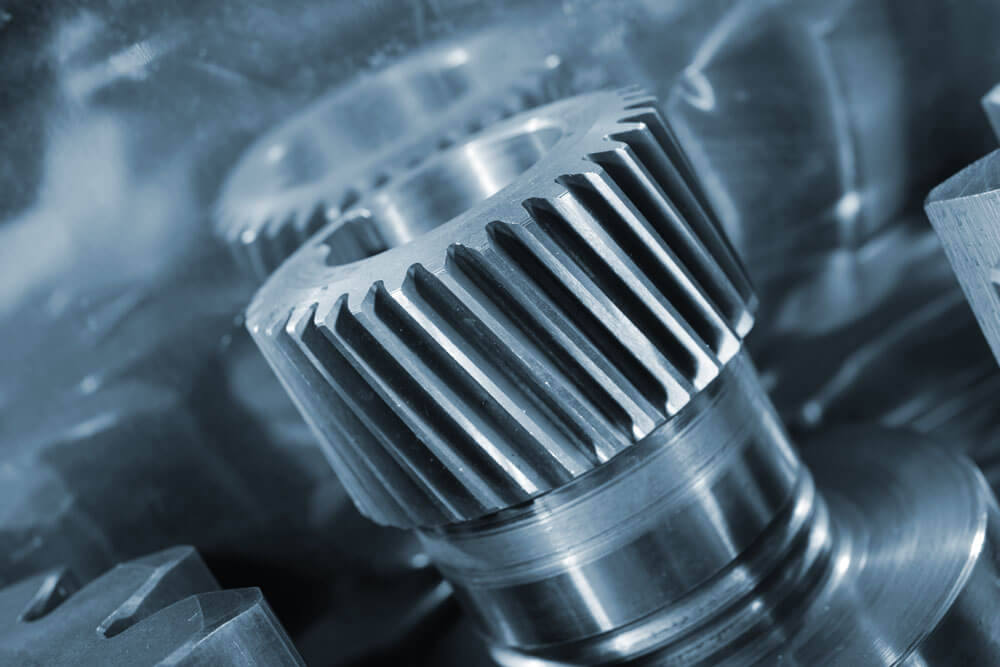
Knurling is a critical machining process used to create patterned textures on cylindrical surfaces, enhancing grip, assembly performance, and aesthetic appeal.
This comprehensive guide covers the fundamentals of knurling, including its purposes, types, suitable materials, tool selection, process parameters, cost considerations, and design guidelines.
Readers will gain insights into the differences between form and cut knurling, how to select the appropriate pattern (straight, diagonal, or diamond), and how to optimize parameters like pitch, feed, and spindle speed for high-quality results.
Key Takeaways:

Knurling is an essential machining process that creates a patterned, three-dimensional texture—typically straight, diagonal, or diamond patterns—on the cylindrical surface of a workpiece. This process serves specific functional and aesthetic purposes.
Essentially, knurling transforms a smooth surface into one with defined friction characteristics. It is widely applied to mechanical parts that require manual operation or tight, secure fitting.
Knurling primarily serves three critical purposes:
This is the most common use of knurling. Applying a knurl pattern to knobs, handles, or tool shafts (like screwdrivers or surgical instruments) significantly increases the friction between the hand and the part. This prevents slipping, boosting both safety and operational efficiency.
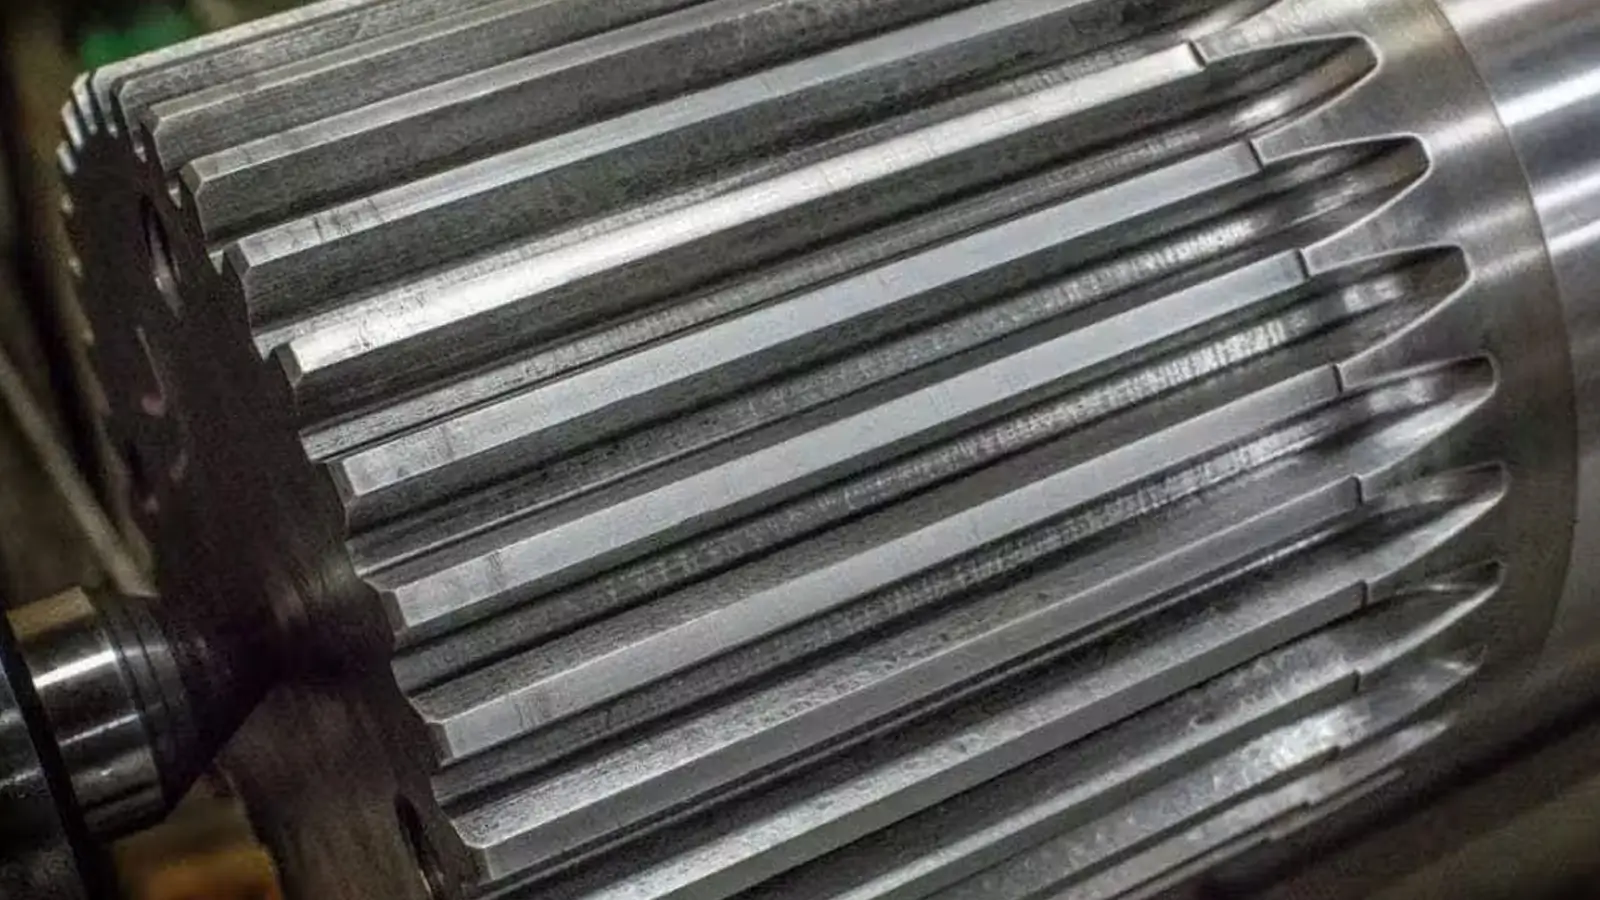
Knurling is used to create an interference fit between a shaft and a hole. When a knurled shaft is pressed into an inner bore, the raised texture bites into the bore material, forming a low-cost, high-strength friction lock. This is commonly seen in the assembly of motor and generator shafts.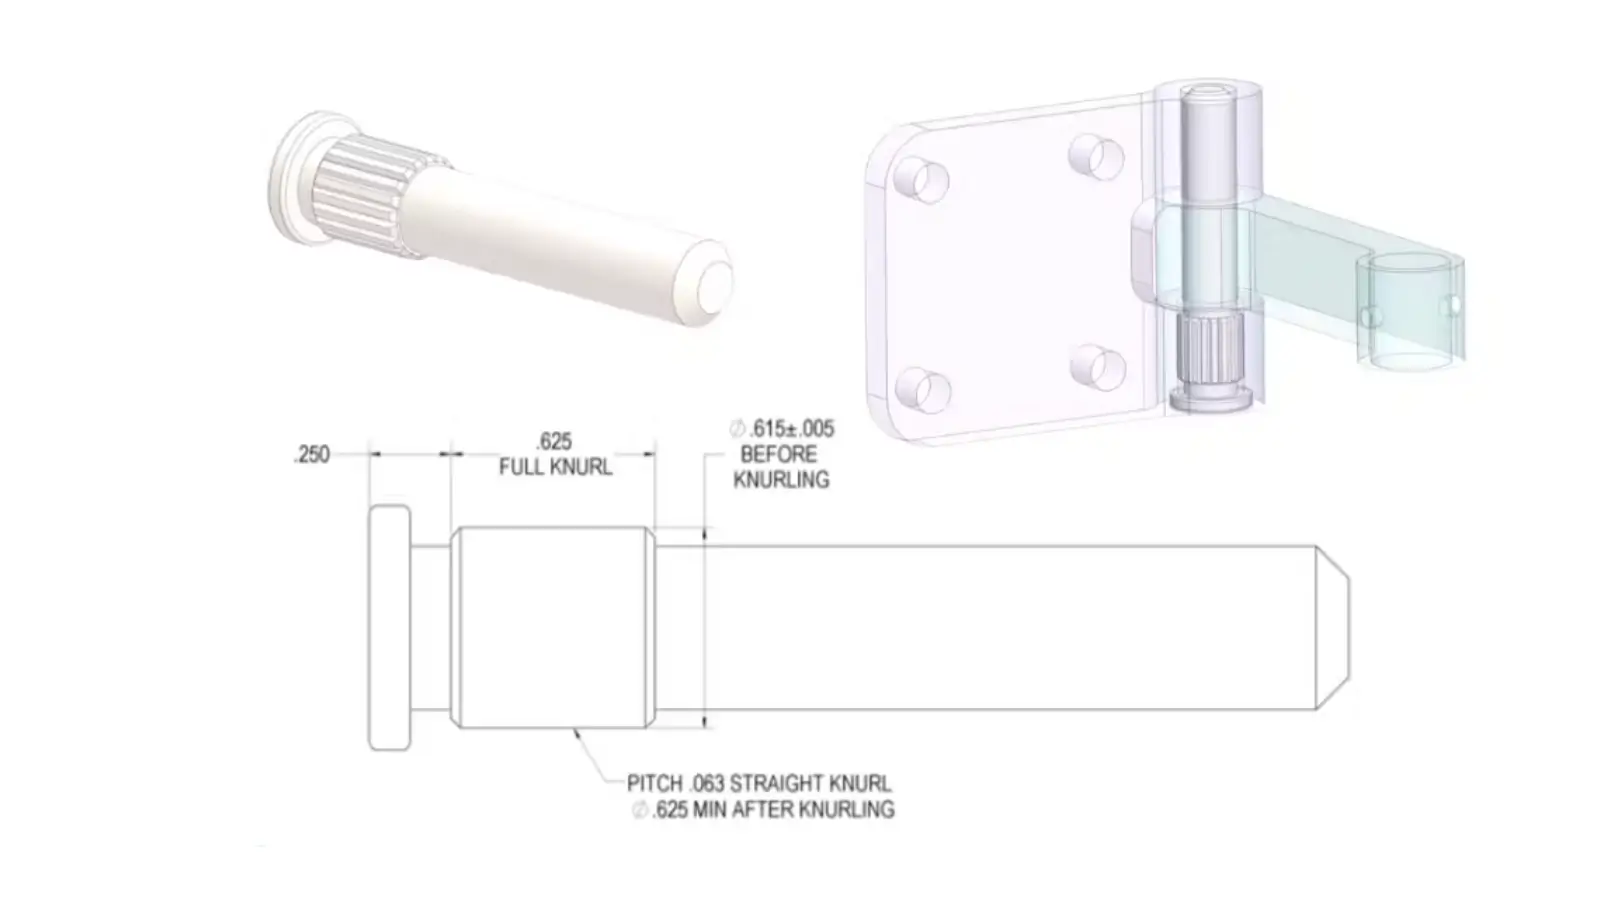
On high-end products such as camera lens focusing rings or precision knobs, knurling is also an important surface feature used for decoration. It signals high-quality craftsmanship and detailed engineering.
Knurling is primarily classified based on the process used and the resulting pattern.
There are two main processes for creating knurls:
| Process | Description | Key Characteristics |
|---|---|---|
| Form Knurling | A deformation process where significant pressure from the tool wheel forces the material to flow and take shape. | Pros: High efficiency, no chips produced. Cons: Increases the part’s outside diameter (OD), requires high machine rigidity. |
| Cut Knurling | A cutting process that uses sharp tool edges to remove material and form the texture. | Pros: High dimensional accuracy, does not change the OD, ideal for high-hardness materials like stainless steel. |
Learn more: Knurling Process: Form Knurling vs. Cut Knurling
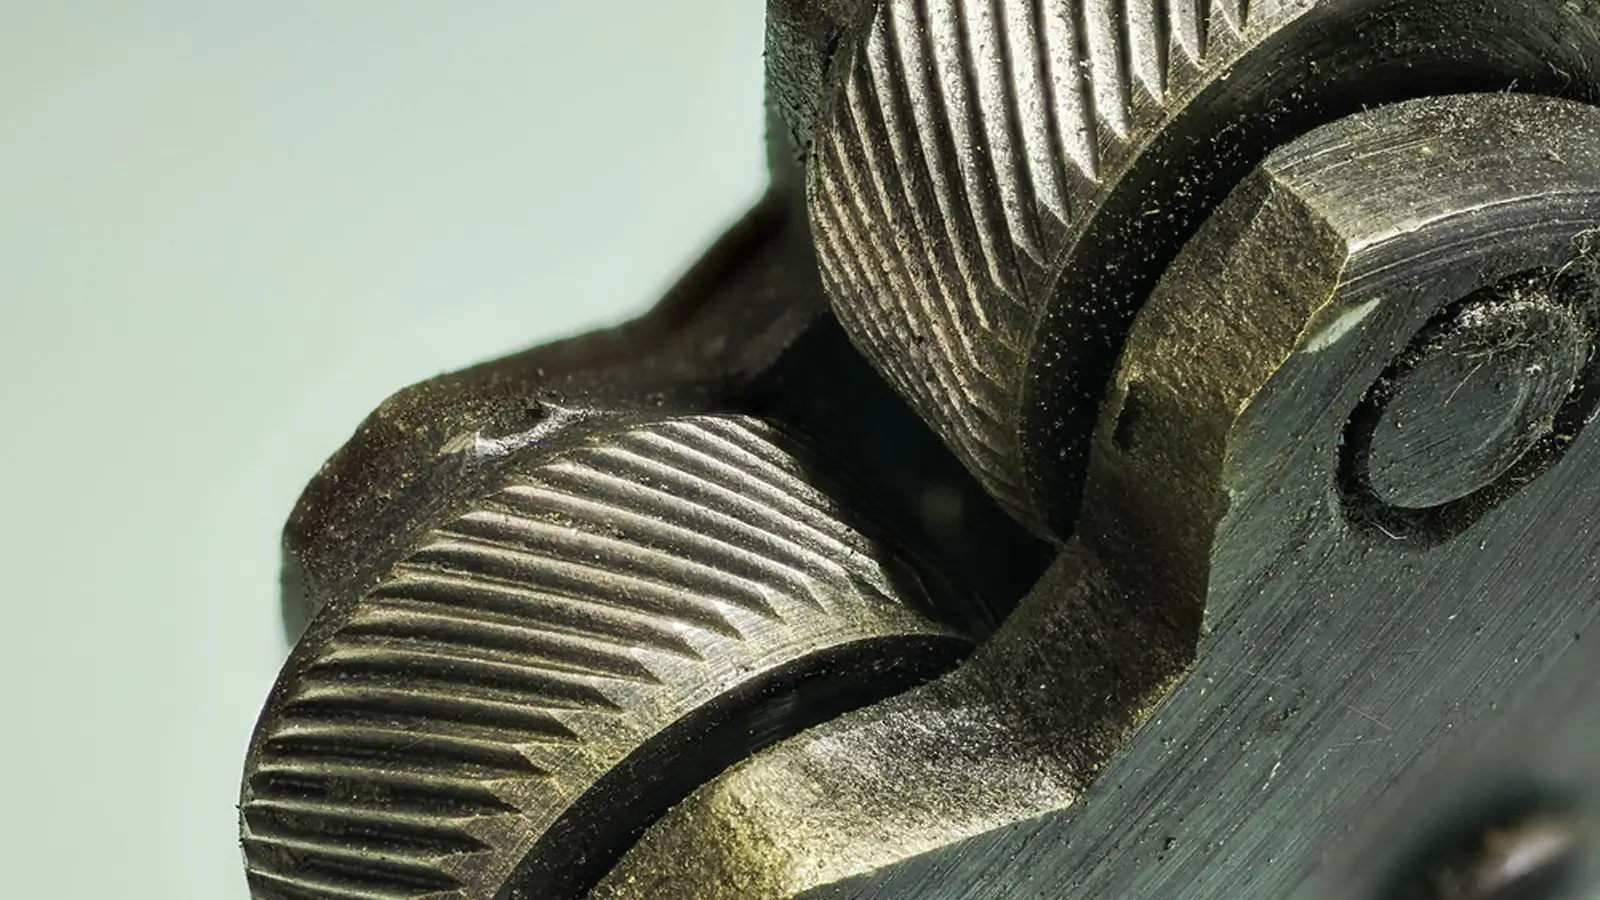
Knurl patterns are divided into Straight, Diagonal, and Diamond: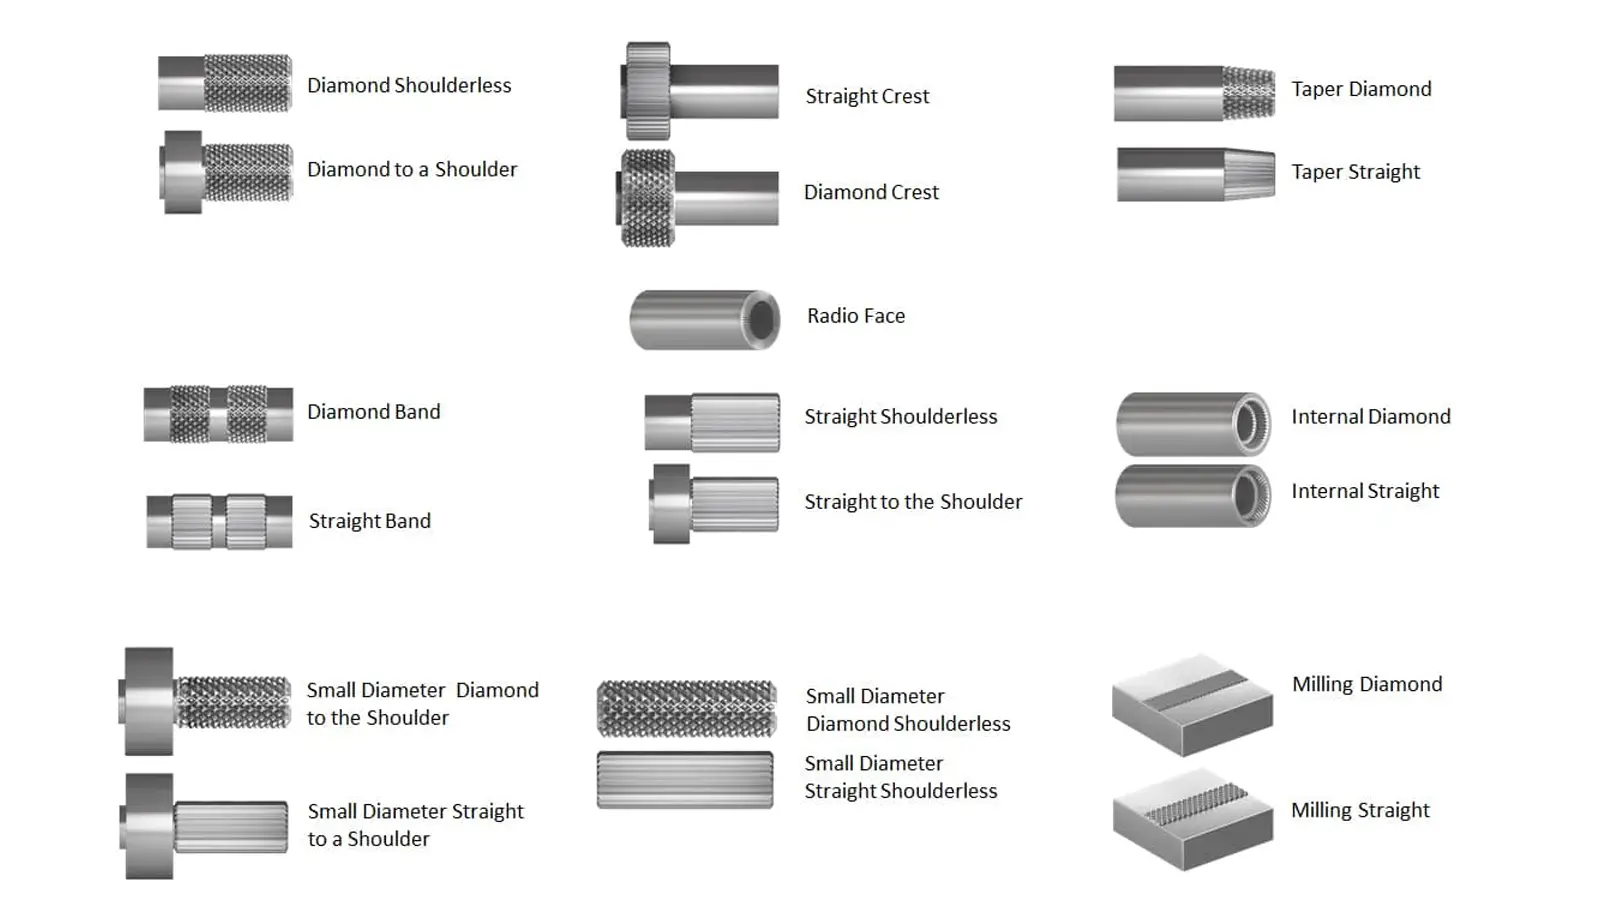
Consists of a series of parallel linear lines. It is primarily used for parts requiring unidirectional slip resistance or linear adjustment, such as micrometer sleeves or linear guides.
Formed by two sets of diagonal lines crossing (usually at 90 degrees) to create a diamond grid. This is the most common and versatile type, providing all-around slip resistance for tool handles, adjustment knobs, and bottle caps.
Consists of parallel lines angled at a specific degree (e.g., 30 or 45). It offers both grip and aesthetic appeal, often used on premium flashlights or camera focus rings for a dynamic look.
Learn more: Types of Knurling Patterns
In CNC machining, knurling is typically classified based on pitch and the fineness of the pattern. The most common categories are Coarse, Medium, and Fine.
Note: This classification isn’t a strict ISO or ANSI standard. Rather, it’s a widely accepted industry practice used in mechanical design, machining, and engineering communication.
Before diving into the types, let’s clarify two key terms:
Pitch: The distance between the peaks of two adjacent knurls.
TPI (Teeth Per Inch): A standard measurement of how densely threads or knurl patterns are spaced. It indicates the number of complete teeth in one inch (25.4 mm) of length.
Definition: Coarse knurls generally have a larger pitch, with 14–20 TPI (or approximately ≥1.2 mm metric pitch). This type has the deepest and most prominent texture among knurl patterns.
Characteristics:
Deep, prominent teeth
Excellent grip and anti-slip performance
High machining stability with low tool wear requirements
Rougher feel, emphasizing function over aesthetics
Applications:
Large industrial handles
Heavy-duty machine knobs
High-torque components
Hand tools and mechanical parts requiring reliable grip
Definition: Medium knurls have a moderate pitch, typically 21–33 TPI (about 0.6–1.0 mm metric pitch).
Medium knurling is the most commonly used knurl type, offering a balanced grip, aesthetic appeal, and enhanced anti-slip performance.
Characteristics:
Moderate pattern, comfortable feel
Good anti-slip performance
High machining stability, suitable for a wide range of applications
Balances functionality and appearance
Applications:
Most hand tools (e.g., micrometers, torque wrenches)
Standard knobs
General mechanical components
Definition: Fine knurls have a smaller pitch, typically 34–80 TPI (or ≤0.5 mm metric pitch). They feature delicate textures and refined feel, prioritizing aesthetics and precision adjustments.
Characteristics:
Shallow, fine teeth
Smooth, refined feel for precise operations
Lower anti-slip performance
Requires higher machining accuracy
Applications:
Precision medical instruments
High-end consumer product knobs
Pen barrels
Components with high aesthetic or tactile requirements
| Knurl Type | TPI (Inch) | Metric Pitch (mm) | Engineering Notes |
|---|---|---|---|
| Coarse | 10–16 | ≥1.2 | Large teeth, deep profile, strongest grip; suited for high-torque or heavy-duty applications |
| Medium | 18–25 | 0.6–1.0 | Best overall balance of feel, appearance, and strength; most common choice |
| Fine | 26–40 | ≤0.5 | Fine texture, refined look, weaker grip; mostly for precision or decorative uses |
Note:
| Feature | Coarse Knurl | Medium Knurl | Fine Knurl |
|---|---|---|---|
| Pitch | Large | Moderate | Small |
| Tooth Depth | Deep | Medium | Shallow |
| Grip / Anti-Slip | Very strong | Balanced & good | Weaker |
| Feel | Rough, industrial | Comfortable, stable | Smooth, precise |
| Appearance | Functional | Balanced | Aesthetic-focused |
| Machining Stability | High | High | Medium |
| Typical Use | Heavy-duty knobs, industrial handles | Knobs, hand-tightened parts, general mechanical components | Instrument parts, decorative parts, precision components |
Summary:
Medium knurls are defined by moderate pitch and tooth depth, striking a balance between grip, tactile feel, and appearance. They are widely used in knobs, hand-tightened components, and general mechanical parts.
While drawings specify exact pitch, the Coarse / Medium / Fine classification remains a quick and intuitive way to communicate knurling requirements in CNC projects.
Knurling works best with materials that have good ductility (plasticity), as these can form stable knurl patterns without cracking when stressed or cut.
Selecting the right material is key to ensuring quality, functionality, and appearance.
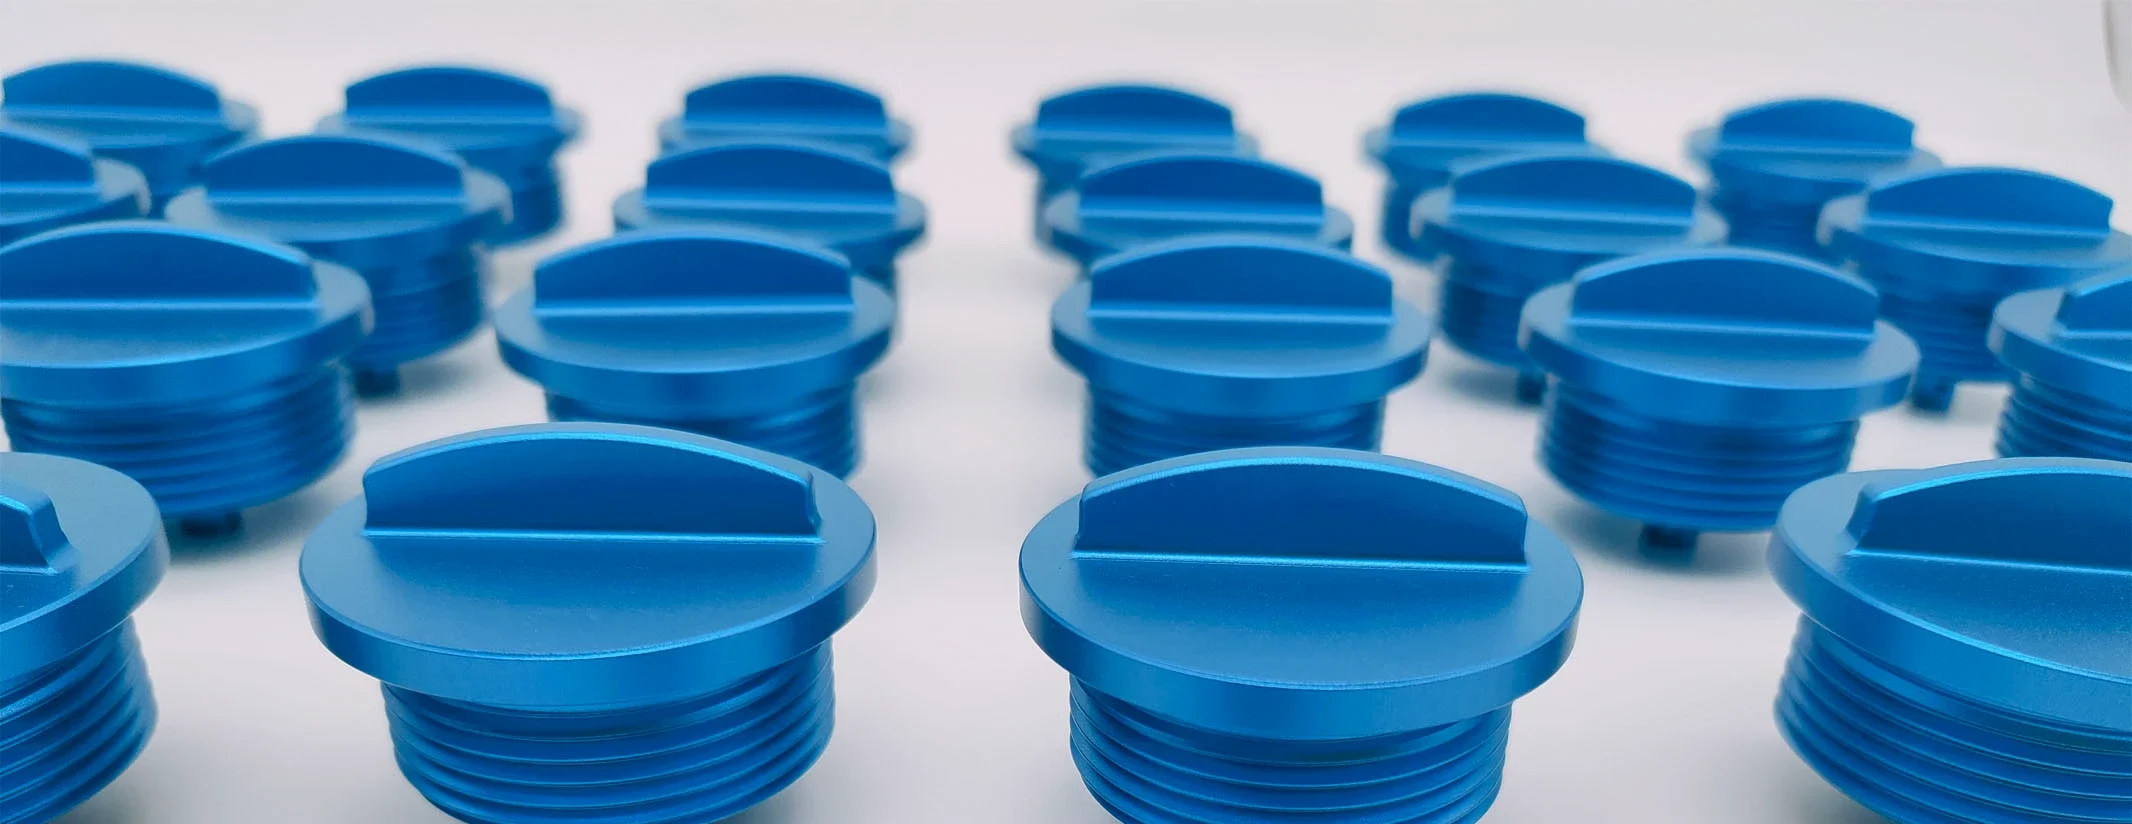
Lightweight, easy to machine, and highly ductile. Aluminum is one of the most common materials for knurling.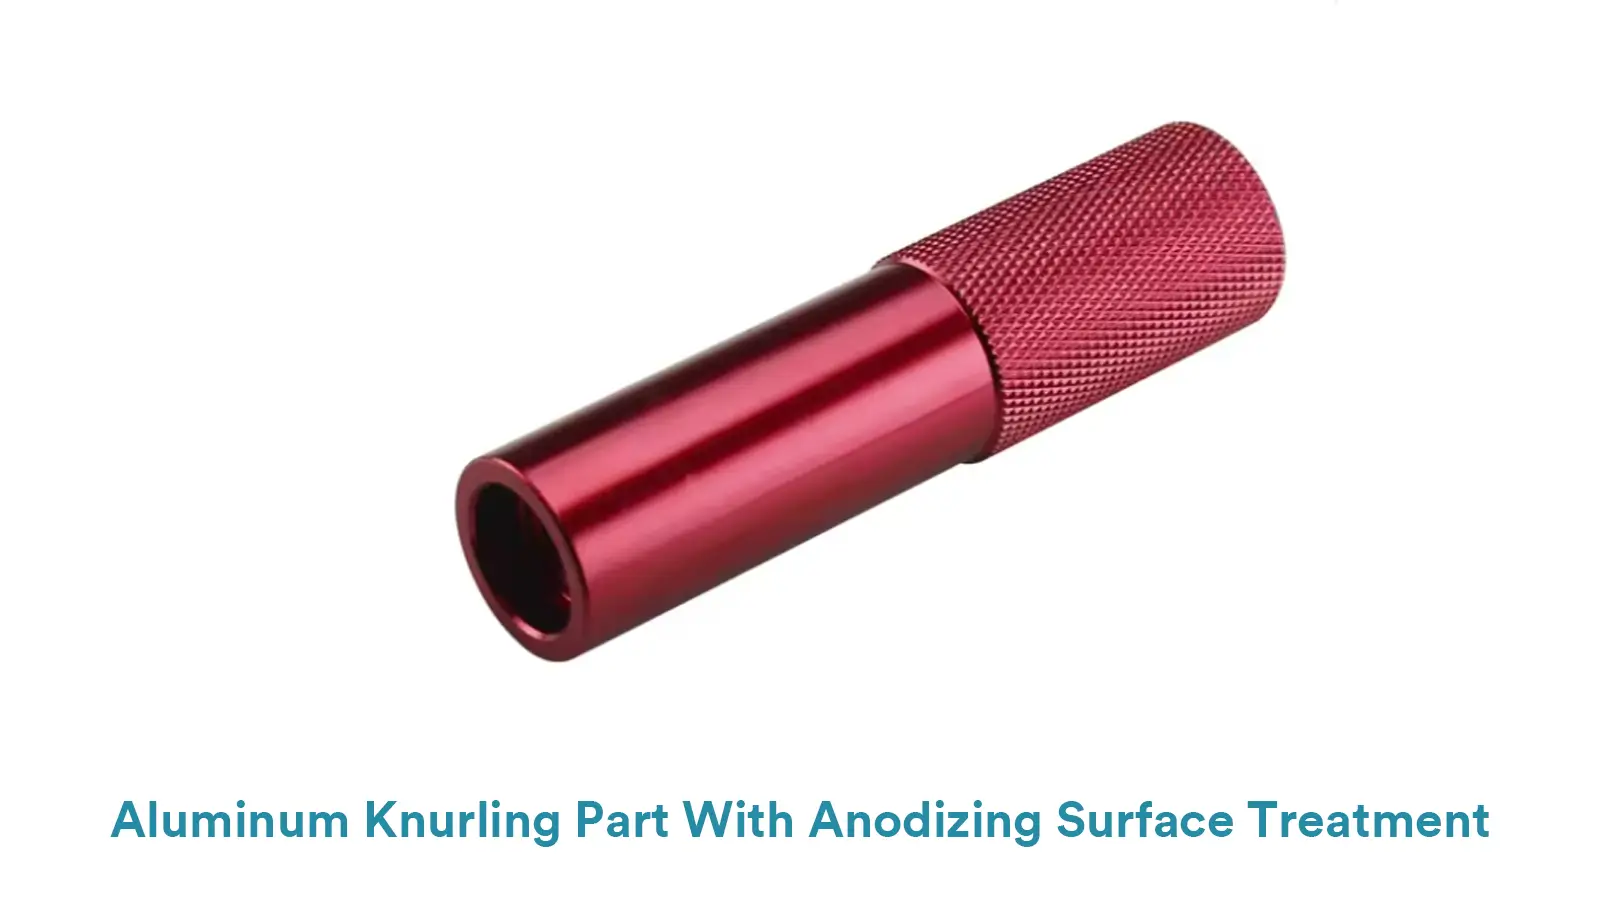
It takes Form Knurling well, resulting in clean textures without cracking. Used extensively for electronic enclosures, instrument knobs, and handles.
Known for their excellent ductility and conductivity, making them highly suitable for knurling. They form stable, non-slip textures while maintaining their natural luster.
Often used in decorative items, high-demand industrial components, and high-end consumer products.
Moderately hard, able to withstand machining pressure while maintaining accuracy, making it an economical choice.
It accepts both Form and Cut Knurling.
Typical uses include mechanical shafts and fasteners requiring enhanced grip or friction locking.
Due to its good wear resistance and stability, bronze is also suitable.
Knurling can enhance the friction locking performance of bearing bushes and gear shafts, extending their service life.
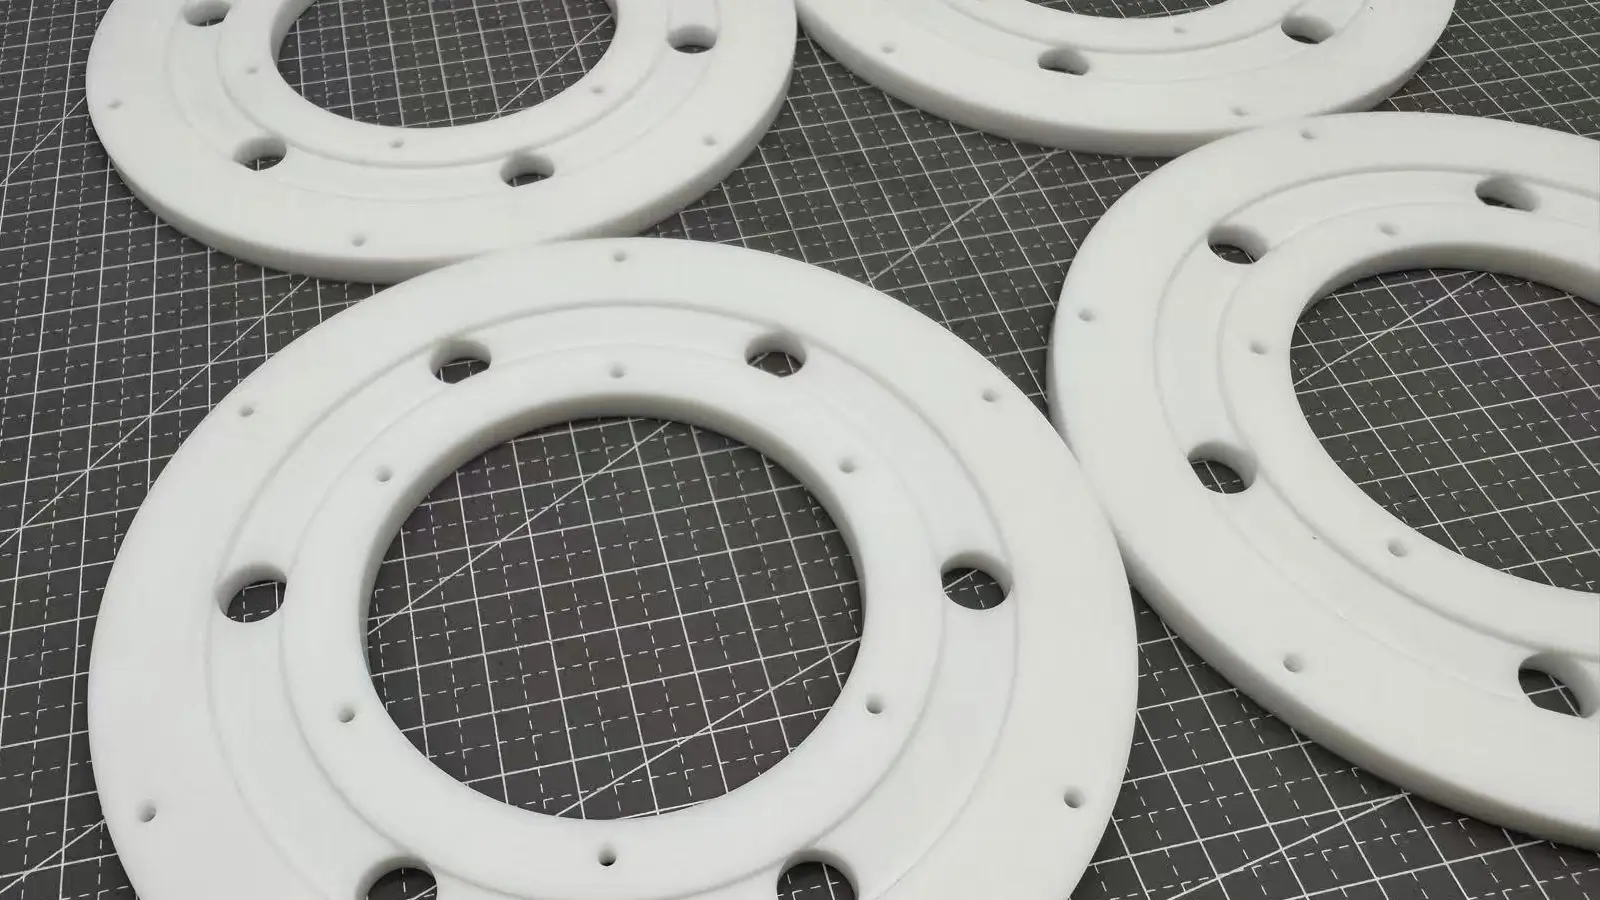
Soft and elastic materials like POM and Nylon can be knurled. Form Knurling creates uniform patterns while maintaining a smooth touch.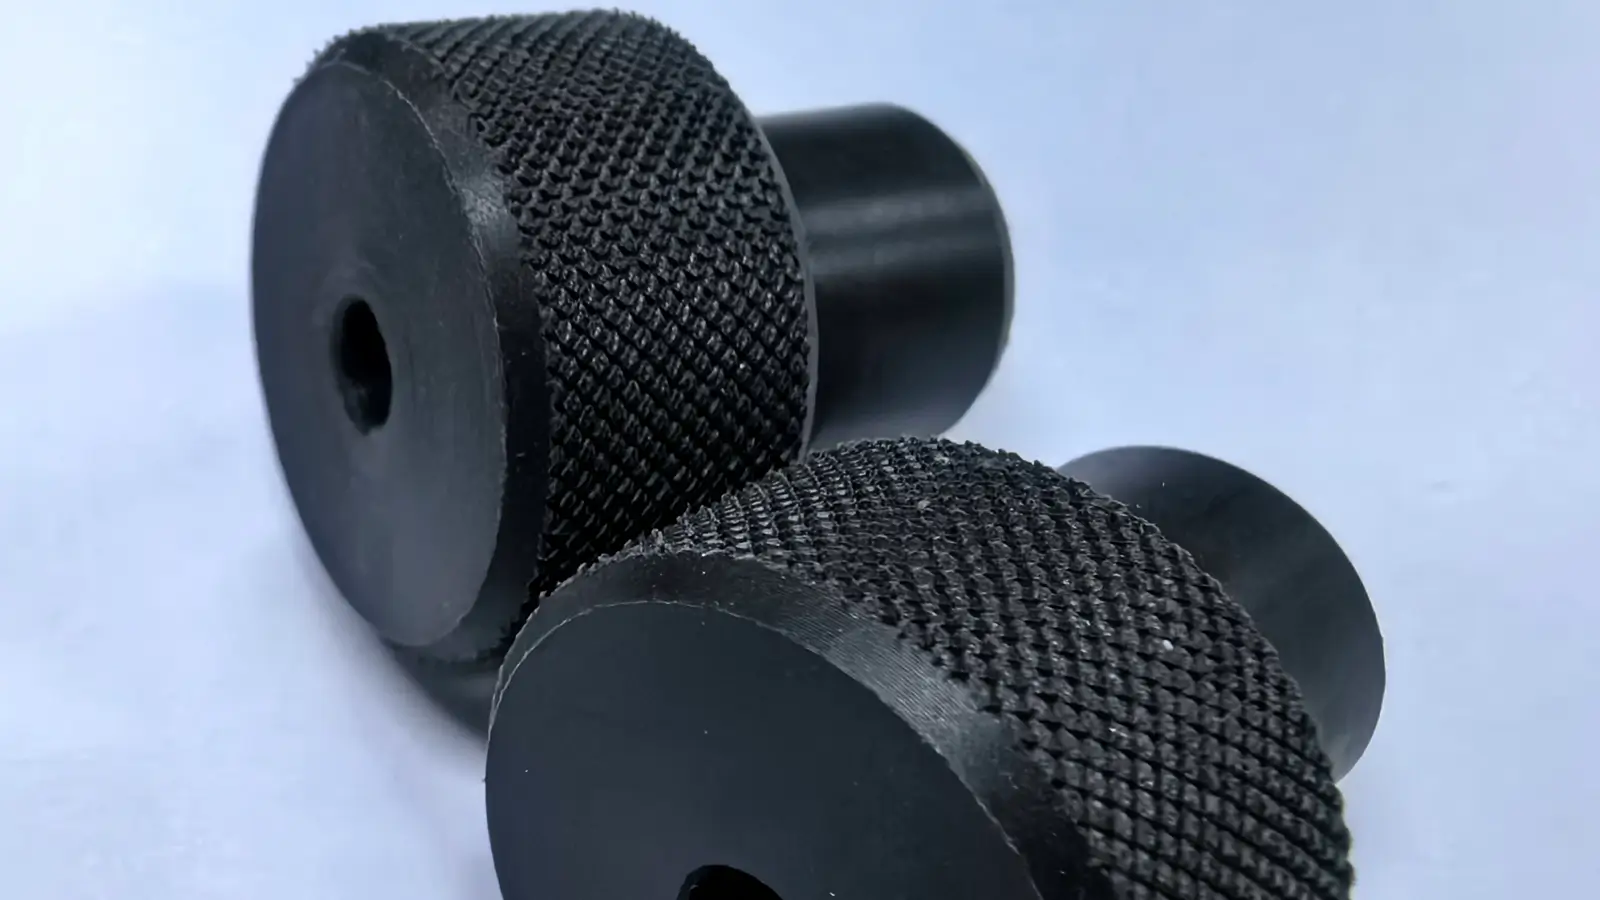
Common applications include handles, knobs, and decorative components that require both grip and aesthetic appeal.
Note: For harder materials (such as stainless steel and titanium alloys), it is highly recommended to use Cut Knurling tools.
This prevents material cracking, excessive tool wear, and ensures superior texture accuracy and surface quality compared to pressure-based methods.
Check more How Material Properties Affect Knurling.
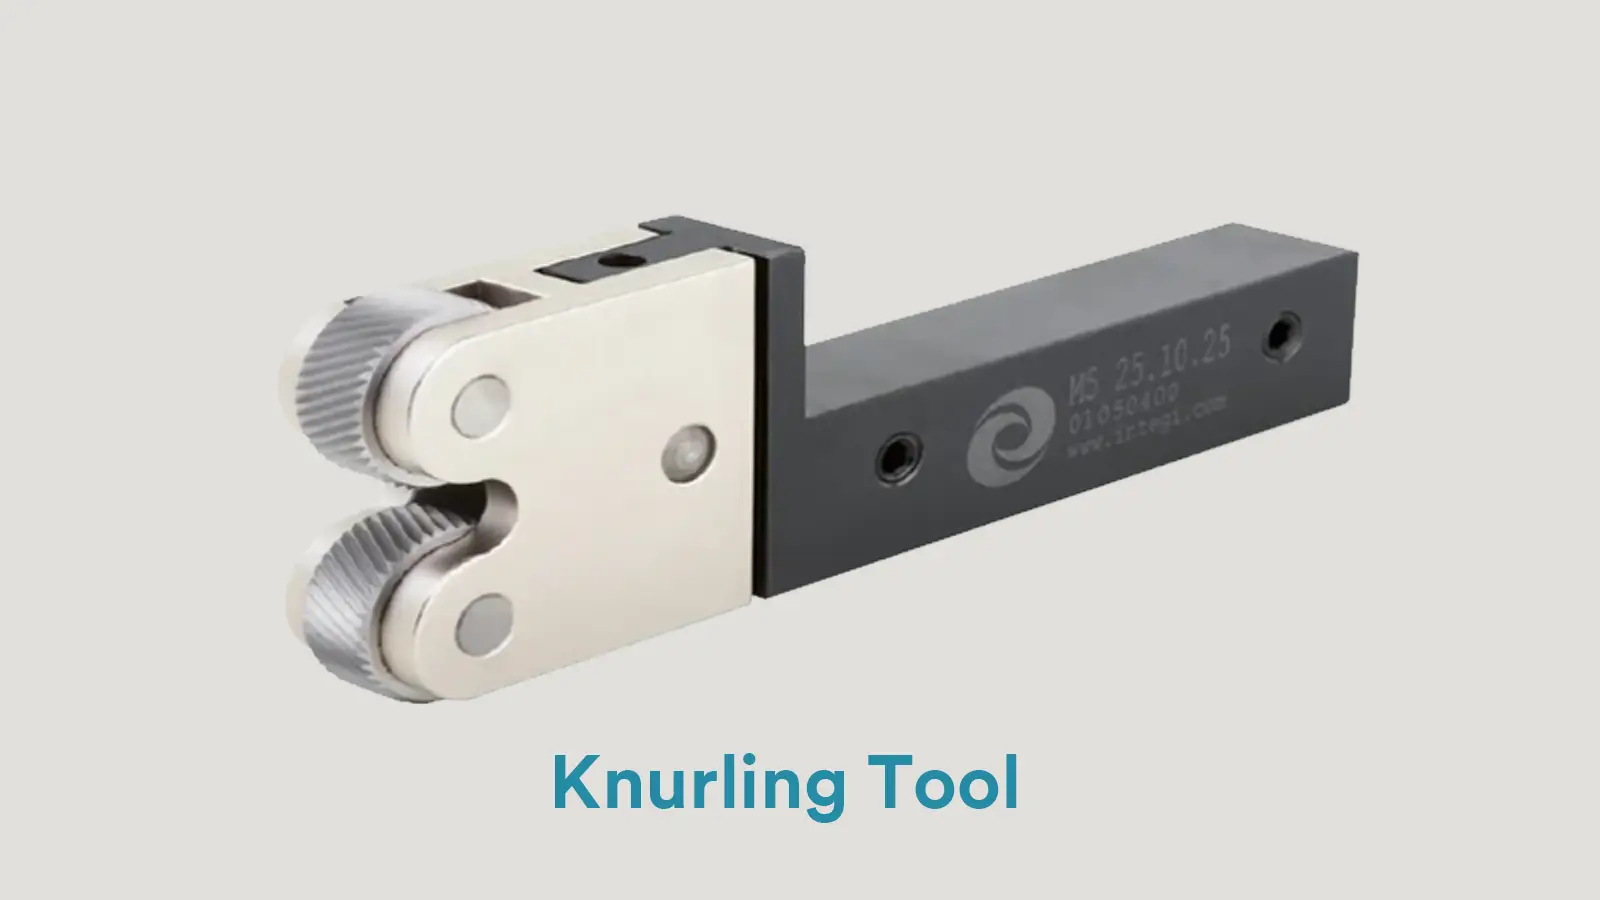
Knurling tools are crucial for achieving high-quality textures. They are generally categorized based on their mechanism:
| Tool Type | Characteristics | Suitable Applications |
|---|---|---|
| Form Knurling Tool | Uses high pressure to plastically deform the material, resulting in a chip-less process. | Aluminum, Brass, Low Carbon Steel (Ductile materials). |
| Cut Knurling Tool | Uses micro-cutting to remove material and form precise patterns. High precision, minimal change to OD. | Stainless Steel, Titanium Alloys (Hard/High-strength materials). |
Knurling tools are usually made from high-performance materials to ensure durability and wear resistance, including High-Speed Steel (HSS), M42 steel, and Carbide.
To further enhance tool life and stability, surface coatings like HSS (Titanium Nitride) or TiAlN (Titanium Aluminum Nitride) are often applied.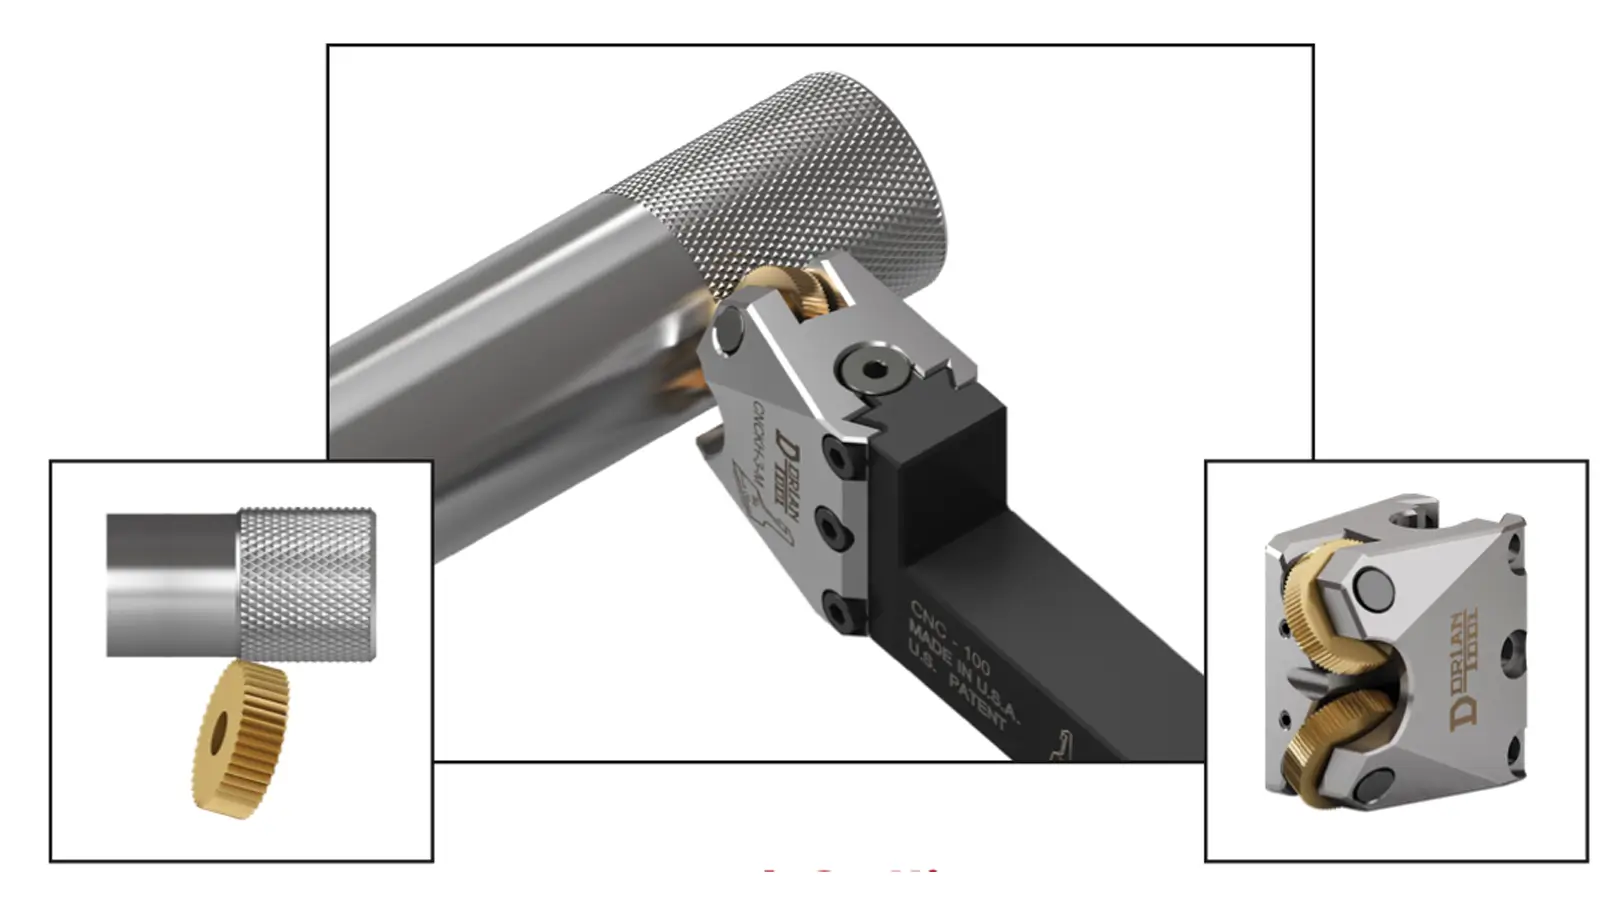
For more information about Knurling Tools, visit our blog:
Types of Knurling Tools and How to Choose the Right One
The quality and functional effect of knurling depend on selecting the correct process parameters. These are grouped into parameters that define the pattern specifications and those that control the machining process.
These parameters define the aesthetics, feel, and grip of the knurl:
The theoretical distance between adjacent teeth, this is the most important knurl parameter.
Representation: TPI (Teeth Per Inch, e.g., 16 TPI), or P (Pitch in mm, e.g. P0.8mm).
Coarse Pitch (8-16 TPl): Large, deep teeth provide maximum grip but feel rougher.
Suitable for heavy-duty tools and valve handwheels.
Fine Pitch (20-40 TPl): Small, dense teeth feel smoother and look finer, but offerslightly less aggressive grip. Suitable for precision instruments and high-end consumerproducts.
Diameter Match (Rule of Thumb): The workpiece diameter (in inches) xTPI shouldapproximately equal an integer to ensure a complete pattern circumference and avoid”ghosting” or “tracking errors.”
Determines the pattern type. 90° is used for diamond and straight knurls (highstrength, general purpose); 30° or 45° is used for diagonal knurls (enhanced aesthetics).
Tooth Profile affects feel and grip.
Standard Profile: Sharp crests provide maximum bite and grip.
Radius/Domed Profile: Rounded crests offer a comfortable, smooth feel and premiumappearance, often used for parts handled directly.
These parameters are set during machining and directly influence quality, tool life, and success rate:
The linear speed of the workpiece surface during rotation.
Form Knurling: Generally low (50-150 SFM / 15-45m/min) to ensure sufficient plastic flow and prevent the tool wheel from slipping.
Cut Knurling: Speed varies by material; soft materials can require higher speeds, while hard materials (such as stainless steel) require lower speeds to minimize tool wear.
The axial movement speed of the knurling wheel along the workpiece.
Form Knurling: The feed rate can be set approximately equal to the pitch. For example,a 16 TPI pitch (≈ 0.0625 inches) might use a feed rate of about 0.060 IPR.
Cut Knurling: Requires a constant, continuous feed to ensure smooth cutting and goodsurface quality. lt is crucial not to stop the feed when machining work-hardeningmaterials.
The depth the knurling wheel is pressed or cut into the workpiece.
Form Knurling: Depth is indirectly controlled by pressure to form a full, clear pattern.
Cut Knurling: Typically involves a single pass to achieve full tooth depth, minimizing multiple cuts that can cause tool wear or work hardening.
Essential for protecting the tool, improving surface quality, and preventing material adhesion.
Form Knurling: Oil or soluble cutting fluid is recommended to reduce friction and prevent material buildup on the wheel.
Cut Knurling: High-performance coolant is mandatory, especially when machining stainless steel and titanium, to maintain tool life and quality.
Knurling Key Parameter Summary Table
| Parameter Category | Parameter Name | Impact on Form Knurling | Impact on Cut Knurling |
|---|---|---|---|
| Pattern Specifications | Pitch | Determines grip and appearance. Must match workpiece diameter. | Determines grip and appearance. Must match workpiece diameter. |
| Pattern Specifications | Tooth Angle | Determines pattern type (straight, diamond, helical). | Determines pattern type (straight, diamond, helical). |
| Pattern Specifications | Tooth Form | Determines feel (standard tooth vs. radiused tooth). | Determines feel (standard tooth vs. radiused tooth). |
| Process Control | Peripheral Speed | Better to use low speed to prevent slipping. | Selected based on material; hard materials require low speed. |
| Process Control | Feed Rate | Approximately equal to the pitch value. | Must be constant and continuous to prevent dwell marks. |
| Process Control | Depth of Cut | Indirectly controlled by pressure to form complete tooth profile. | Usually reaches full tooth depth in one feed. |
| Process Control | Coolant/Lubrication | Recommended to improve surface quality. | Essential for tool life and final quality. |
The overall cost of knurling is influenced by several factors, including the chosen process, tooling, machine requirements, material characteristics, and required precision.
| Process | Cost Profile | Rationale |
|---|---|---|
| Form Knurling | Lower Unit Cost. | This method is fast and chip-less, making it ideal for high-volume production runs. |
| Cut Knurling (Machining) | Higher Unit Cost. | Tooling costs are higher, and machining time is slightly longer. However, it is essential for hard materials and high-precision parts, often reducing machine wear and part scrap rates by ensuring quality. |
High-performance Cut Knurling tools (such as self-centering tools) are generally more expensive. For Form Knurling, if the machine’s rigidity is insufficient to handle the high pressure required, the overall cost may increase due to the need for machine or tooling upgrades.
When machining hard materials (e.g., stainless steel, titanium) or when strict diameter tolerances are required, Cut Knurling must typically be used. This necessity, coupled with stricter quality control measures, will naturally increase the unit manufacturing cost.
Beyond conventional hand tools, electronic devices, and basic assembly, knurling plays a critical role in the following specialized sectors:
Knurling is applied to manual control knobs for gas, liquid, or vacuum systems, faucet handles, and adjustment rods on industrial machinery.
Its function is to ensure operators can quickly and accurately open, close, or adjust the valve even when wearing gloves or when surfaces are wet or oily.
Quick connectors, the outer rings of hose fittings, and some custom sealing nuts feature knurling.
This provides extra friction, allowing technicians to hand-tighten or loosen them for quick installation and maintenance.
Knurling is used on components for quick-adjust jigs, the heads of clamping bolts, or the ends of locating pins. It acts as a friction-enhanced locating element or a surface for quick manual locking.
Beyond micrometers and calipers, knurling is found on the fine-adjustment knobs of height gauges and the locking nuts for dial indicator stands.
This provides the necessary high friction and tactile feel for precision instrument micro-adjustments.
Knurling covers the shells of high-end audio/video connectors (like BNC or RCA heads) and the coupling nuts on military or aerospace plugs.
It allows users to easily plug, unplug, and tighten connectors in dense or cramped wiring spaces, ensuring reliable contact.
Knurling is used on electric guitar volume/tone knobs, tuner shafts, and professional microphone detachable couplings.
This non-slip surface ensures that the artist can precisely control volume and tone during a performance.
Knurling is the classic application for dumbbell and barbell grip bars, as well as the adjustment pins on fitness machines.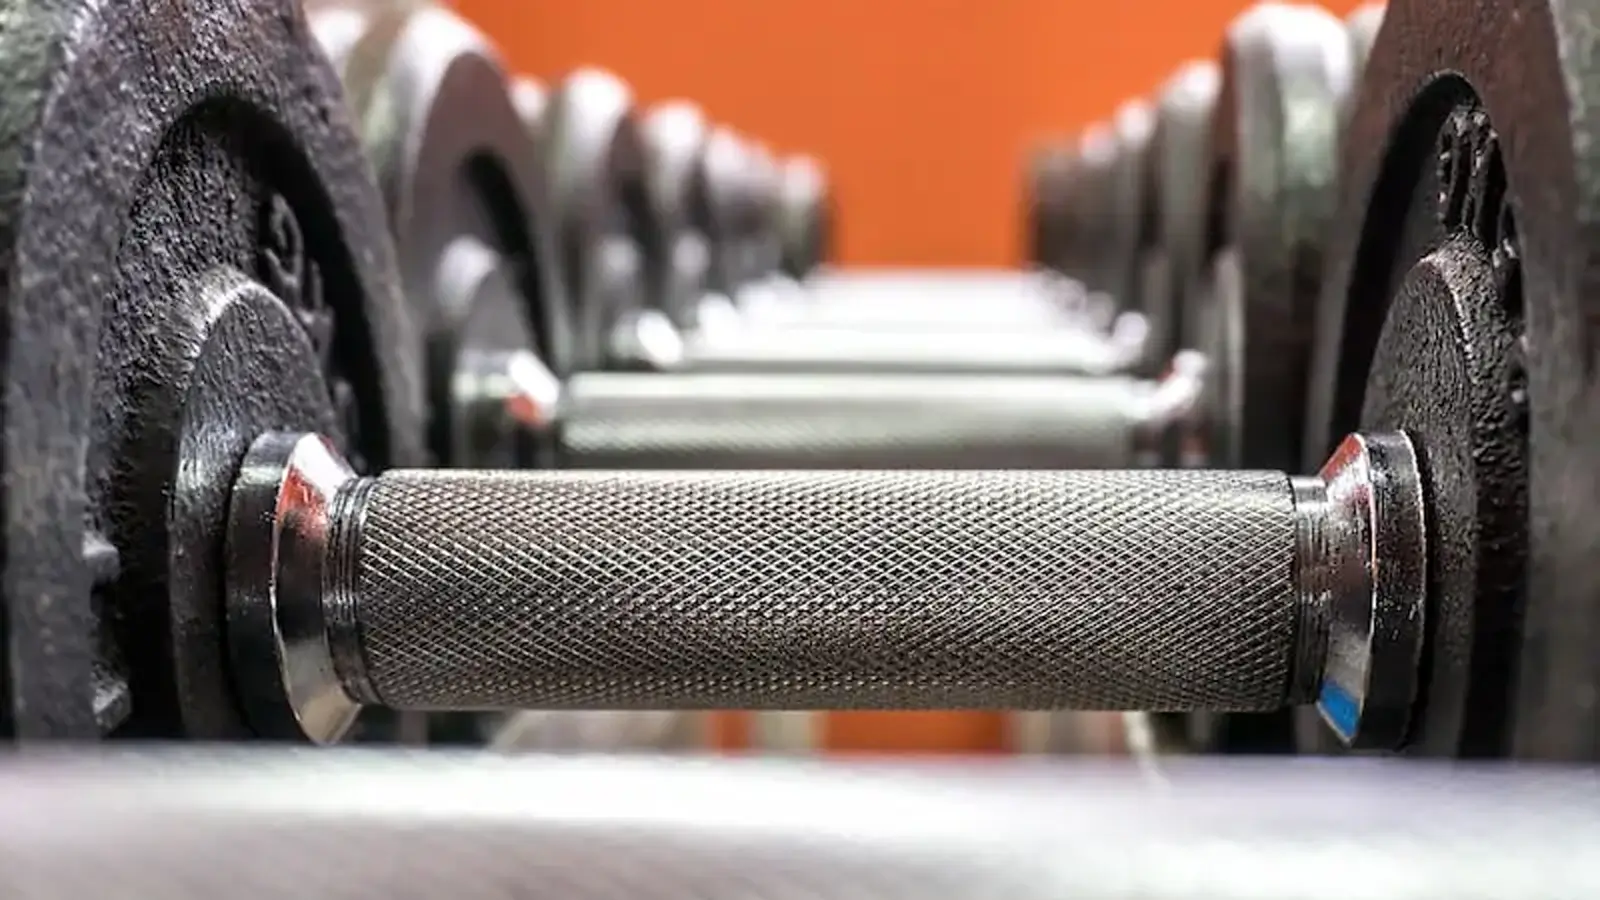
Its function is to provide extreme slip resistance, preventing equipment from slipping and causing injury.
Knurling is applied to the height adjustment locks on crutches and walkers, and the gripping sections of some syringes or sampling tools. This ensures a reliable grip in medical environments where hygiene and precise operation are critical.
Knurled brass or bronze nuts are implanted into plastic casings via heat staking or ultrasonic welding.
The knurl pattern acts as a fixed structure, effectively preventing the nut from rotating or pulling out of the plastic, creating a high-strength thread.
In some designs, knurled pins are permanently pressed into metal or plastic holes, replacing keys or adhesives.
The knurl texture provides mechanical bite, guaranteeing resistance against both pull-out and rotation.
The surface finish of knurled parts is understood in two ways: the microscopic roughness (Ra/Rz) of the texture itself and the final surface treatment (Post-Knurling Finish}) applied afterwards.
The inherent roughness of the knurl texture directly impacts the part’s gripping performance and durability.
Since form knurling relies on the plastic deformation of the material to create the pattern, the surfaces of the tooth crests are typically smoother, resulting in a lower Ra value.
However, the depth and sharpness of the final tooth profile may be less precise than with cut knurling.
Cut knurling uses a sharp edge to remove material.
If the cutting parameters are set incorrectly (e.g., feed rate is too slow or depth is too large), the tooth crests may experience tearing, burrs, or work hardening, leading to elevated localized roughness.
The primary goal of knurling is to provide a reliable grip, so its roughness is generally higher than the part’s mating surfaces.
For example, a knurl on a knob or handle should achieve an Rz value of 10 u m or more to ensure effective gripping force.
Many knurled parts require further treatment after knurling to enhance corrosion resistance, wear resistance, or aesthetic appeal. Common post-knurling finishing methods include:
During the production of knurled parts, controlling the surface finish goes beyond simple visual inspection; strict checks are necessary for the following:
The edges and crests of the knurled teeth must be free of significant burrs or flash, as these compromise tactile comfort and operating safety.
Particular attention should be paid to chip evacuation and deburring when using cut knurling.
A profile projector or microscope should be used to inspect the knurl texture, ensuring the depth and tooth profile meet design specifications.
Defects such as “Ghosting” (overlapping or misaligned patterns) or incomplete tooth formation must be avoided to ensure the knurl is both functional and aesthetically sound.
The quality of knurled parts affects not only grip performance but also assembly precision and aesthetics.
Knurling inspection typically involves three key aspects: reference standards, dimensional control, and visual/tactile evaluation.
Knurling design and inspection usually refer to the following standards:
DIN 82 is the most widely used knurling standard globally. It defines basic knurl types and key dimensional parameters:
Types: RAA (Straight), RBL/RBR (Helical), RKE/RGV (Diamond Pattern)
Key Parameters: Pitch or module
The standard requires that symbols are clearly indicated on design drawings to ensure manufacturers and inspectors correctly understand and implement the design intent.
ISO 13444 provides international guidance for knurl design, dimensioning, and measurement methods.
Although less frequently used than DIN 82, it is valuable for cross-border collaboration and exported parts.
The texture roughness and depth are critical functional indicators for knurled parts. Professional measurement tools are used to ensure accuracy:
Measured from peak to valley, ensuring the texture reaches the designed depth. In form knurling, depth affects grip and radial precision. Common tools: pointed depth gauges, profile projectors.
Even though knurling creates a rough surface, the micro-roughness of the peaks must be controlled. Excessive roughness can impair hand feel or cause tearing in cut knurling. Surface roughness meters or qualitative evaluation ensure consistent texture without burrs.
Especially critical for form knurling. Final knurled diameter is measured using high-precision calipers or micrometers to verify pre-machined diameter and compensate for material expansion during knurling.
Besides precise dimension measurement, visual and tactile inspection ensures both functionality and aesthetics:
Check the knurl pattern for completeness and uniformity. Pay attention to:
Misaligned or overlapping patterns due to wheel-workpiece speed mismatch.
Starting or ending texture not fully formed or inconsistent in depth.
Sharp edges or flying debris can affect grip and safety.
Inspectors feel the knurled area to assess grip adequacy, comfort, and the absence of sharp burrs. While subjective, tactile assessment is crucial for ergonomic performance.
Designing knurled parts requires balancing functionality, manufacturability, and tolerance control to ensure parts are both practical and visually appealing.
| Design Element | Consideration | Human-Centered Guideline |
|---|---|---|
| Pattern Type | Functional Requirement | – Maximum grip: Diamond Knurl – Anti-rotation only: Straight Knurl – Aesthetic/Comfort: Fine or medium pitch |
| Knurling Length | Efficiency & Aesthetics | Avoid chamfers, grooves, or transitional fillets. Clearly define start and end. Cover the hand-grip area. |
| Workpiece Diameter | Prevent Tracking Errors | Knurled diameter should be an integer multiple of the chosen module/pitch. |
| Knurling Relief / Margin | Tool Entry & Burr Prevention | Leave a 0.5–1 mm unknurled margin at both ends to allow smooth tool exit and avoid end defects. |
| Material Selection | Process Matching | – Soft materials (Al, Cu): Prefer Form Knurling – Hard materials (SS): Must use Cut Knurling |
Knurled area tolerances mainly involve diameter and concentricity, chosen according to the intended function and knurling method.
A. Diameter Tolerance
| Knurling Type | Tolerance Type | Key Points |
|---|---|---|
| Form Knurling | Wider | Due to material expansion, OD may fluctuate ±0.1–0.2 mm. Pre-machined diameter requires negative tolerance compensation. |
| Cut Knurling | Tighter | Minimal OD change, can achieve ±0.05 mm or less. Suitable for assembly-critical parts. |
B. Form & Position Tolerances
| Tolerance Type | Importance | Recommended Value / Notes |
|---|---|---|
| Coaxiality | Knurled region must align with part axis, especially for high-speed rotating components | ≤ 0.05 mm to prevent wobble or eccentricity |
| Cylindricity | Ensure uniform cylindrical shape along knurled length | ≤ 0.05 mm (as per drawing) |
| Burrs & Defects | Ensure comfort and safety | Drawing should prohibit sharp burrs or incomplete patterns (ghosting), especially on hand-held components |
Drawings must clearly indicate knurl type (per DIN 82 or ISO standard), module/pitch, final diameter tolerance, coaxiality, and burr requirements.
Here is a systematic guide to diagnosing common knurling problems, practical solutions, and methods to improve surface quality.
| Issue | Possible Causes | Professional Solutions |
|---|---|---|
| Burrs |
|
|
| Pattern Distortion / Ghosting |
|
|
| Unclear Texture |
|
|
| Rough Surface |
|
|
Achieving a high-quality knurled surface is a systematic process that involves selecting the appropriate process, optimizing parameters, and performing secondary finishing.
Process Choice:
For applications requiring high surface quality and precision, cut knurling is generally preferred because it can provide superior surface finish compared to form knurling.
Parameter Optimization:
Select appropriate feed rate and spindle speed based on the material, and ensure sufficient high-performance coolant is used.
Secondary operations are key to enhancing the final appearance and feel of knurled parts:
Deburring:
Almost always required after form knurling. Methods include vibratory finishing, tumble polishing, wire brushing, or manual scraping to remove burrs from peaks and edges, ensuring safety and comfort.
Light Polishing:
For decorative parts, a soft polishing wheel can be used to gently polish the peaks for a smooth, shiny finish, taking care not to distort the knurl pattern.
Regardless of whether form or cut knurling is used, sharp tools, optimized parameters, and effective cooling are the three pillars of achieving high-quality knurled surface finishes.
Knurling adds functional and decorative textures to smooth surfaces, improving grip, enabling secure fits, and enhancing appearance. The two main methods—form and cut knurling—are chosen based on material, precision, and production needs.
This guide covers suitable materials, tools, process parameters, post-processing (deburring, polishing), design guidelines, and standards (DIN 82, ISO 13444) to prevent defects.
Applications range from hand tools and machinery to electronics, medical devices, and sports equipment. By following best practices, manufacturers can produce knurled parts with consistent texture, precise dimensions, and high-quality surfaces.
Most metals can be knurled, but medium-hard materials like aluminum, brass, stainless steel, and mild steel work best.
Very soft materials (e.g., pure copper) may deform, while extremely hard ones (e.g., hardened steel) can wear down the knurling tool quickly.
Yes. We can customize the pattern type (straight, diamond, etc.), pitch, depth, and angle based on your requirements.
If you provide a sample or drawing, we can replicate the exact pattern.
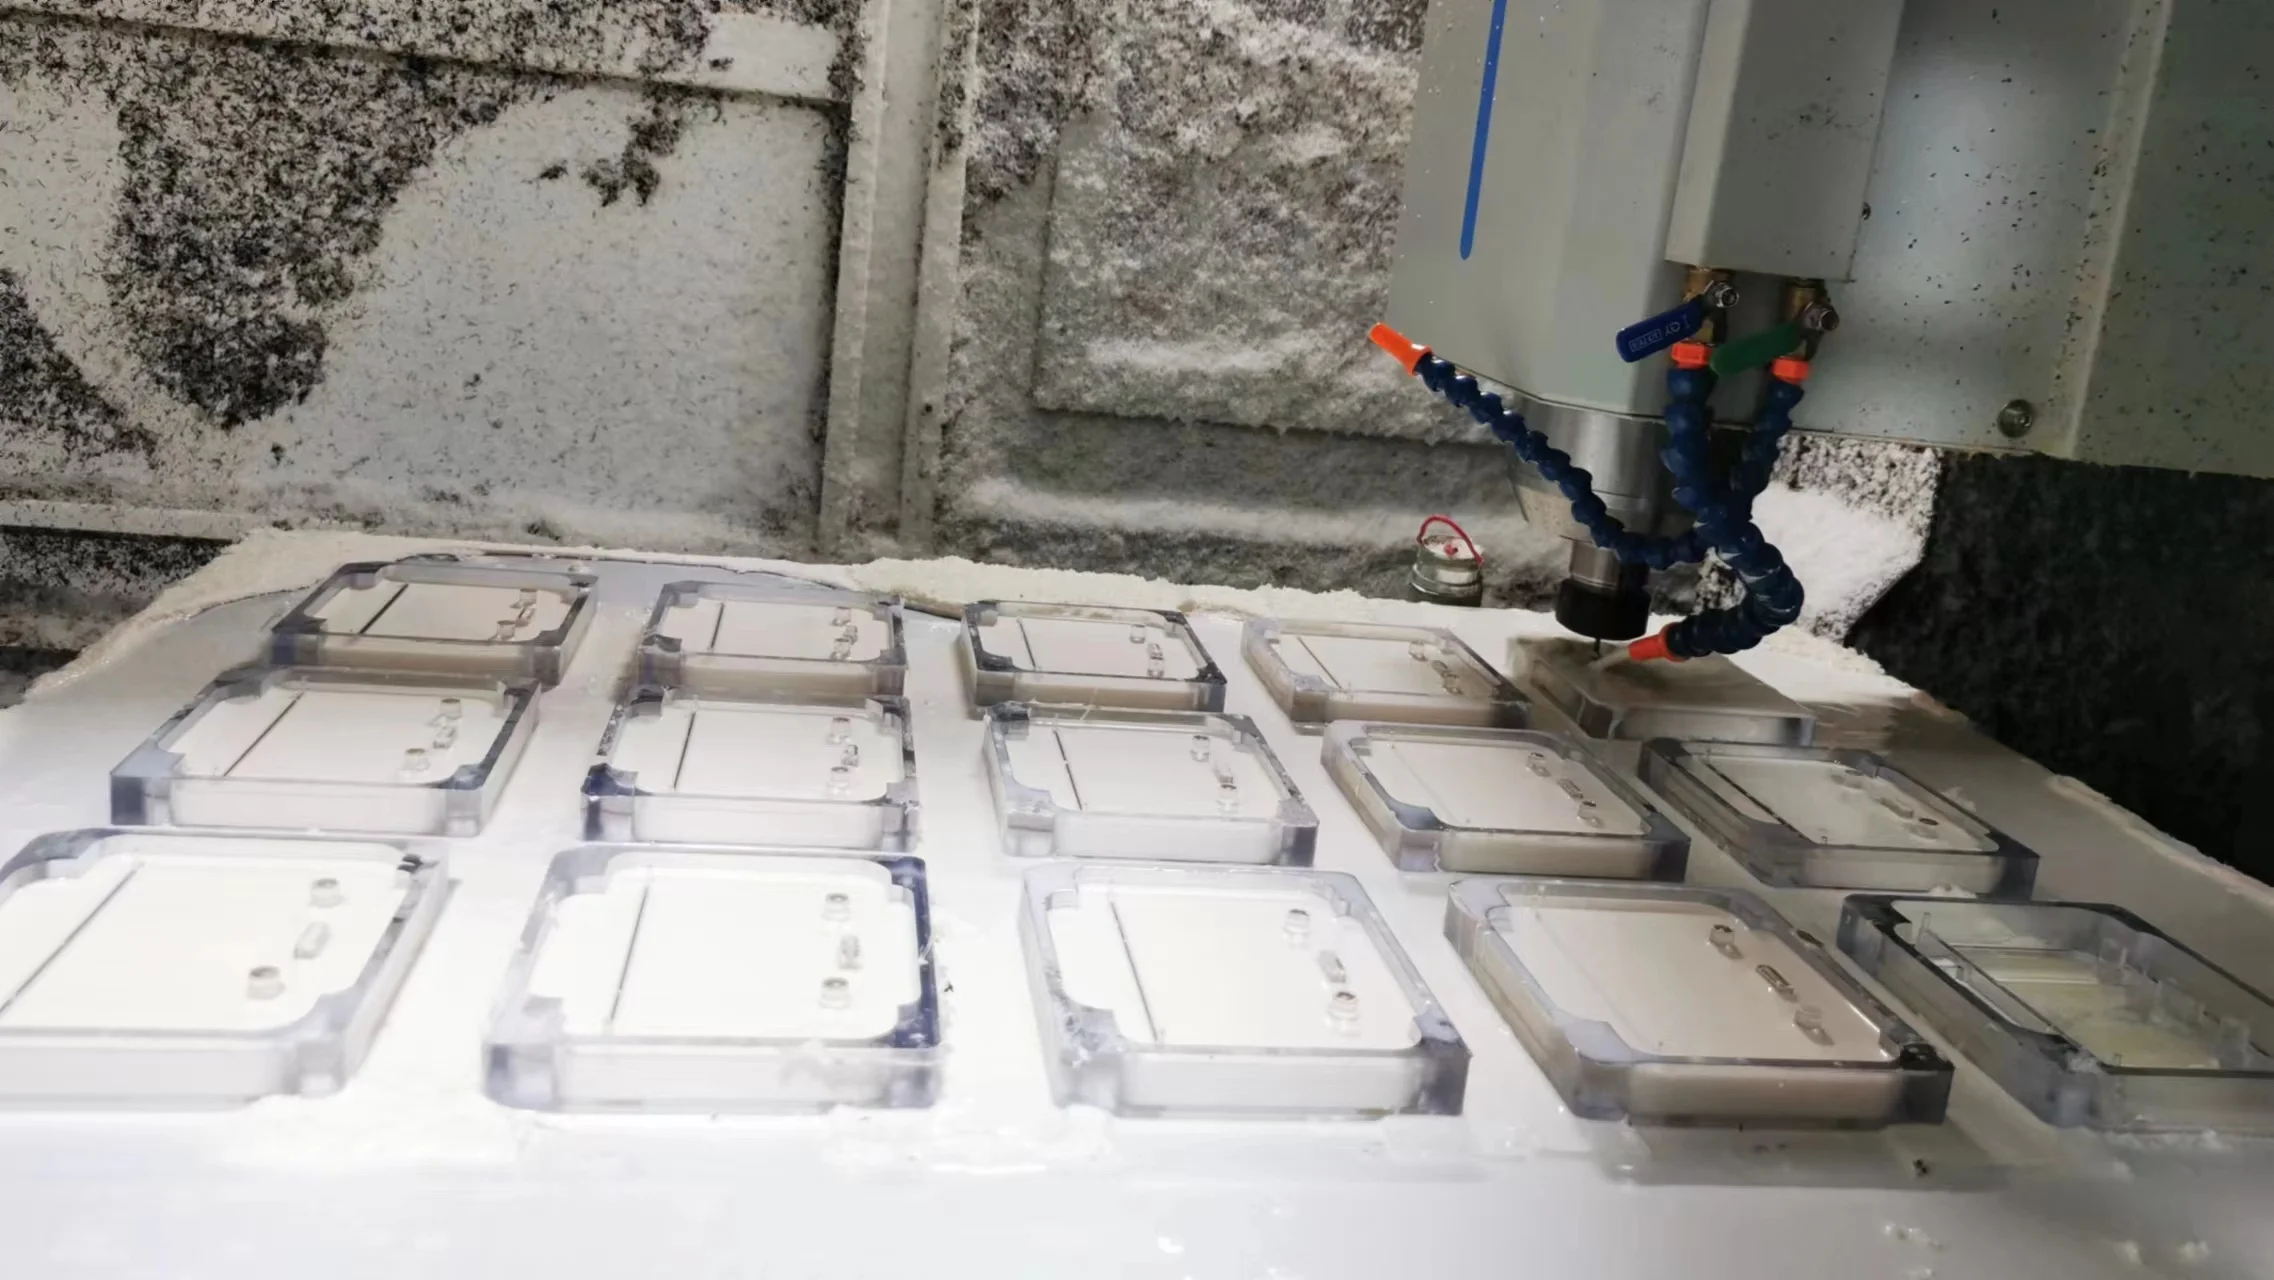
CNC knurling offers higher precision, more consistent texture, and better repeatability, ideal for large-scale production.
Traditional manual knurling is slower and less consistent.
For high-quality industrial components, CNC knurling is the superior choice.
Check more about: CNC Knurling vs Conventional Knurling: Key Differences, Features, and How to Choose
A standard knurling note includes:
Pattern type (e.g., Diamond)
Pitch (e.g., 1.0 mm or 30 TPI)
Angle (e.g., 30°)
Knurled area dimension
Example: KNURL, DIAMOND, 1.0 PITCH × 30°, LENGTH 20mm
This mainly depends on your production volume, material, and precision requirements.
If you are creating prototypes or small batch production (within a few hundred pieces) and the material is soft metals like aluminum or brass, traditional form knurling is a cost-effective and efficient choice, offering fast speed and low cost.
For large batch production (thousands of pieces), harder materials (like stainless steel), or when precise fitting with other components is required, CNC cut knurling is the better option, ensuring every piece is identical and free of burrs.
Burrs are typically caused by the inherent nature of the form knurling process or tool wear. This is a common issue. To avoid it, we can take the following measures:
Process Optimization: For parts where feel and appearance are critical, we recommend using CNC cut knurling, which prevents burrs caused by material displacement at the source.
Add Post-Processing: If form knurling must be used, we will add a deburring step after machining, using vibratory tumbling or manual polishing to ensure smooth, non-abrasive edges.
Ensure Tool Sharpness: We strictly adhere to tool inspection and replacement protocols to ensure sharp knurling wheels are always used.
Yes, absolutely! Many plastics (like Nylon, POM) are suitable for knurling. Our solution is:
Use Low-Pressure Process: We use optimized form knurling with minimal pressure to create the texture without causing cracking or deformation.
Control Heat: Plastics are susceptible to melting from heat, so we use low RPM and ample cooling to prevent friction heat from damaging the part.
Conduct Sample Testing First: Before mass production, we will produce samples using your plastic material to ensure the texture effect and strength meet your expectations.
This is a classic press-fit (interference fit) application. To ensure connection strength, focus on these design aspects:
Clearly Specify the Final Diameter: The drawing must clearly indicate the final diameter after knurling and its tolerance. Our engineers will use this dimension to precisely calculate the interference for the press-fit.
Recommend Cut Knurling: For this application, we strongly recommend CNC cut knurling. It provides precise control over the final diameter with minimal variation, ensuring consistent holding force for every part.
Provide Relief Areas: It’s advisable to leave a 0.5-1mm smooth area (relief groove) at both ends of the knurled section. This prevents material from being displaced and forming raised edges at the ends, which can interfere with assembly.
Yes, your stainless steel parts absolutely can be knurled, but they require a specialized approach.
Materials like 304 stainless steel are very hard and prone to work hardening (they get harder as we machine them).
Trying to squeeze them (Form Knurling) often results in tool failure or an unclear pattern.
We must use a precise, slicing action with specialized tools and parameters to aggressively cut the pattern.
This ensures the knurl is clear, deep, and won’t crack, guaranteeing a durable and functional texture for your high-strength component.
Related blog:
Cut Knurling is for Precision; Form Knurling is for Speed: Choose cut knurling when dimensional accuracy is critical, as it doesn’t change the workpiece diameter.
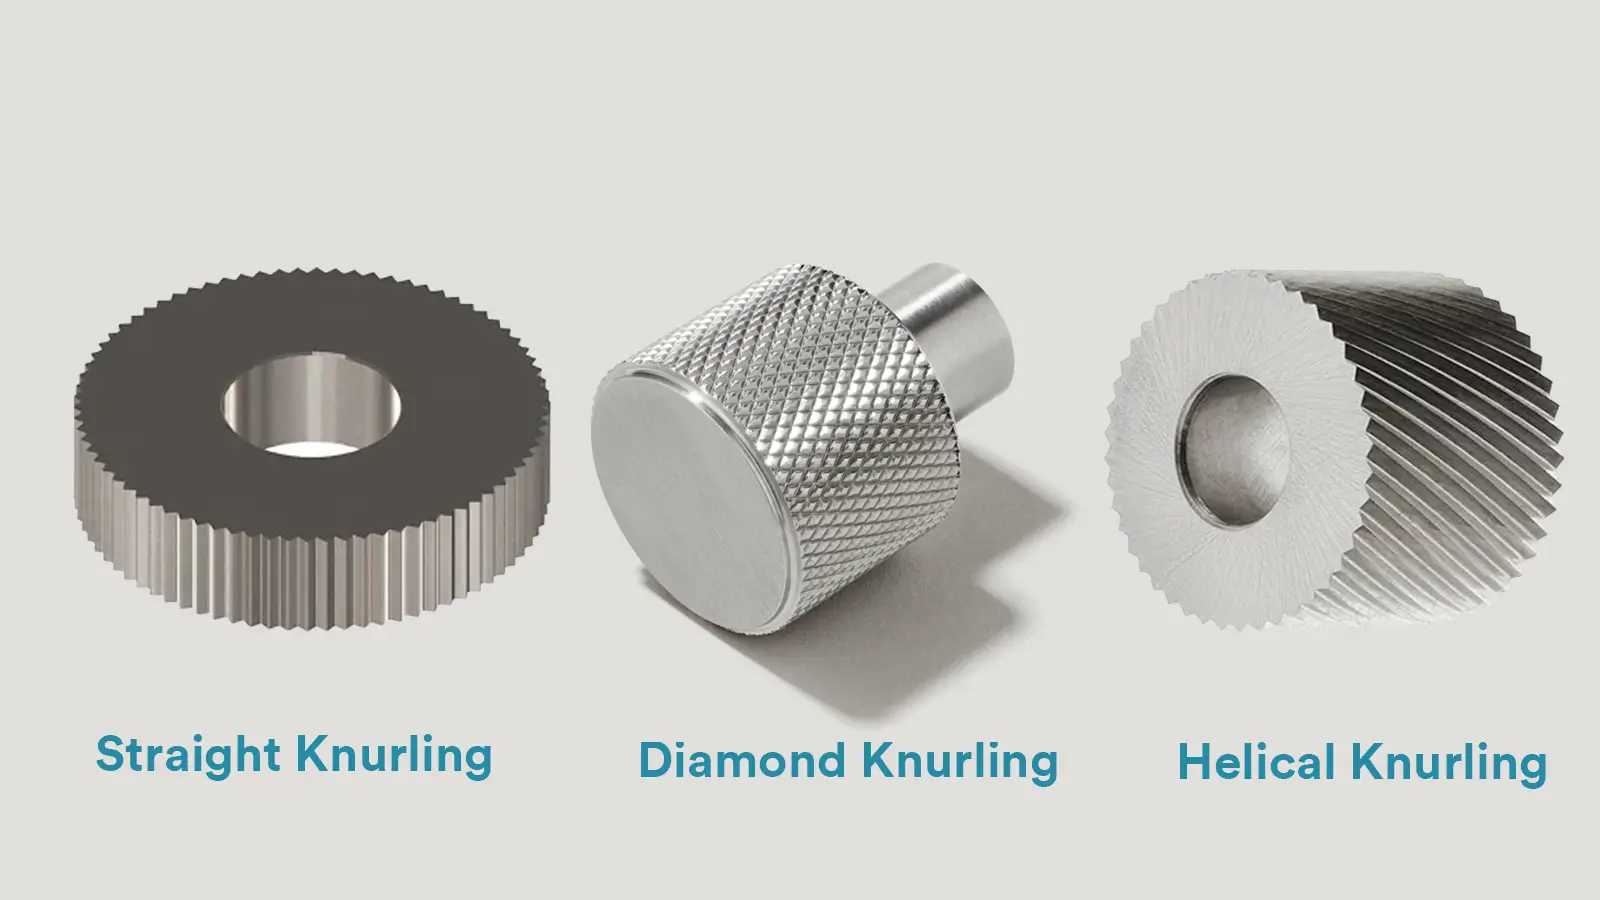
The most common types of knurling textures are Straight Knurling, Diagonal (Helical) Knurling, and Diamond Knurling.
For high-precision, repeatable results in medium to large batches, CNC knurling is unmatched.
Form knurling tools excel in high-volume production for efficiency, while cut knurling tools provide accuracy for tight tolerances.