Are you looking for a reliable vacuum casting rapid prototyping service? Vacuum casting is an ideal solution for creating high-quality prototypes that closely mimic final production parts.
In a recent automotive project, vacuum casting enabled the delivery of 15 functional prototypes within two weeks, closely matching production specifications.[ARRK, Rapid Prototyping Guide, 2023]
To ensure quality and timely delivery, it is recommended to work with verified suppliers.
Examples include ISO-certified rapid prototyping companies or those recognized in industry reports.
These suppliers can provide professional support throughout the process, from design to finished prototype.
Key Takeaways:
Vacuum casting for rapid prototyping is a flexible molding process that reproduces high-quality plastic or rubber parts from a master model, typically created through 3D printing or CNC machining.
Using silicone molds and vacuum pressure, it eliminates air bubbles and ensures excellent surface finish and accuracy.
This technique is widely used for functional testing, design verification, and small-batch production.
It allows engineers to evaluate form, fit, and performance before investing in expensive injection molds, making it an efficient bridge between prototyping and mass production.
Vacuum casting delivers high-quality prototype parts quickly and affordably, making it ideal for low-volume production.
It ensures smooth surfaces, excellent dimensional accuracy up to ±0.05 mm, and reliable repeatability.
With flexible material choices and short lead times of about 7–15 days, it bridges the gap between prototype testing and full-scale manufacturing, helping designers validate both function and appearance efficiently.
These benefits make vacuum casting ideal for prototypes and low-volume production runs requiring production-like quality at an affordable cost, while allowing flexibility in materials, design iteration, and functional testing.
vacuum casting provides high-quality, durable parts with excellent surface finish, making it suitable for producing small to medium batches with consistent results; meanwhile, 3D printing excels in rapid prototyping and complex geometries but may face limitations in material strength and surface smoothness.
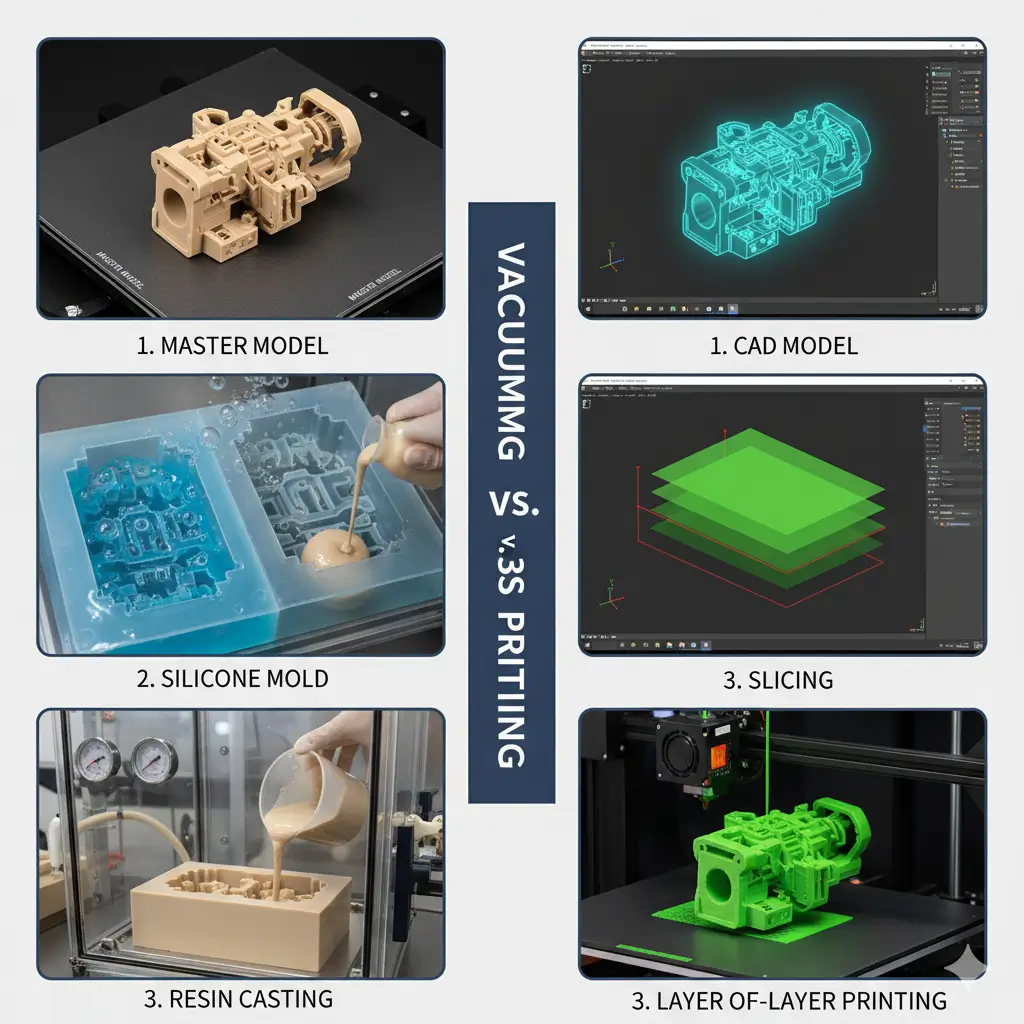
Vacuum casting typically involves molds made from silicone or similar materials, offering a cost-effective approach for limited runs, whereas 3D printing uses additive layer-by-layer fabrication, allowing for quick design modifications but potentially higher per-unit costs for larger quantities.
Overall, vacuum casting is favored for precision and finish in production, while 3D printing is more suited for fast iteration and complex design exploration.
Yes, you can get production-like prototypes in a few weeks using vacuum casting. The process typically takes about 10 to 15 days from master model creation to final cast parts. Vacuum casting produces high-quality replicas with tight tolerances, smooth finishes, and material properties close to production plastics, making it ideal for rapid prototyping and small-batch production before mass manufacturing.
Materials commonly used in vacuum casting include:
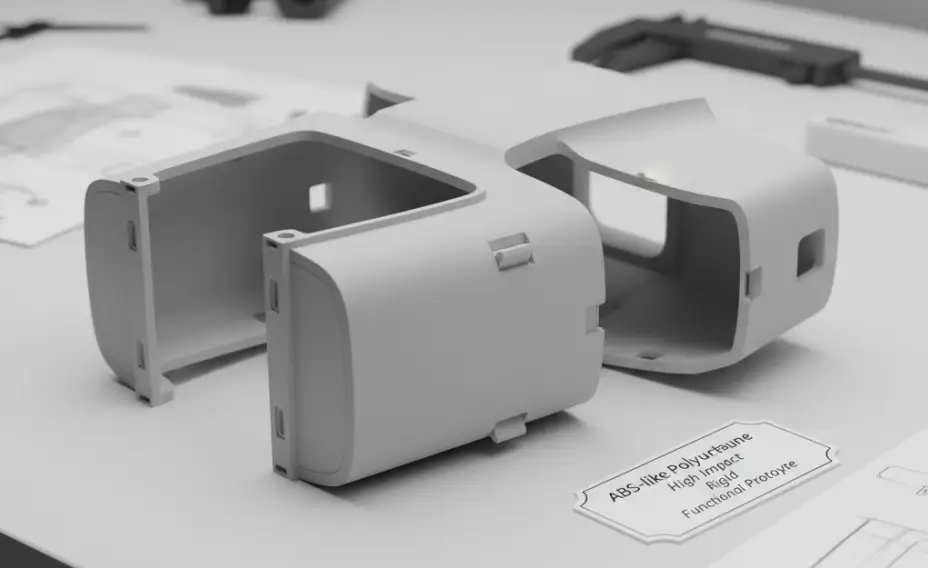
These materials replicate the mechanical properties, surface finishes, and durability of production plastics. Soft-touch elastomers and rubber-like materials expand the versatility for flexible components.
Material Selection Guidelines:
Vacuum casting supports a broad range of materials to match diverse design requirements, making it ideal for functional prototypes, aesthetic models, and small-batch production.
Selecting the right material based on part function, environmental conditions, and mechanical requirements ensures prototypes are reliable and representative of final production parts.
| Step | Key Actions | Typical Duration | Tools / Materials | Tips / Notes |
|---|---|---|---|---|
| 1. Create Master Model | 3D print or CNC machine master; smooth surfaces | 1–2 days | 3D printer or CNC machine, sandpaper, release agent | Apply thin release agent on complex areas for easy demolding |
| 2. Make Silicone Mold | Pour silicone over master in mold box; degas in vacuum chamber | 1–2 days (curing 8–24h) | Silicone, mold box, vacuum chamber | Pour slowly from one corner to reduce air entrapment |
| 3. Prepare for Casting | Remove master, mix & degas resin, add color if needed | 0.5 day | Casting resin (polyurethane), pigments, vacuum chamber | Degas under vacuum 3–5 min to minimize micro-bubbles |
| 4. Pour Resin in Vacuum | Pour resin into silicone mold inside vacuum chamber | 0.5 day | Vacuum chamber, silicone mold | Pour continuously along one edge to avoid air pockets |
| 5. Cure and Demold | Cure resin at elevated temperature; remove, trim, finish | 1–2 days | Oven (optional), cutting tools, sandpaper, paint | Flex silicone mold slightly when demolding; follow resin curing temperature |
Choosing depends on required strength, flexibility, clarity, heat resistance, and application.
Vacuum casting supports a broad spectrum of materials to closely simulate production plastics.
Choose Vacuum Casting if you need small batches (5-100 parts) of high-quality prototypes with production-like material properties, smooth surface finish, and durability.
It is best for functional testing, design validation, and pre-production runs but has a longer lead time (about 1-2 weeks) due to mold making.
Choose 3D Printing for rapid prototyping of one-off or complex geometries with fast turnaround (hours to days).
It excels at customization and quick iteration but typically produces rougher surfaces and parts with lower strength compared to vacuum casting.
| Aspect | Vacuum Casting | 3D Printing |
|---|---|---|
| Batch Size | Small to medium (5-100 parts) | One-offs or very low volume |
| Material Properties | Production-like, durable parts | Limited strength, rough finish |
| Surface Finish | Smooth, detailed | Visible layer lines, rough |
| Lead Time | 1-2 weeks | Hours to days |
| Complexity | Limited by mold design | Complex and intricate |
| Cost Efficiency | Low cost for batches | Cost-effective for single parts |
For small to medium batches—around 10 to 50 parts—requiring functional testing and production-like quality, vacuum casting is often preferred.
Meanwhile, 3D printing is well-suited for single custom prototypes or highly intricate geometries that benefit from rapid design iterations.
Both methods have their strengths, so choosing between them depends on factors such as batch size, design complexity, timeline, and required material properties.
Following these steps ensures you partner with reliable vacuum casting manufacturers like ECOREPRAP who provide quality, speed, and material versatility for prototyping and small batch production.
Yes, vacuum casting can handle complex geometries, including intricate shapes and fine details.
However, it has some limitations with very thin walls, highly complex internal structures, and ensuring uniform resin flow in molds.
Silicone molds have a limited lifespan, which can affect precision over multiple uses.
In general, vacuum casting is suitable for many complex designs but may require careful mold design and process control to avoid defects.
You can typically receive vacuum casting prototypes within 7 to 15 days. This includes the time to create the master model, produce the silicone mold, and cast the parts.
The exact lead time depends on the part complexity, batch size, and finishing requirements.
Vacuum casting offers a fast and cost-effective solution for small batch prototyping compared to other methods.
So, yes, vacuum casting can handle very low minimum orders, even single prototypes, making it ideal for rapid prototyping and low-volume production.

5-Axis CNC machining is a manufacturing process that uses computer numerical control systems to operate 5-axis CNC machines capable of moving a cutting tool or a workpiece along five distinct axes simultaneously.

China is the best country for CNC machining service considering cost, precision, logistic and other factors. Statistical data suggests that China emerges as the premier destination for CNC machining.

Selecting the right prototype manufacturing supplier in China is a critical decision that can significantly impact the success of your product development project.

Machining tolerances stand for the precision of manufacturing processes and products. The lower the values of machining tolerances are, the higher the accuracy level would be.