Home » Blog » 3 Axis CNC Milling Machine: What You Need To Know?

3 Axis CNC Milling Machine: What You Need To Know?

By Lucas Lo | Updated: June 13, 2024

With a 3-axis CNC milling machine, by moving the cutting tool in three directions – left and right (X-axis), front and back (Y-axis), and up and down (Z-axis) – it is possible to manufacture complex parts with great precision.

In this article, we’ll take an in-depth look at how these machines work, the various types, and their benefits.
 

What Is A 3 Axis CNC Milling Machine?

A 3-axis CNC milling machine is like a robotic sculptor it can move the cutting tool in three directions – left and right (X-axis), front and back (Y-axis), and up and down (Z-axis).
 
This ability to move in three different ways allows it to accurately cut, shape, and sculpt materials into intricate designs and parts.
 
Just as a sculptor can carve intricate details into a statue, the machine can produce fine parts with high precision.
 
In a 3 Axis CNC milling machine, the three axes refer to the directions the cutting tool can move:
X-axis: Moves left to right.
Y-axis: Moves front to back.
Z-axis: Moves up and down.
 
3 axis

How Does A 3 Axis CNC Milling Machine Work?

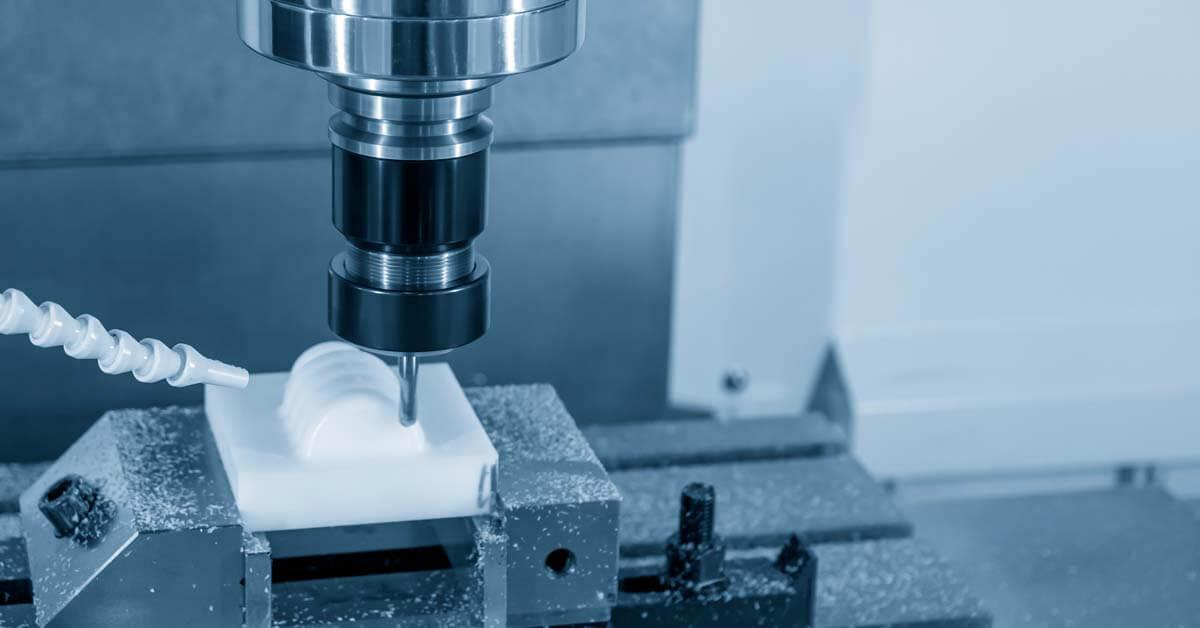
Simply put, a 3-axis CNC milling machine is a machine that automatically engraves. Take a look at how it works.

Step 1: Design Components

Design the desired part using CAD (Computer Aided Design) software such as AutoCAD, SolidWorks, and Fusion 360.

Accurately mark all dimensions, tolerances, material specifications, and features, and then use the software to create a detailed 3D model of the part.

Specific example: Design a custom gear in Fusion 360. Set the outside diameter to 100 mm, and the inside diameter to 50 mm, and add 20 teeth with a specific tooth shape.

Step 2: Convert Design to Code

Use CAM (Computer Aided Manufacturing) software to convert the design into a language that the machine understands, such as Mastercam, and Fusion 360 CAM.

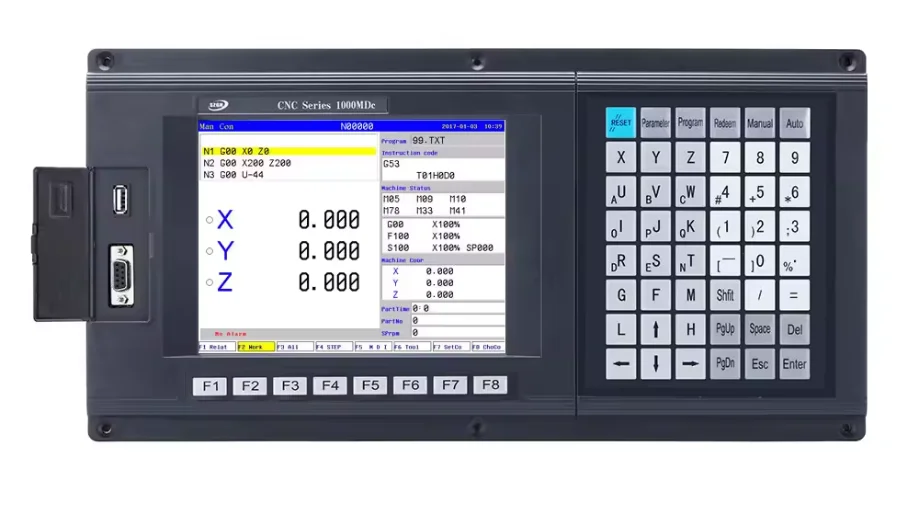
This step generates G-code, which is essentially the instruction set for the machine. Pay attention to the following names and parameters:

  • Toolpath: Defines the path of the cutting tool.
  • Cutting Speed (S): Typically measured in RPM (revolutions per minute).
  • Feed Rate (F): The rate at which the cutting tool moves through the material, in millimeters per minute.
  • Depth of Cut: The depth of each cut of the tool into the material.

Example: In Mastercam, generate a toolpath for a gear with a spindle speed of 1500 RPM, a feed rate of 300 mm/min, and a depth of cut of 2 mm.

Related reading: 4 Axis CNC Machine: The Complete Guide in 2024

Step 3: Set up the machine

Before the machine starts cutting, you’ll want to check the table and the material to make sure there’s no debris in the way.

In addition to this, you will need to set up the instrument. This includes securing the raw material (e.g., a metal or plastic block) to the machine’s table and making sure everything is perfectly aligned.

For the material setup, you’ll want to decide whether to use a vise or jig to hold the material in place. For the alignment tool, you’ll want to consider whether to use a dial indicator or an edge finder.

Example: Use the fixture to secure a 150 mm x 150 mm aluminum block to the table. Use a micrometer to check flatness and an edge finder to determine the position of the material edge relative to the machine’s zero point.

3 Axis CNC Milling Machine Work
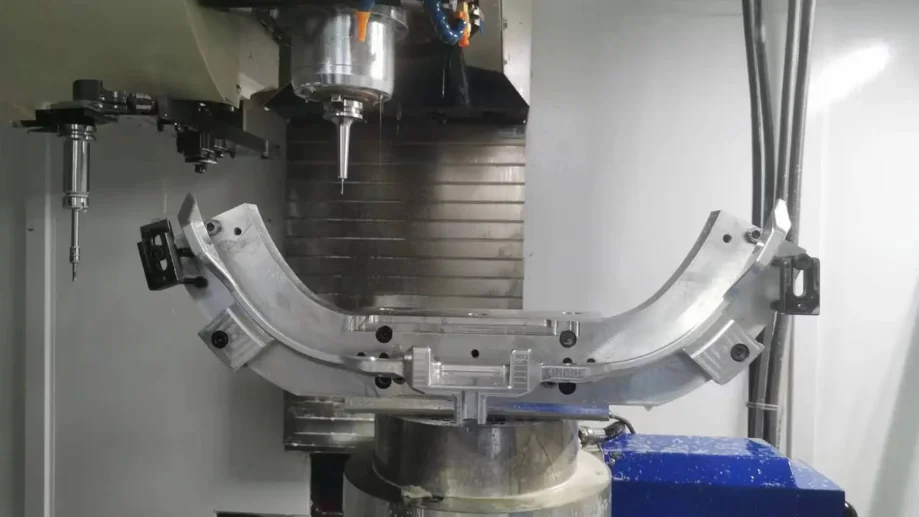
Step 4: Execute the milling process

With the design ready and the material in place, the machine starts working. It then follows G-code instructions to move the cutting tool along the X, Y, and Z axes to remove material and shape the part.

This is done as follows:

  • Machine Initialization: Power on the machine and set all axes in place to set the starting position.
  • Load G-Code: Transfers a G-code file to the machine controller via USB or network.
  • Start Run: Begin the milling process and monitor the initial cut to ensure accuracy.

Example: Load the G code for the gear into the machine, set the spindle speed to 1500 RPM, and start the cutting sequence. The machine first cuts the OD, then the ID, and finally the gear teeth.

Step 5: Monitor and Adjust

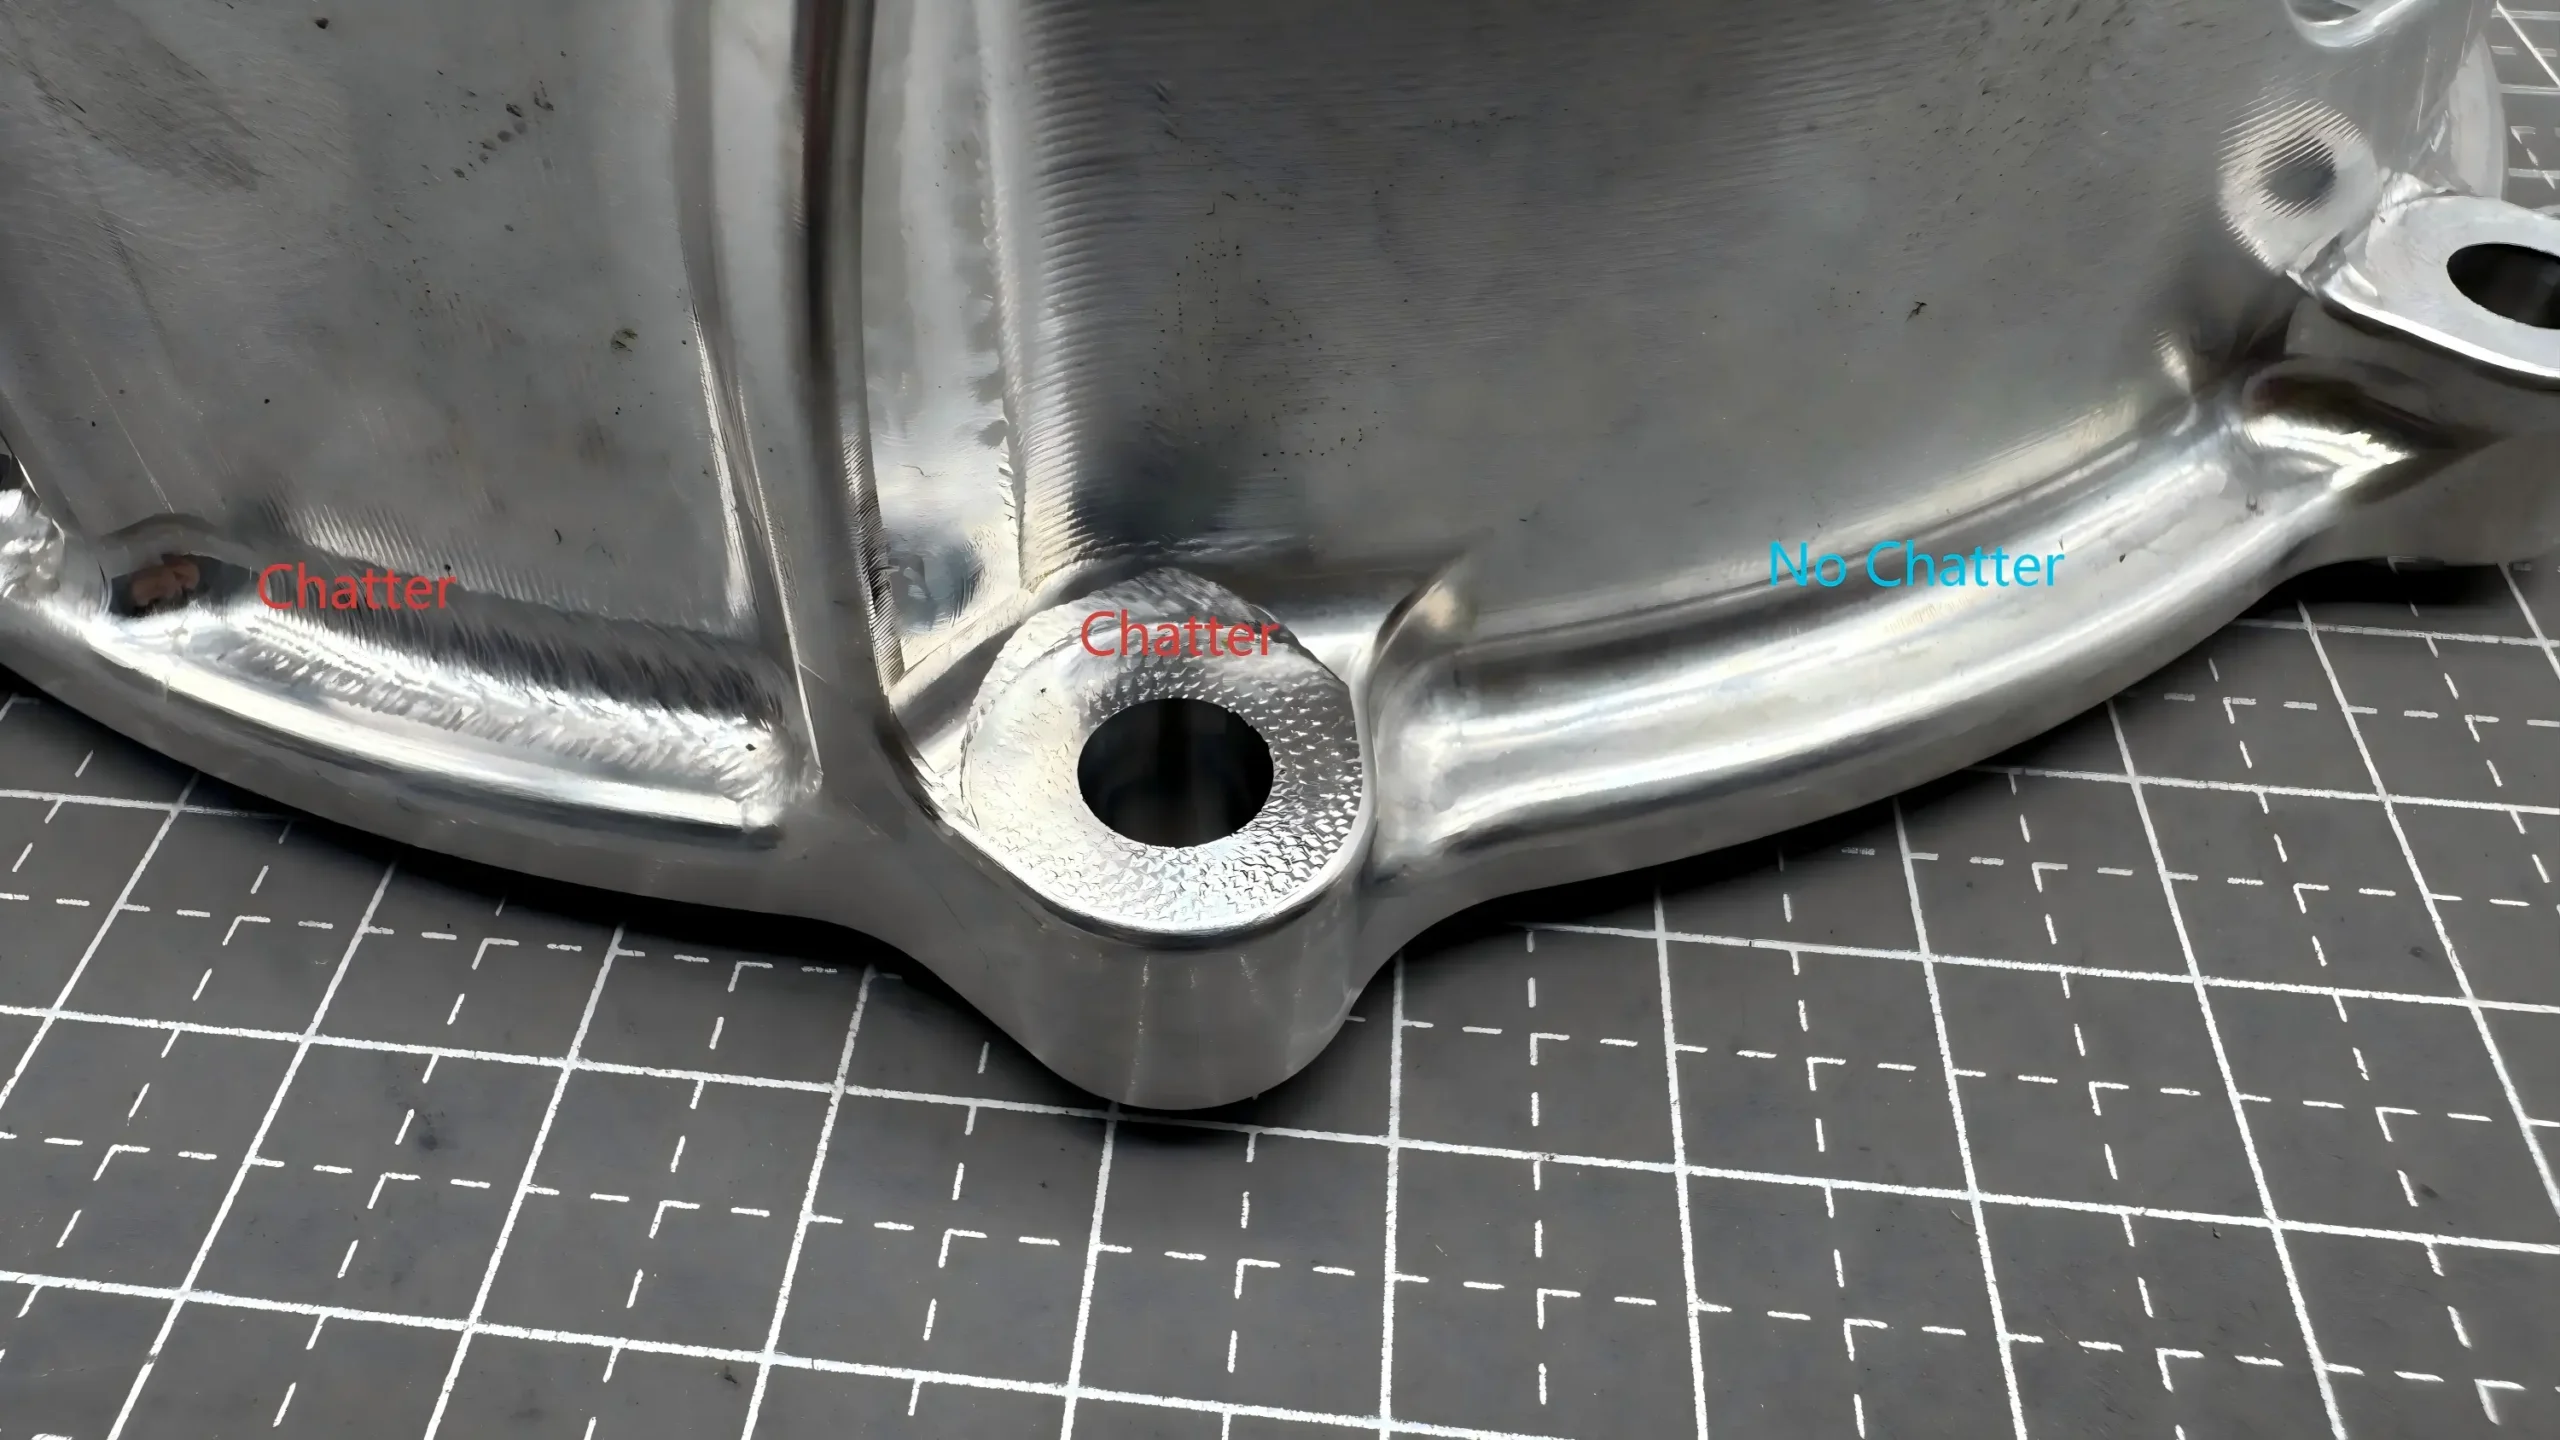
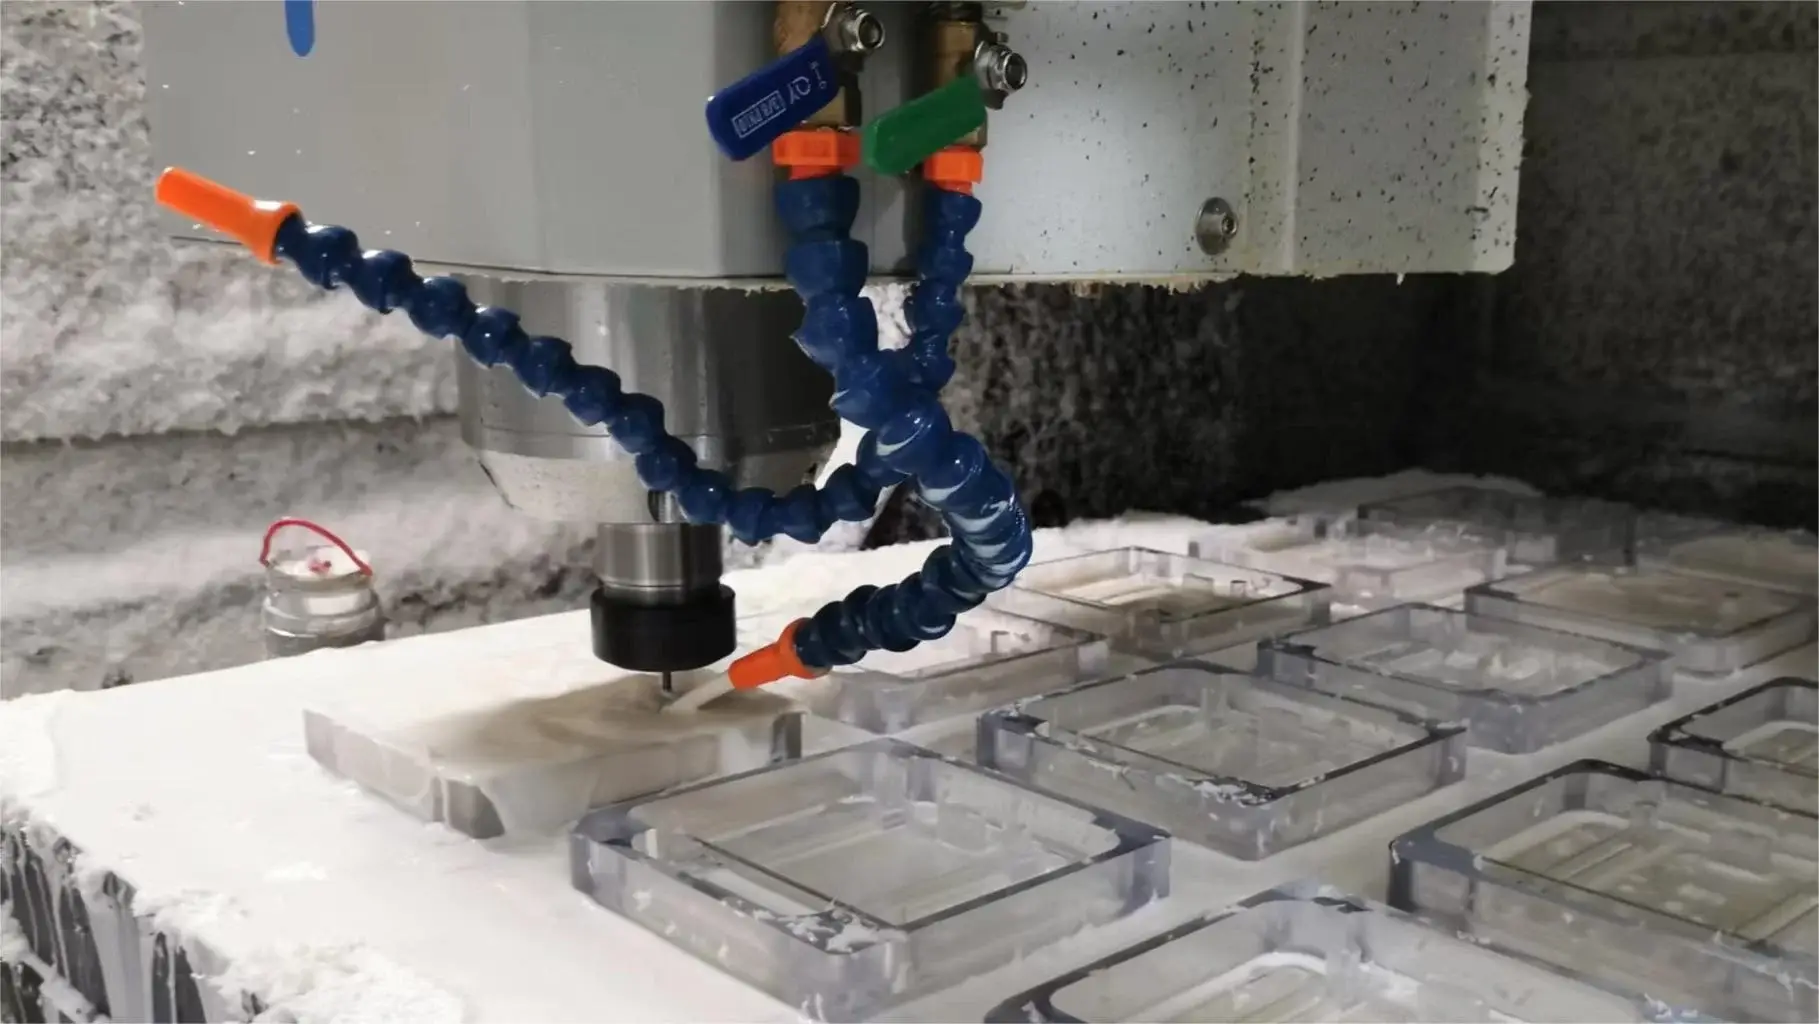
Throughout the milling process, operators monitor the machine to make sure everything is running smoothly. They make adjustments as needed to maintain accuracy and prevent errors.

Monitoring tools can be used to monitor real-time data from the control interface in real-time, primarily through visual inspection, and make adjustments based on problems.

For example, if the machine is tight, adjust the feed rate or spindle speed. Pause operation to remove chips or debris if necessary. Use coolant to prevent overheating and improve cutting efficiency.

Example: If the tool is tight, reduce the feed rate from 300 mm/min to 250 mm/min. Apply coolant to the cutting area to maintain optimum temperature.

Step 6: Finishing

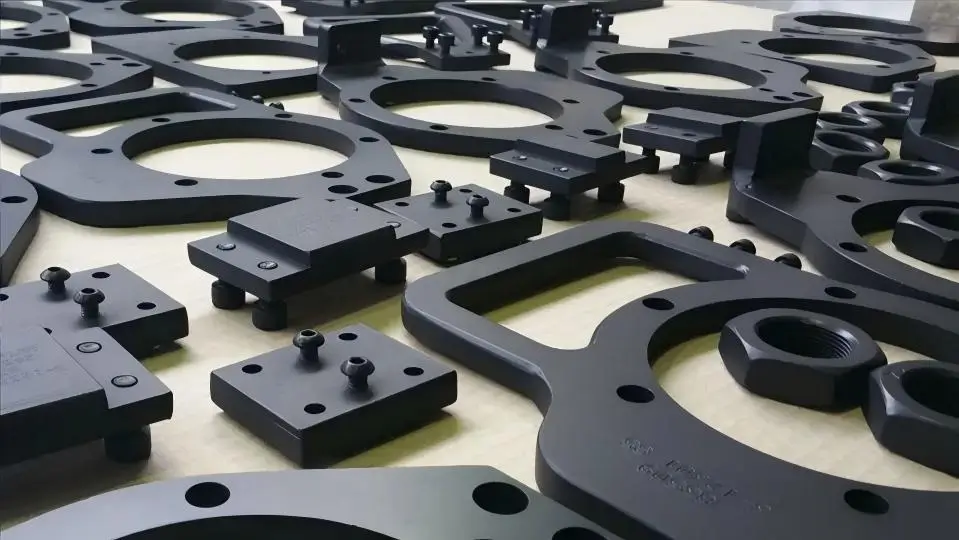
After the milling is complete, the part is usually subjected to additional processes such as polishing, cleaning, or coating to achieve the final finish.

The following operations are mainly performed:

  • Deburring: Use a file or deburring tool to remove sharp edges or burrs.
  • Polishing: Use sandpaper or polishing wheels to smooth the surface.
  • Clean: Clean the part to remove cutting fluids or debris.
  • Coating: Apply protective coatings as needed, such as anodizing aluminum parts.

Example: After milling, deburr the edges of gears with a fine file, polish the surface with 600-grit sandpaper, clean with isopropyl alcohol, and apply an anodized coating for durability.

3 Axis CNC Milling Machine Work

What Are The Types Of 3 Axis CNC milling Machines?

Take a look at the different types of 3-axis CNC milling machines, their differences, and the types of production they are used for. This will make it easier for you to find the best tool for what you want to machine.
 
Vertical milling machine: The cutting tool is mounted vertically with a spindle that moves up and down. It is ideally suited for making small, complex parts with fine engraving on the surface. Specifically, it can be used for custom gears, precision electronic components, and engraved signs or plaques.
 
Horizontal milling machine: The cutting tool is mounted horizontally and has a spindle that moves left and right. Ideal for machining large, robust materials and cutting large areas.Specifically available for large metal panels, heavy-duty stands, and machine bases.
 
Gantry milling machines: Have a large bridge structure. The workpiece stays in place while the cutting tool moves over it. Ideal for machining large and heavy parts, and large fine molds. Specifically, they can be used for aircraft parts, automobile engine blocks, and large industrial molds.
 
Bed milling machine: The bed milling machine has a fixed bed. The table moves horizontally and the spindle moves vertically. It is designed for large, heavy parts. It is suitable for machining detailed and precise items. Specifically for large machine parts, customized tools, and heavy-duty industrial components.
 
Universal milling machine: Can be switched between vertical and horizontal milling. Suitable for simple and complex projects. Versatile and adaptable. Specifically for training and educational programs, customized prototypes, and low-volume production parts.
 
3 Axis CNC milling

Features And Advantages Of 3 Axis CNC Milling Machine

Three-axis CNC milling machines have high precision, a wide range of uses, and high efficiency. The following is a brief description of its main features and advantages.
 
Precision and accuracy: 3-axis CNC milling machine can cut materials down to a fraction of a millimeter.
 
Versatility: 3-axis CNC mills can handle a wide range of materials, from metals to plastics, and perform a variety of functions, including milling, drilling, and tapping.
 
Automation: Automation reduces manual intervention, increasing efficiency and minimizing human error. The CNC can run continuously around the clock.
 
Increased productivity: Automated processes significantly reduce production time and increase throughput.
 
Cost Effectiveness; Although the initial investment is high, the long-term savings are significant due to reduced labor costs and minimized material waste.
 
Enhanced safety: Automation reduces the need for direct interaction with the machine, reducing the risk of accidents. Many CNC machines have guards that protect operators from debris and moving parts.
 
High Accuracy and Repeatability: These machines can produce identical parts with high accuracy. They can machine complex geometries that would be impossible to achieve by hand, ensuring that each part meets precise specifications.
 

What Is The Difference Between 3 Axis CNC Milling Machine And Other Axes?

There are also differences between the various CNC mills, and this article will compare 3-axis CNC mills with 4- and 5-axis CNC mills, highlighting their unique features, capabilities, and applications.

3 Axis Vs 4 Axis CNC Milling Machine

A 4 Axis CNC milling machine adds an additional rotational movement to the basic three axes of the 3 Axis machine. This fourth axis, often called the A-axis, allows the cutting tool or the workpiece to rotate around the X-axis.

When comparing three-axis and four-axis CNC milling machines, the main differences are in their motion capabilities and applications. Three-axis CNC machines move the cutting tool along three linear axes (X, Y, and Z) and are suitable for simple parts that need to be machined in a single plane.

In contrast, four-axis CNC machines add rotary motion around the X-axis (A-axis) and can handle more complex shapes and geometries, such as curved and cylindrical workpieces.

While 3-axis machines are more affordable and easier to operate, 4-axis machines cost more because of their ability to reduce manual repositioning, increase productivity, and handle complex designs.

The choice between the two ultimately depends on the complexity of the project and budgetary factors.

5-Axis CNC Machining

3 Axis Vs 5 Axis CNC Milling Machine

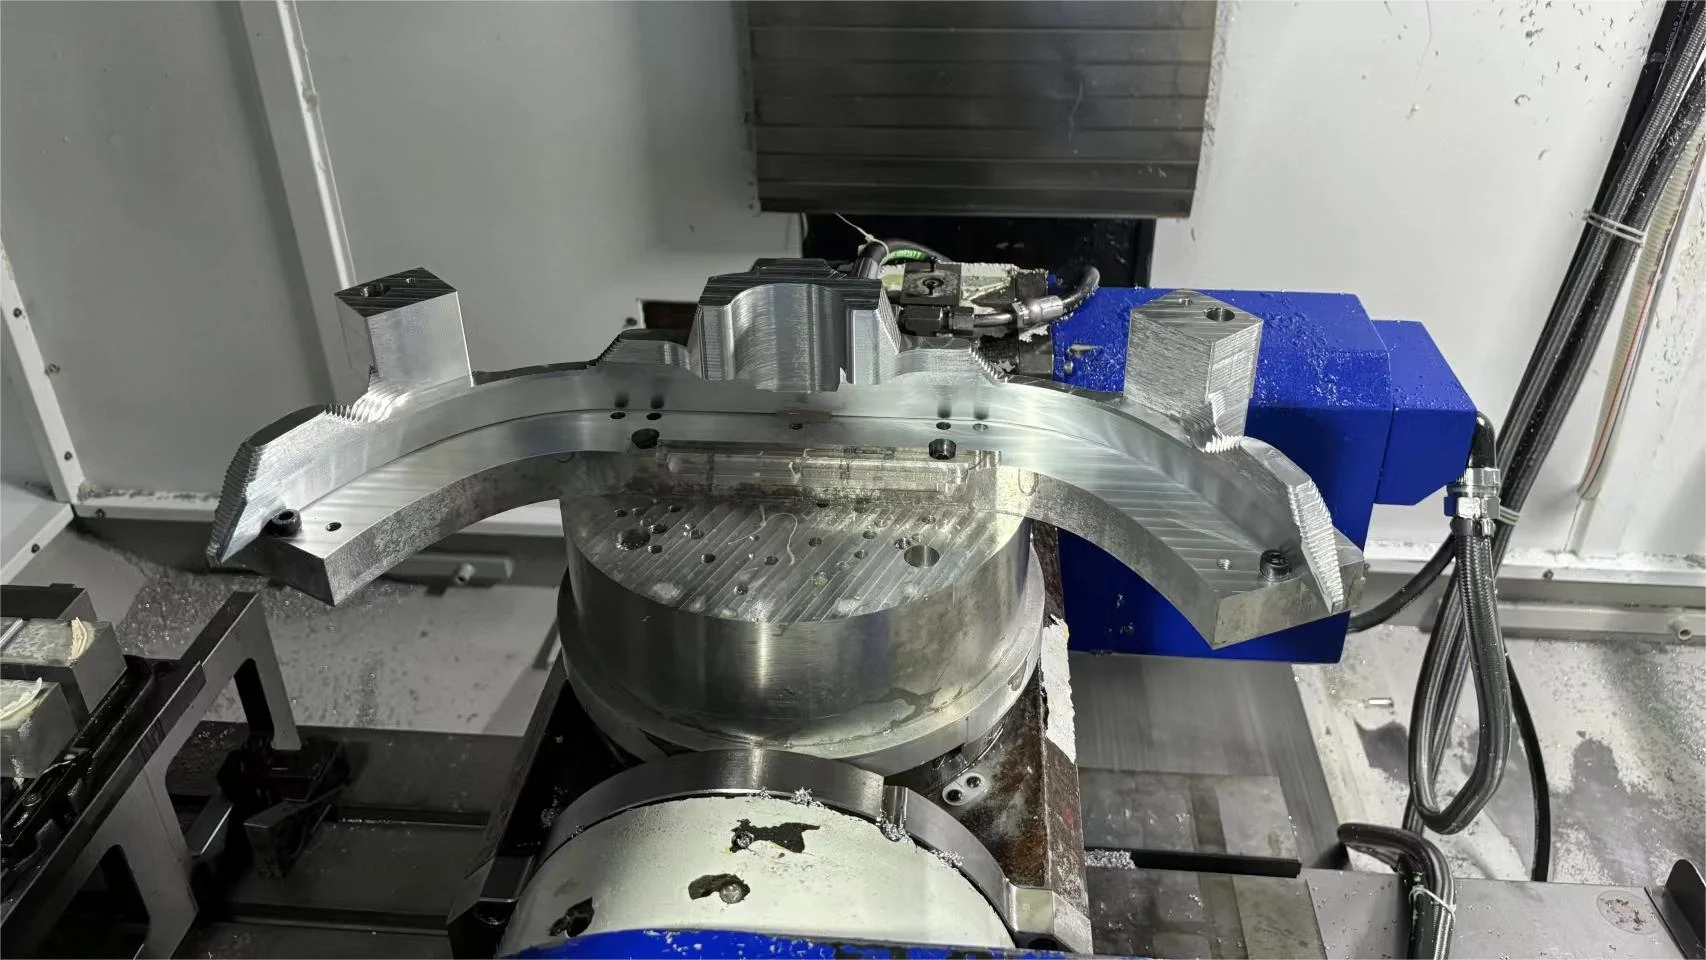
A 5 Axis CNC milling machine includes two additional axes beyond the basic three of the 3 Axis machines. These are usually the B-axis (tilt along the Y-axis) and the C-axis (rotation around the Z-axis), allowing the cutting tool to approach the workpiece from virtually any angle.

A major difference between the two is cost. Three-axis CNC machines cost less to purchase, program, and operate and therefore cost less per part.

Another key difference is their ability to create and process complex shapes. A 5-axis CNC machine excels at machining complex geometries and making deep cuts. It can machine all sides of a workpiece without the need for manual repositioning, which greatly increases productivity.

In contrast, three-axis machines require multiple adjustments and repositioning to handle complex geometries, which is not only time-consuming but also less efficient.

Conclusion

This article details 3-axis CNC mills and briefly describes the differences between 3-axis, 4-axis, and 5-axis CNC mills, which will help you choose the right machine for your needs and ensure optimal productivity and quality.

ECOREPREP offers 3 Axis, 4 Axis, and 5 Axis services. For all inquiries regarding CNC Milling services, we will let our team of specialized application engineers help you select the right material for your respective needs. To use and consult on your project, please contact us.

Advantages of Rapid Prototypingmanufacture for prototypes
Author Lucas
Lucas

Lucas is a technical writer at ECOREPRAP. He has eight years of CNC programming and operating experience, including five-axis programming. He also spent three years in CNC engineering, quoting, design, and project management. Lucas holds an associate degree in mold design and has self-taught knowledge in materials science. He’s a lifelong learner who loves sharing his expertise.

Learn More about Lucas.

Let's get your projects started, together!

Get custom parts machined in high quality, delivery on time.