How to Fix Elephant Foot 3D Printing?
There are two strategies to avoid elephant foot: to make the base layer as strong as possible or anticipate an unavoidable Elephant’s Foot effect.
The choice of which option is more viable depends on several factors. The types of 3d filament you are using, the model you are printing, and the ability to edit 3D models are all considerations.
Bed Leveling
The most straightforward action to 3d printing elephant foot is to level your bed. Something that you should be doing anyway as part of regular 3D printing practice.
The goal of bed leveling is to ensure that the nozzle and print bed distance are uniform at all points. This makes it a lot easier to dial in the proper Z-offset settings for the nozzle. Not only does this solution help prevent elephant foot, but it also results in more consistent bed adhesion and layer cooling.
Some 3D printers come with an automatic bed leveling feature. If this is the case for you, then there should be no reason not to run it every time you start a new 3D printing project. This feature is available on many new 3D printers, whether it’s a professional 3D printer or a 3D printer for kids.
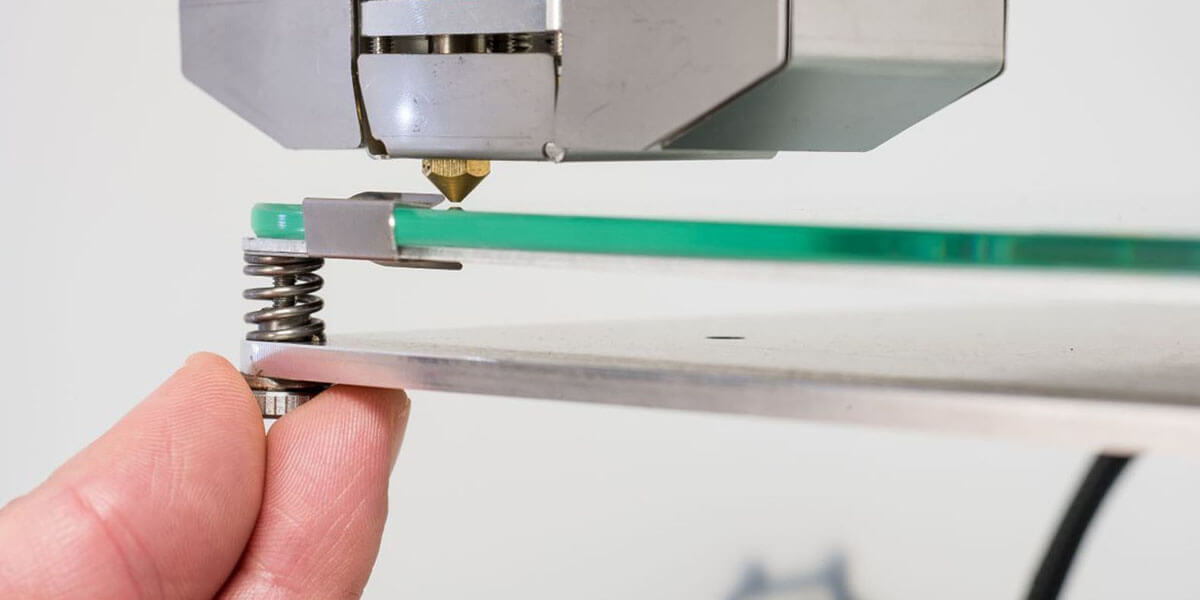
If your 3D printer has no such feature, then you can do the bed leveling manually. You will involve setting the bed height by adjusting each of the four adjustment screws on the bottom.
A piece of paper or cardboard can serve as a makeshift “feeler gauge” that you can stick between the print bed and nozzle. This feeler gauge is inserted between the nozzle and print bed at various points, adjusting screws as necessary. It is an easy process and should not take more than five minutes.
Reduce Heated Bed Temperature
Although heated bed massively helps with bed adhesion, it can also cause adverse effects if set improperly. It is a clear sign that the heated bed is set at too high a temperature for the elephant foot.
If the bed is too hot for the filament, it prevents the material from becoming more rigid and developing strength. This makes it more prone to deforming into an elephant foot as soon as it needs to bear the model’s upper layer weight. You may even see the elephant foot getting worse as the 3D printing proceeds.
The first thing to do is check the recommended bed temperature for the filament. Make sure that you are working within this range. If there’s some wiggle room, then lower the bed temperature by 5 °C increments. Even small reductions in temperature should significantly improve if this is the root cause of the problem.
You can even try and go below the recommended temperature range for your filament, as long as you don’t run into any bed adhesion or warping issues. If this still does not solve your elephant foot problem, you might need to look into other solutions.
Add Raft to The Model
A more robust option to avoid elephant foot is to print with a raft. You can make it easily through slicer software.
Raft is another layer of filament printed right below the base layer of your model. It acts as a sacrificial layer, significantly reducing the chances of errors becoming visible in the actual first layer.
Among most 3d printing problems, printing with a raft is considered a last resort. Because raft can consume a significant amount of filament that goes to disposal after, it’s not very practical if you’re planning to 3D print many models.
Typically, the raft is always used to facilitate bed adhesion and avoid warping. In this case, the raft becomes a buffer to absorb a potential Elephant’s Foot error. After printing, you can remove the raft from the rest of the print. This preserves the appearance of the model’s base layer.
Printing with a raft does not precisely address the root cause of elephant foot defects. It is still a good option if you don’t have the time to tweak your printer’s settings. However, solutions that do not require printing with a raft are a lot more sustainable.
Use Chamfers for Your Print
Instead of printing the base layer of the model, you can consider adding a chamfer to it. It is one of the more unconventional solutions.
The chamfer is simply a 45-degree slope that you can add to the model’s first few layers. This effectively means that the base layer of the model becomes narrower. This strategy is that the base layer’s swelling will cause it to become the ideal size.
A 45-degree angle is particularly ideal for this technique as it prevents the print from collapsing even with narrower base layers. This is one of the most reliable methods used in printing overhanging features.
The advantage is that it does not consume any extra filament. Since you’re printing with smaller layers, you might even end up using less filament – although the savings are minimal.
However, it’s going to take a bit of trial and error to anticipate precisely how much the base layer will swell. The best practice is to limit the chamfer to a 1-millimeter height or about two to three layers.
Adjust Z-offset
Sometimes, elephant foot is simply the result of the filament material being compressed too tightly on the base layer. This could cause the filament to flare out and form the classic elephant foot appearance.
If reducing the bed temperature does not solve the problem, you may need to increase your nozzle Z-offset. The Z-offset determines the nozzle’s height relative to the print bed and plays a massive role in deciding bed adhesion and extrusion quality.
Although a low Z-offset aids bed adhesion by pressing down on the filament, too much of this pressure can cause the filament to deform excessively. Try to increase the Z-offset setting by about 0.1-millimeter increments until improvement can be observed.
Take note that increasing the Z-offset can cause other problems to pop up, the most likely poor bed adhesion. This can cause the base layer to lift off or become warped.
If this happens, then you may need to solve the bed adhesion problem differently. Printing at higher temperatures, using a different adhesive, or printing with a skirt can be good options. Sometimes this happens in 3d printing – solving one problem leads to worsening another.
“Elephant Foot Compensation” Settings
Some 3D printers or slicers come with an automatic ‘elephant foot compensation’ setting. It is a convenient solution if the option is available.
When activated, this option reduces the size of the first layer of the model. Think of it like an automatic horizontal size compensation that only applies to the first layer. In this regard, this strategy is similar to the chamfer method but does not rely as much on guesswork.
As the following layers print, they press down on the first layer and compress the filament outwards. Ideally, this will result in perfect alignment of the first layer with the rest of the print. The size of the model determines precisely how large the compressive force on the first layer will be.
Even if your finished print comes out with a prominent elephant foot, all is not lost. If you’re not up to starting over with your project, then you can sand or deburr the imperfections in your finished print. This will take a lot of time but not as much as starting from scratch.