Over extrusion is one of the 3d printing problems that you can encounter. Depending on how lousy over-extrusion is, your print can suffer from minor quality defects or poor structural strength.
In most cases, you can address this simply by making a few changes to software settings, such as print speed, and layer height. It can also be hardware-related and will require more work to solve. Check out some of our tips on identifying and solving over extrusion in 3d printing
Over extrusion is a 3d printing troubleshooting caused by excessive extrusion of filament. This will ruin the aesthetics of the model. Worse cases of over extrusion can even compromise the structural integrity of 3D print. It is possible regardless of the 3d filament type you’re using or the brand of your 3d printer.
You can notice 3d printing over extrusion from some tell-tale signs. These include blobs, strings, drooping layers, or layers that are overly thick. If you spot any of these signs, we suggest that you address the underlying cause right away. If allowed to run, your 3d printer will likely suffer from a jammed nozzle. It is a problem that is much harder to solve.
In addition to the 3D printing over extrusion phenomenon, there is also the phenomenon of under-extrusion.
Over extrusion is caused by too much filament, while under extrusion is when a 3D printer extrudes too little filament. Both problems can negatively affect print quality but manifest themselves in different ways.
Under-extrusion can lead to gaps, weak spots, and missing sections within the printed layer, making the printed structure fragile and incomplete. Common signs of under-extrusion include thin layers, gaps between filaments, and weak or fragile prints.
Over-extrusion, as mentioned earlier, can lead to blobs, stringy filaments and excessively thick layers that compromise aesthetics and structural integrity.
With too much filament material, the print can end up with dimensional inaccuracies and poor overall quality. To solve over-extrusion, we need to know the underlying factors that cause this issue.
It is probably the most common cause of an over extrusion problem. When the filament is heated, the viscosity reduces and takes on a more fluid characteristic. It is fine when the material is under the proper circumstances. That is the very essence of using thermoplastic materials for 3D printing.
However, any filament only functions well within a specific temperature range. Beyond this range, the filament becomes more fluid than intended by the 3d filament manufacturer. This makes it difficult to control as the print head moves, even with retraction enabled.
As we know, 3d printers feed filament to the nozzle by the rotation of an extrusion gear, which connects with a motor. The running speed of the motor runs is dictated by the “extrusion multiplier” or “flow rate” settings in your slicer. Under normal circumstances, the default 100% setting of the extrusion multiplier works perfectly fine.
When the extrusion multiplier is too high, you will likely end up with too large layers. This will mess up the dimensional accuracy of prints and distort any delicate details. And what’s more, the excess material could end up with a clogged nozzle.
In any project, you need to make sure that the slicer settings line up perfectly with the 3D printer hardware. In over-extrusion, incorrect slicer settings on filament diameter and nozzle size can be possible root causes.
For the most part, your slicer software can set 3d printing parameters ideally based on your 3D model. However, it cannot detect the size of your filament and the diameter of your nozzle – these are parameters you will need to input by yourself. Extrusion problems can happen if the slicer settings do not correspond to your actual hardware.
The first step in solving a problem is identifying it. Over-extrusion is not immediately apparent in the first few layers of a 3D printing project but should be easy to spot later.
In the case of over-extrusion, these are the warning signs to look out for:
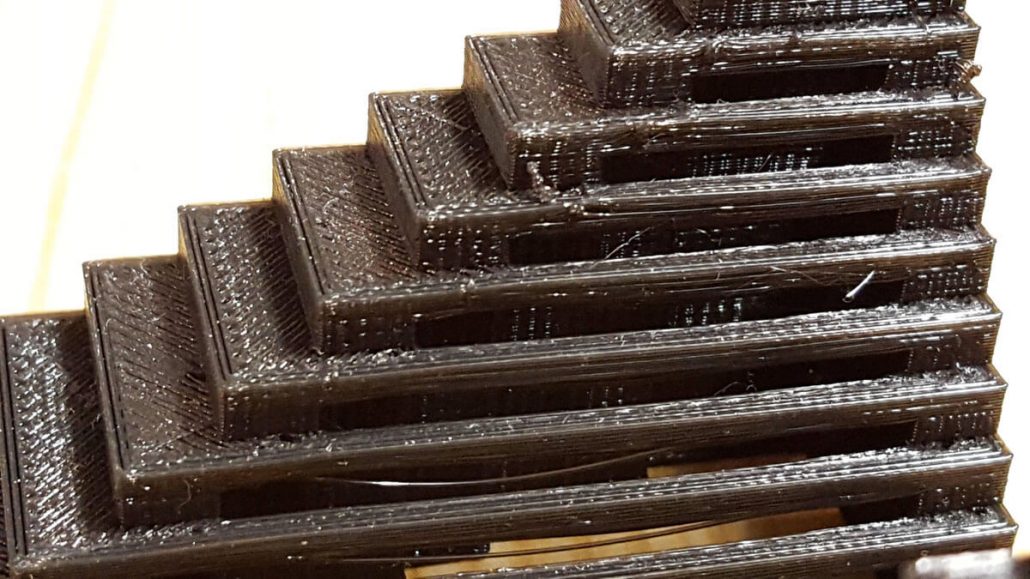
String is the most obvious warning sign of over-extrusion. Errant blobs and filament strings can appear when there is an excess of molten filament in the hot end. Excessive stringing is also quite common when the printing temperature is set too high.
We can remedy 3d printer stringing and blobs by post-processing. However, excessive stringing will ruin the prints. If you spot stringing and blobs early on in your project, it would be best to intervene.
Read more: how to fix 3D prints zits and blobs?

Over extrusion will almost create layers with non-uniform thickness. This will result in messy layers with excess filament, they are seemingly oozing out of the shell of the print. The stability of the layers will also be compromised as the weight of the extra filament causes the layers to droop down.
Drooping layers can significantly ruin the outer dimensions of a finished print. You can sand down with minor protrusions. In most cases, the dimensional inaccuracy will not guarantee after the post-processing.
Typically, It takes several layers before over-extrusion becomes apparent. This makes over extrusion more problematic, as you could end up spending a few hours on a project before finding out you will need to start over.
The effects of over extrusion are more aesthetic but can drastically reduce the visual appeal of your finished print.
Over extrusion is considered one of the most accessible 3d printing problems to solve. Because the solution usually only involves making a few adjustments to slicer settings.
Here are some of the possible ways to fix the problem. They arrange in the sequence which one you should try first.
The first thing to check is the print temperature for your project. Is it within the recommended temperature range based on the 3d filament manufacturer? If you still have room to reduce, then do so only in small increments. Reducing by 5 °C at a time is recommended.
When taking this step, note that it’s perfectly possible to set your printing temperature too low. This can result in poor bed or layer adhesion. Make sure to still stay within the recommended temperature range. Adjustments to print speed may also be necessary when reducing the extruder temperature or nozzle temperature.
If the problem persists while you’re already at the lower end of the temperature range, you need to look for other solutions.
The extrusion multiplier setting determines the rate at which the extrusion gears move the filament forward. In most slicers, this parameter setting is 100% in default. However, you are free to increase or reduce the material flow as needed.
The obvious solution is to reduce the extrusion multiplier setting on your slicer if you’re experiencing over-extrusion. You must still be careful when doing this. Increasing in small, gradual increments is best – about 2.5% at a time.
Again, reducing the extrusion multiplier by too much runs the risk of going into the under-extrusion territory. Watch out for incomplete layers or gaps between adjacent extrusions. If these signs become noticeable, then re-adjust your extrusion multiplier to slightly higher numbers.
Just keep in mind that reducing the extrusion multiplier will also significantly affect printing speed and total printing time.
Getting the extrusion right requires perfect coordination between the nozzle, extruder gears, and heating element. You need to play your part in making sure that all the info the slicer needs is accurate.
One crucial piece of information is the diameter of 3d printer filament. The slicer uses this value to calculate the rate of extrusion needed for your model. Supplying the wrong filament diameter will undoubtedly lead to extrusion problems.
Inputting the incorrect filament diameter is a widespread reason for over-extrusion. When you switch over from one filament to another, this can also happen if the filament you are using has poor diameter consistency.
The best method is to take a caliper and measure your filament diameter in three different spots. Ideally, the measurements should be within 0.5 millimeters of each other. Take the average of your measurements and input that value into your slicer. This may not exactly be 1.75 or 3.00 millimeters, but every bit of accuracy helps.
The slicer setting with the proper nozzle diameter plays a huge role, not just in extrusion. Other parameters such as shell thickness and layer size also depending on nozzle size.
If you’re experiencing over extrusion, there’s a chance that your slicer is set with the wrong nozzle diameter. A simple correction of the nozzle diameter value should address the problem. If you have the option to swap out your stock nozzle for a larger one, that can also help avoid over-extrusion.
The worn-down nozzle has a larger opening than you expect. This situation will be familiar if you always use the brass nozzle with your 3D printer.
The larger opening nozzle means that the printer will extrude more material than what the slicer program intends. If your nozzle shows signs of wear and tear, it is best to replace it with a spare nozzle.
When 3d printing a complex model, empty runs are unavoidable, an “empty run” is a short period when the print head is moving, but no extrusion is taking place. This is typically a transition from one layer to the next. Empty runs can be problematic because the molten material left in the nozzle can droop down and cause stringing.
Increasing the movement speed or travel speed is the easiest way to shorten these empty runs. There is less chance for the molten filament to drip out of the nozzle. However, there is also an upper limit to the print head’s travel speed.
Swift movement can create excess vibrations and cause the print head to overshoot its target. Layer shifting is a common sign of a print head that is moving too fast.
When the printer is doing an empty run, the retraction allows a portion of the plastic filament to be pulled back within the extruder. This reduces the pressure on the molten plastic inside the nozzle, making it less likely for the molten material to form blobs or stringing. The measure may be more commonly needed when working with flexible tpu filament.
Related read: What’s the best clear 3D filament
When the plastic material goes through the extruder’s heating, it is essentially converted to its molten form. This material remains molten and will inevitably drip down into the build plate. Retracting the filament could delay this happening.
Over extrusion is more likely at high nozzle temperatures and using flexible filament. In these cases, you may have to fine-tune settings such as retraction distance and retraction speed. However, over retracting can also be an issue as it can cause a nozzle jam or filament stripping.
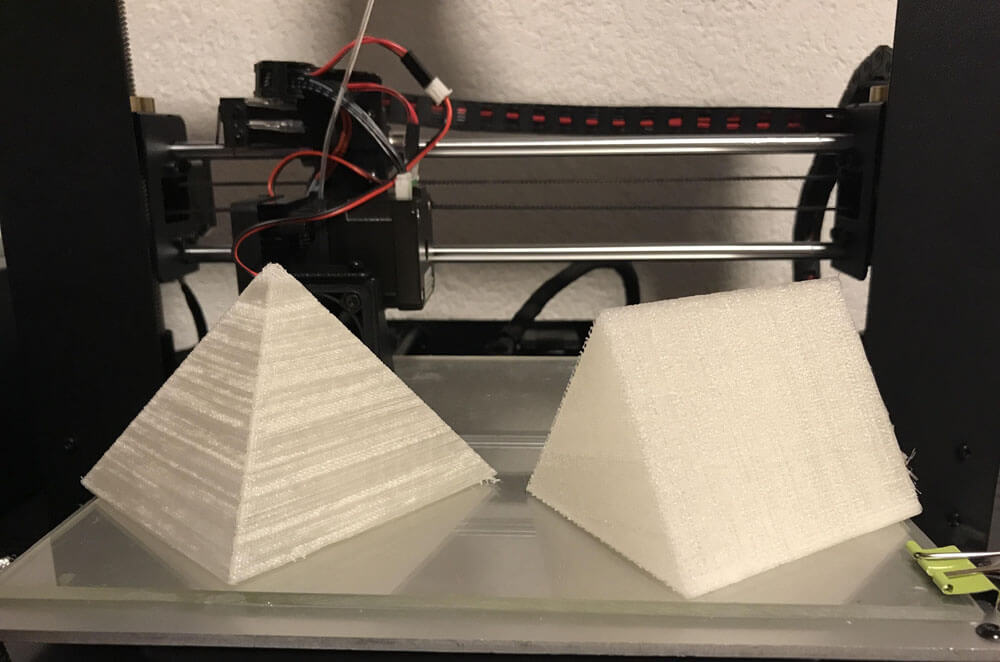
If you have trouble fine-tuning settings to avoid over-extrusion, we recommend testing them on a minimal model. The standard bench would be a good “torture test” that will not waste a lot of time and filament. You also can access other free STL files in the online community for 3d printing. Over-extrusion usually isn’t apparent on the first few layers of a print, so you will have to be patient to test your settings.
Stringing in 3D printing is caused by the filament oozing out of the nozzle while the printer is moving between different parts of the print. This unwanted extrusion results in thin strands of filament, known as strings, that can mar the appearance of the final model. Several factors can contribute to stringing, including incorrect retraction settings, high printing temperatures, and slow printing speeds. If the retraction distance or speed is not properly calibrated, the filament may not retract quickly enough, allowing it to ooze out. Similarly, if the printing temperature is too high, the filament becomes overly fluid and more prone to stringing. Adjusting these settings in your 3D printer slicer can help reduce or eliminate stringing, leading to cleaner and more precise prints.
To fix 3D printing stringing, adjust the printing speed in your 3D printer slicer settings. Start by gradually increasing the printing speed and testing multiple times to find the optimal speed that reduces stringing. Ensure that the printing speed is not too slow, as this can also cause issues. Experimenting with different speeds will help you determine the best setting to minimize stringing and achieve smoother prints.
Common indicators of a clogged nozzle include inconsistent extrusion of filament, sudden stops in filament flow during printing, and a noticeable decline in print quality.
You might observe that the filament is coming out in spurts or not at all, causing gaps or weak layers in your prints.
Additionally, the printer may make unusual clicking sounds as it struggles to push filament through the clogged nozzle.
Recognizing these signs early not only saves you time but also helps prevent further damage to your printer. Regular maintenance and cleaning of the nozzle can help avoid clogs and ensure consistent, high-quality prints.
Yes, having too much retraction in 3D printing can negatively impact part quality. Excessive retraction can cause small gaps or even blobs on the print, as air pockets may form within the print head. It’s crucial to tune your retraction settings properly, as both too much and too little retraction can lead to print defects. Finding the right balance will ensure smooth and high-quality prints.
As far as 3D printing problems go, over-extrusion is far from being one of the worst. The silver lining is that you know your 3D printer is extruding – you have to hold it back. Over-extrusion is relatively easy to solve with just a few tweaks in your slicer settings.
Getting extrusion just right in a 3D printer requires perfect coordination between the many components. You need to provide the slicer with accurate information, which will calculation based on your model.
As long as you’re working with suitable filament and proper settings, the prints should not suffer from an over-extrusion issue.
ECOREPRAP’s main business has shifted from 3D printing filaments manufacturing to 3d printing services and CNC machining services since 2023. We will continue to share related blogs about filaments and CNC machining.